Are you looking to improve your automation process? Imagine having complete control over when each task in your workflow happens. Instead of everything running instantly, you can introduce Delays in Workflows to create a smoother, more efficient process. With just a simple step, you can make sure your actions occur at the right time, improving both performance and user experience.
In this post, we’ll show you how to add delay steps in Workload. You’ll learn what delays do, how they benefit your business, and how to set them up in just a few clicks. Whether you’re new to automation or fine-tuning an existing process, these tips will help you take control of your workflow timing.
If you need more guidance, check out our detailed video on the Workload YouTube channel. You can also visit Workload University or our Help page for additional tips and support.
Why Should You Use Delays in Workflows? #
Adding a delay to your workflow gives you more flexibility and control. Here’s how it helps:
- Improve user experience – Give customers a moment before receiving follow-up emails.
- Prevent system overload – Space out actions to keep everything running smoothly.
- Enhance engagement – Time your messages for the best possible response rates.
By using delays strategically, you create workflows that feel natural and well-paced. Now, let’s walk through how to set them up.

How to Add a Delay #
Adding a delay in Workload is simple. Follow these steps to set it up:
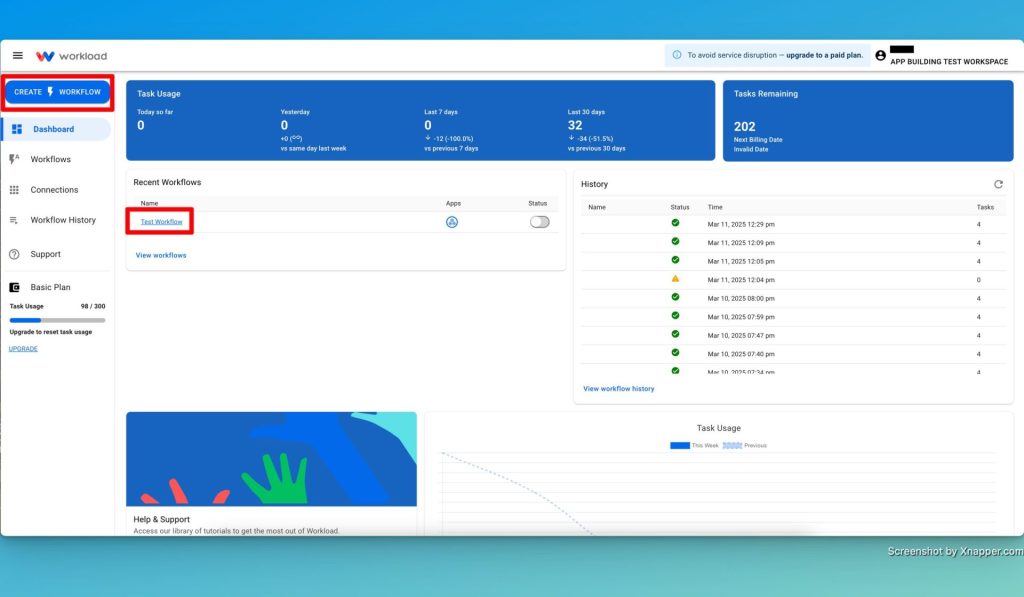
- Open your workflow: In the Workload Editor, select an existing workflow or create a new one.
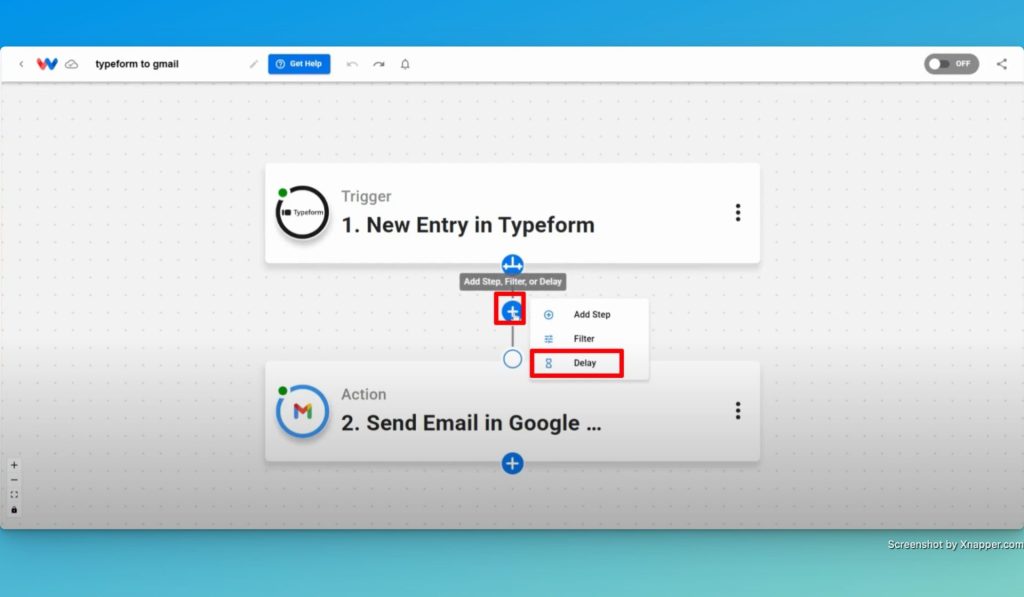
- Insert the delay step: Identify the steph were the delay is needed. Next, click the “+” button between steps and choose “Delay” from the options.
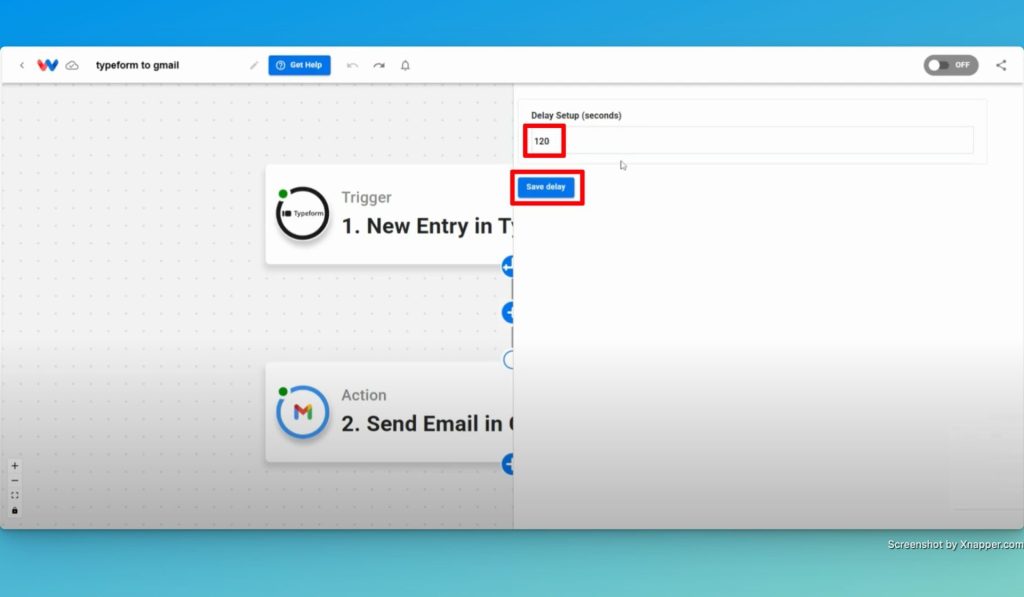
- Set the delay time: Enter the number of seconds to wait (e.g., 120 seconds for a 2-minute delay), then save the delay step.
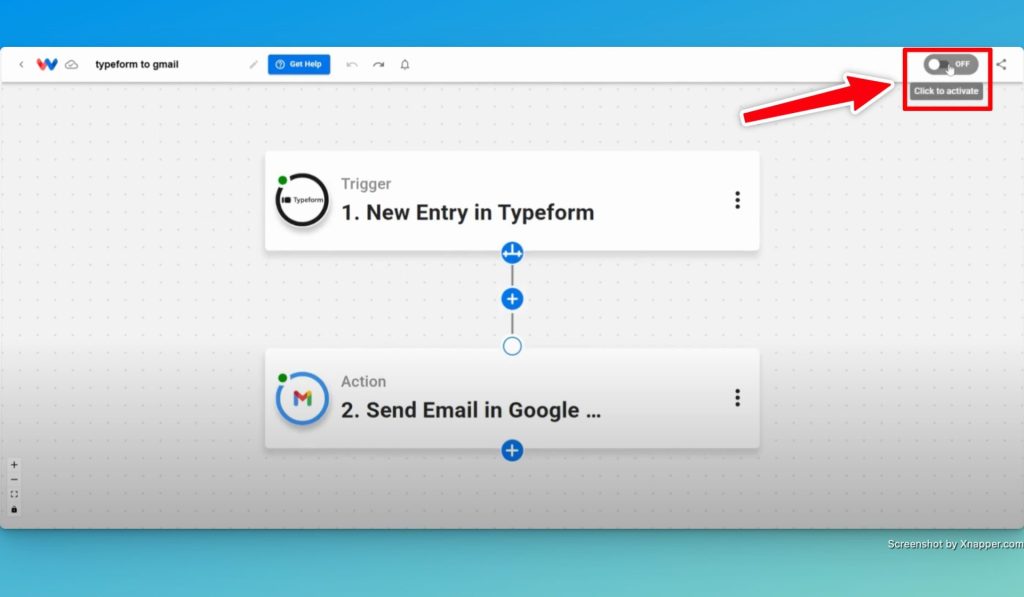
- Activate your workflow: Turn it on, and the delay will now run automatically.
Real-World: Delaying an Email #
Let’s say you use Typeform to collect user submissions. Right now, an email is sent as soon as someone fills out the form. But instead of an instant response, you want to add a short delay. Here’s how:
- Insert a delay step between the form submission and email action.
- Set the delay to 120 seconds (2 minutes).
- Now, when a user submits the form, the email will send after a brief pause rather than immediately.
This approach prevents your emails from feeling too automated and gives users a moment before receiving their message. It also gives time for the systems to update properly from prior steps, ensuring that your workflow operates accurately.
Take Control of Timing Using Delays in Workflows #
By adding delays, you control the timing of your automation. This small adjustment can improve efficiency, create smoother operations, and enhance customer engagement. Start using Delays in Workflows today and make your processes run more efficiently.
Now, it’s time to take action! Try Workload today and start building smarter, better-timed workflows.
For more automation tips, visit Workload University or check out our Help page. 🚀


