Workflow automation saves time, reduces errors, and keeps everything running smoothly. But what if your workflow needs more flexibility? Maybe you want to update records, send notifications, or create reminders—all triggered by a single action. That’s where the Workload comes in! In this guide, we’ll show you how adding steps and paths to your workflow makes it easy to automate tasks, format data, and create conditional paths, giving your automated workflows more power. By the end, you’ll have a dynamic workflow that was designed by your for you.
If you need additional help, check out our in depth video on our Workload YouTube channel. You can also visit Workload University or our Workload Help page for more tips.
Let’s dive in!
Workflow Building: Adding Steps and Paths #
How to Add Steps to Your Workflow #
Start by adding the core steps to your workflow. Start by determining the trigger you want to use. Now you want to add a step. Each step determines what happens after the trigger. You can add actions such as updating records, sending emails, or performing calculations.
- Open the Workload Dashboard and create a new workflow or select an existing workflow to update.
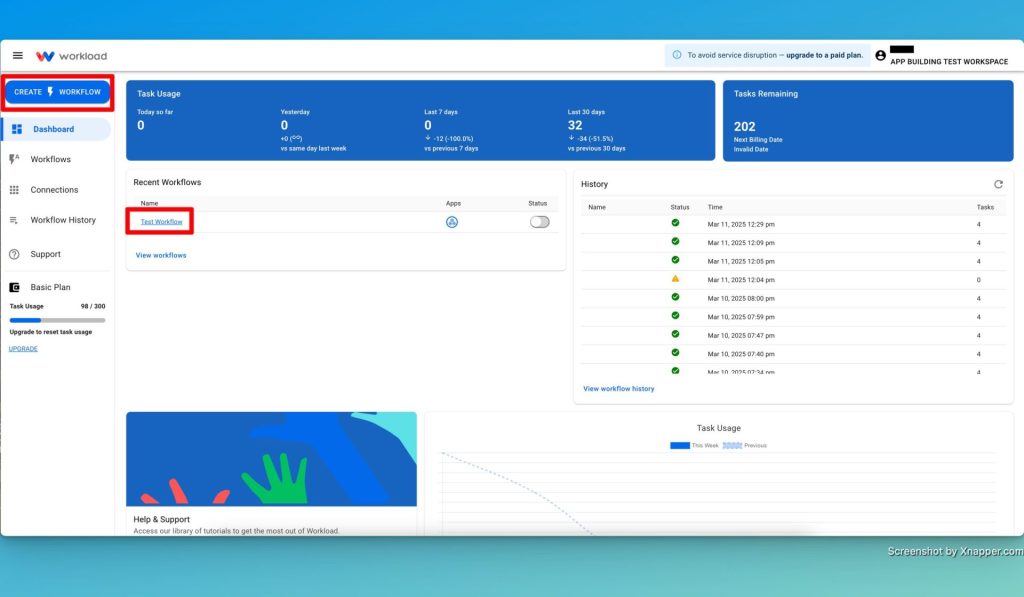
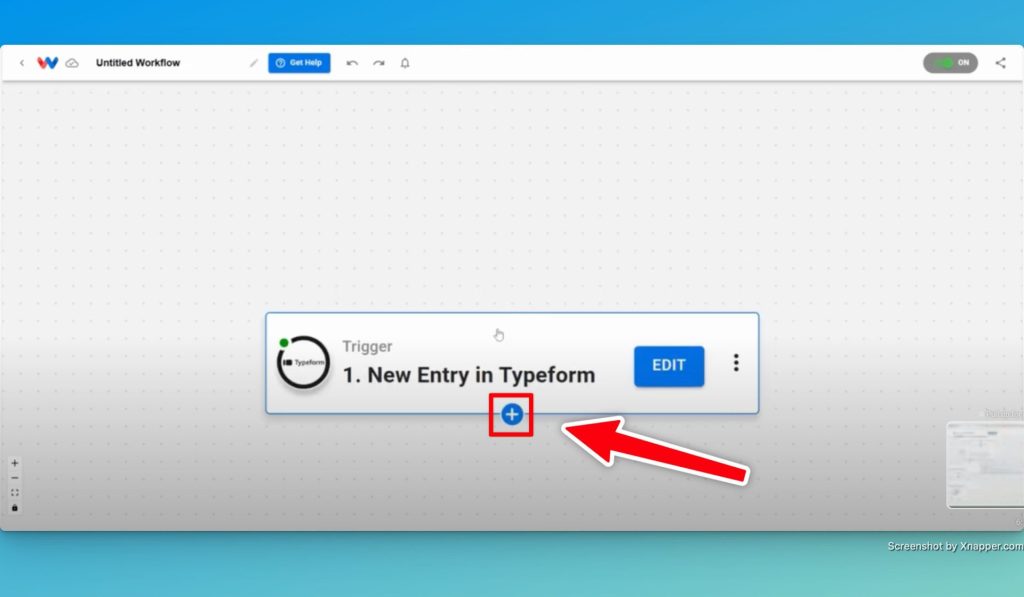
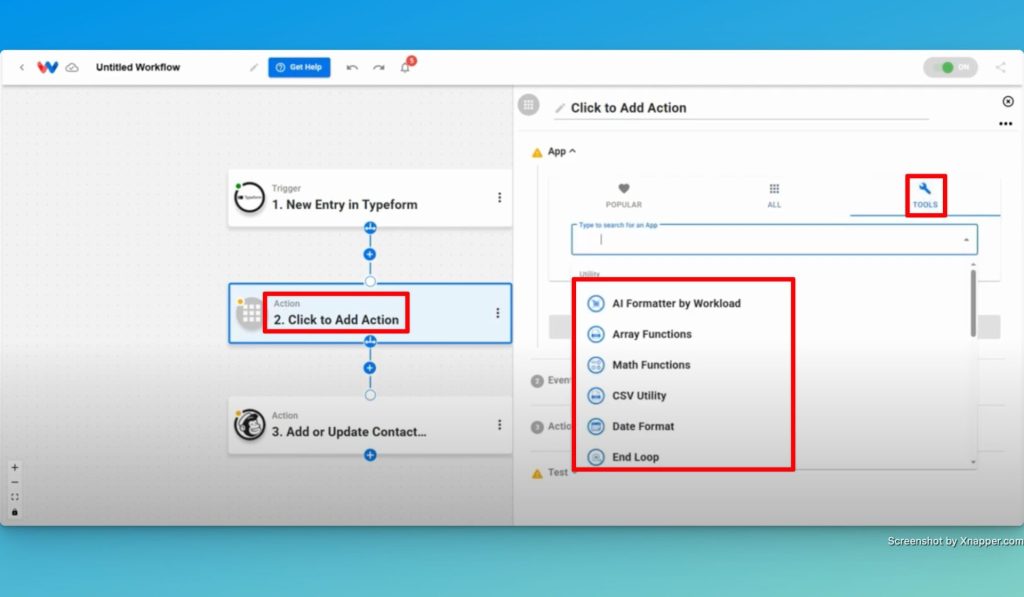
- Click the blue “+” button and then select the action or tool you want to add to your workflow.
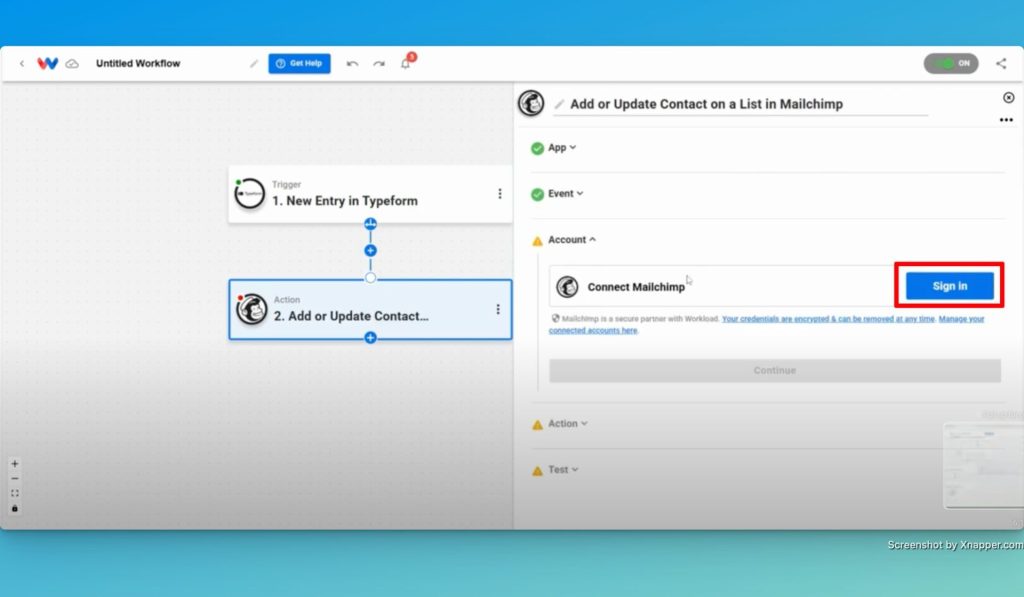
- Securely connect your account to Workload and configure the settings for that step.
- Map the data from the trigger to the action. Next, test the step to ensure it works as expected.
These steps lay the foundation for your automated workflow.
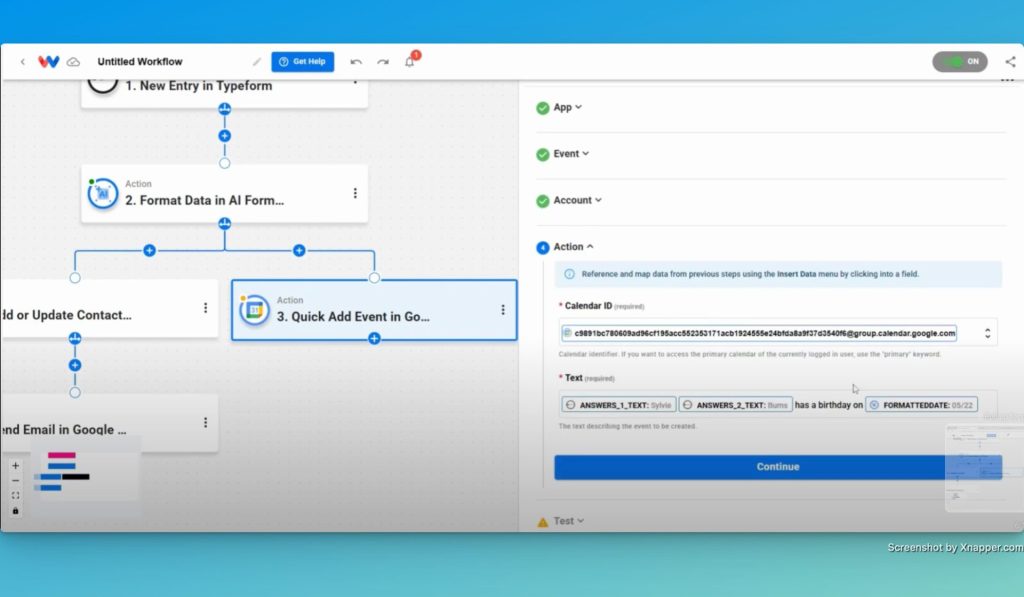
How to Use Data Formatting in Your Workflow Steps #
Sometimes, the data you collect from one app needs formatting to work properly with another app. Adding a data formatting step ensures everything flows smoothly through your workflow.
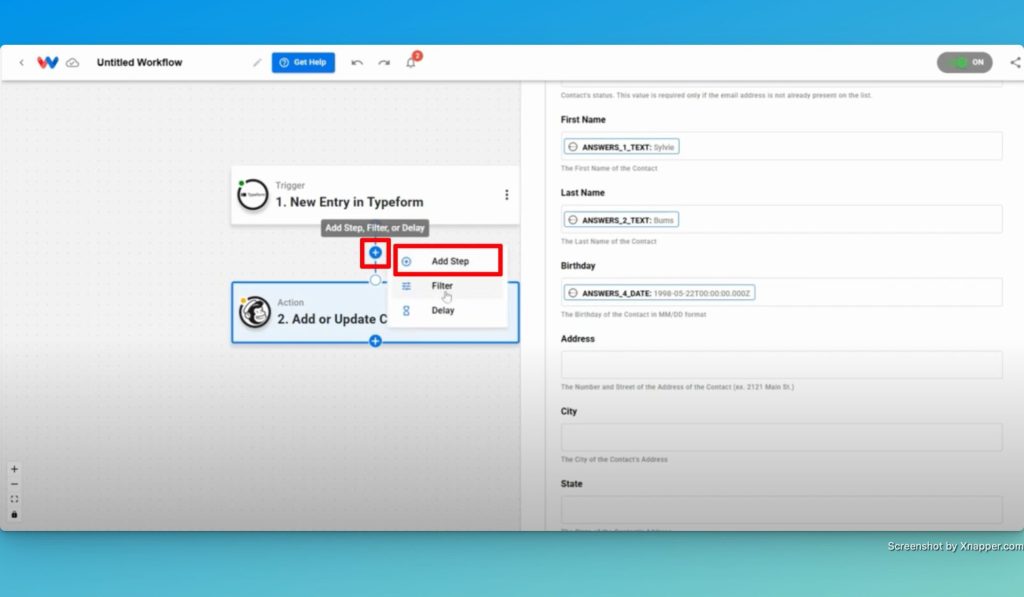
- Click the blue “+” and then “Add Step” where you need data formatting.
- Click in the next step box, then choose a formatting tool.
- Select the event that you would like to use.
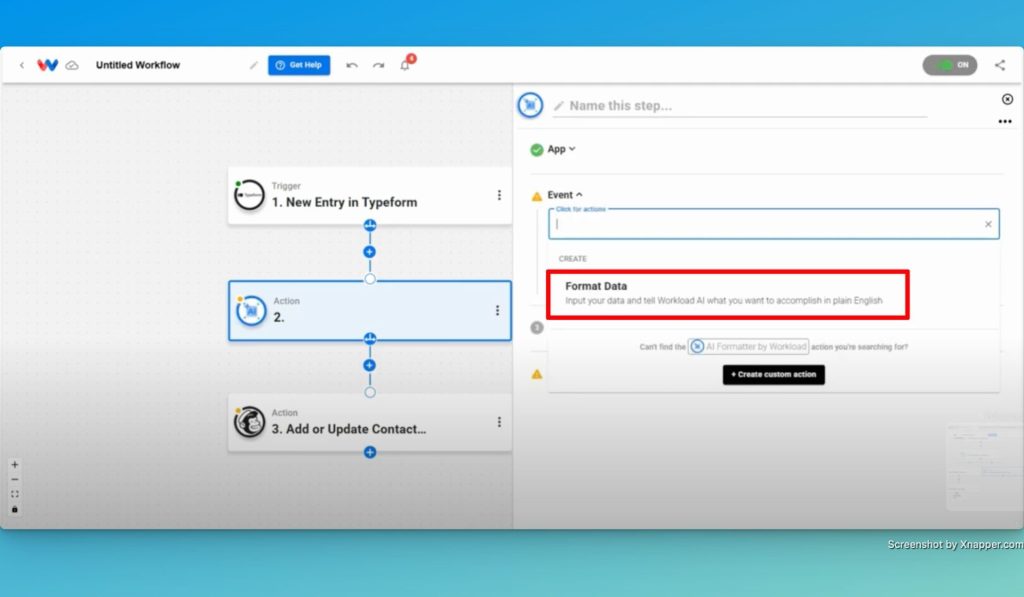
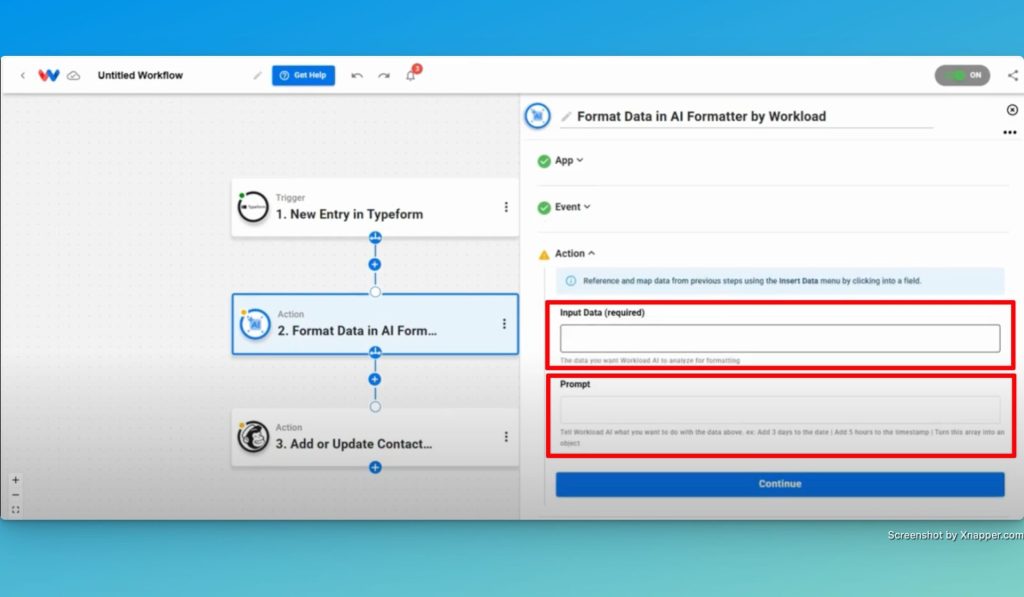
- Configure the formatter step. (Note: this will be different depending on the formatting tool that you use. For the AI Formatter tool, select the “Input Data” and then enter a “Prompt“.)
- Test the formatting step to ensure it works correctly.
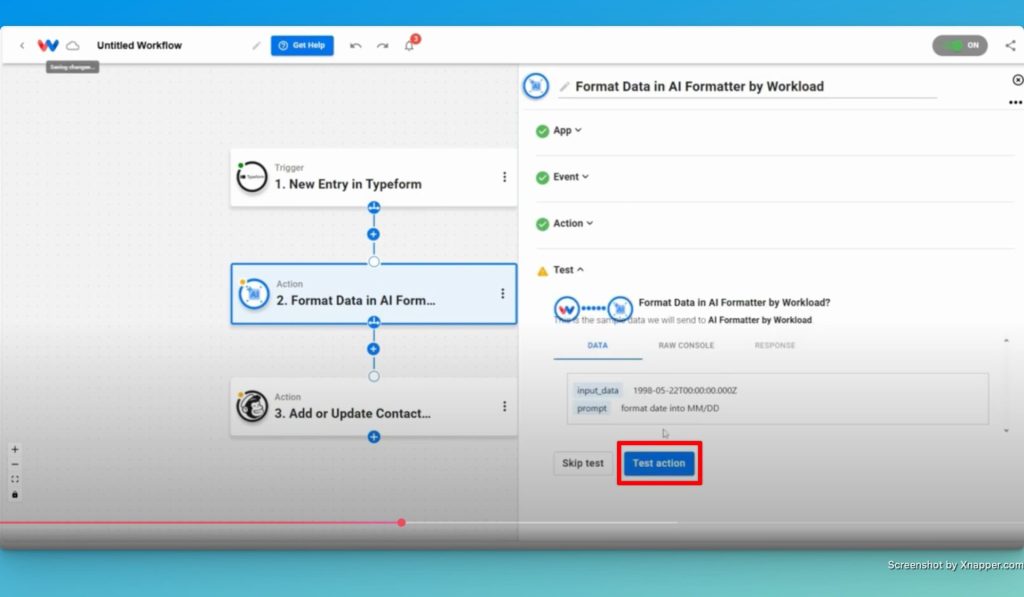
This step guarantees your data is in the right format for every action that follows.
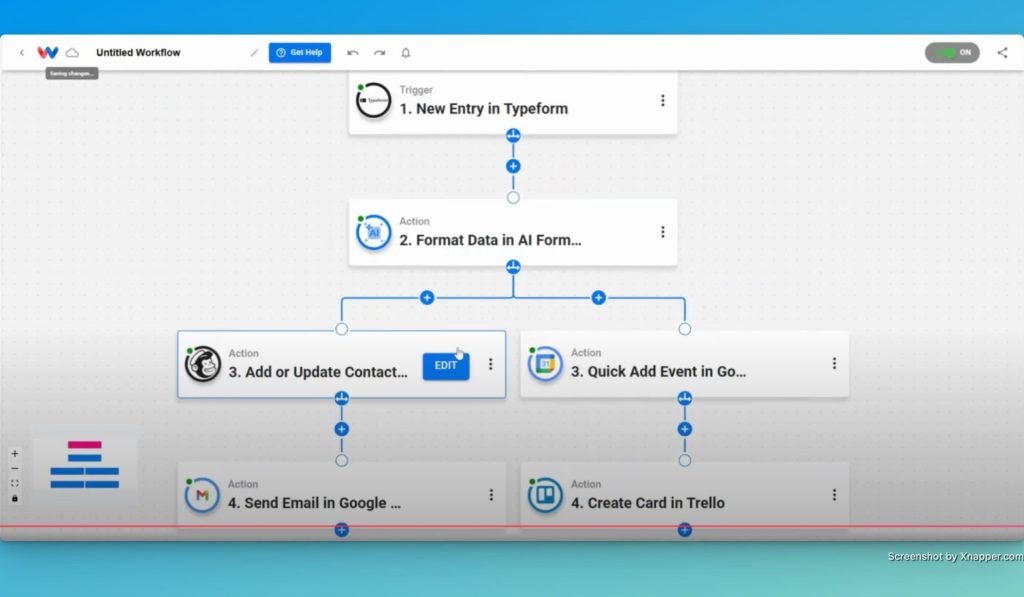
How to Add Conditional Paths to Your Workflow #
With paths, you can create dynamic workflows that adapt based on conditions. You can split your workflow into different routes depending on specific triggers or data values.
- Click Add Path where a condition is needed.

- Add actions to the path, such as sending notifications or creating tasks.
- Define the condition that triggers this path (e.g., a specific value or event). (Note: you can add conditions that will only trigger a branch of a workflow if they are met. Do this by clicking the “+” and defining the condition.)
- Test the path to make sure it runs correctly under the given condition.
Paths make your workflow smarter and more flexible by handling different scenarios.
Finishing Up: Benefits of Adding Steps and Paths to a Workflow #
A customized workflow lets you streamline your processes, reduce errors, and save time. By adding steps, paths, automating tasks, and formatting data, you can create workflows that meet your business needs. Workload makes it easy to set up and personalize these workflows, ensuring they work efficiently for you. Whether you’re just getting started or refining existing processes, automation boosts productivity and lets you focus on what matters most.
Now it’s your turn! Try Workload today and build smarter workflows that work for you.
For more tips on workflow building, be sure to visit Workload University or check out our Workload Help page. 🚀


