Repeating the same daily tasks before tackling important work is a common frustration for business owners. When repetitive tasks eat into your valuable time, automation becomes a game changer. Our Typeform to Airtable Integration allows you to build your own workflows that streamline your workday. This worfklow will allow you to automatically convert new Typeform entries into Airtable records, so you don’t have to spend time doing it yourself. In this post, we guide you through each step so you can set up this powerful automation quickly and easily, allowing you to focus on growing your business.
If you need help, check out our step-by-step video on the Workload YouTube channel. You can also visit Workload University or our Workload Help page for more tips.
Overview: Typeform to Airtable Integration #
In this workflow, you will:
- Trigger on New Typeform Entries: Automatically capture new responses as they are submitted.
- Map Form Data to Airtable: Match Typeform responses to the correct Airtable fields.
- Create a New Airtable Record: Store the submitted information seamlessly in your database.
Before you start, make sure you have:
- An active Typeform account with a form ready to collect responses.
- An Airtable account with a table set up to store the data.
- A Workload account to build and automate your workflow.

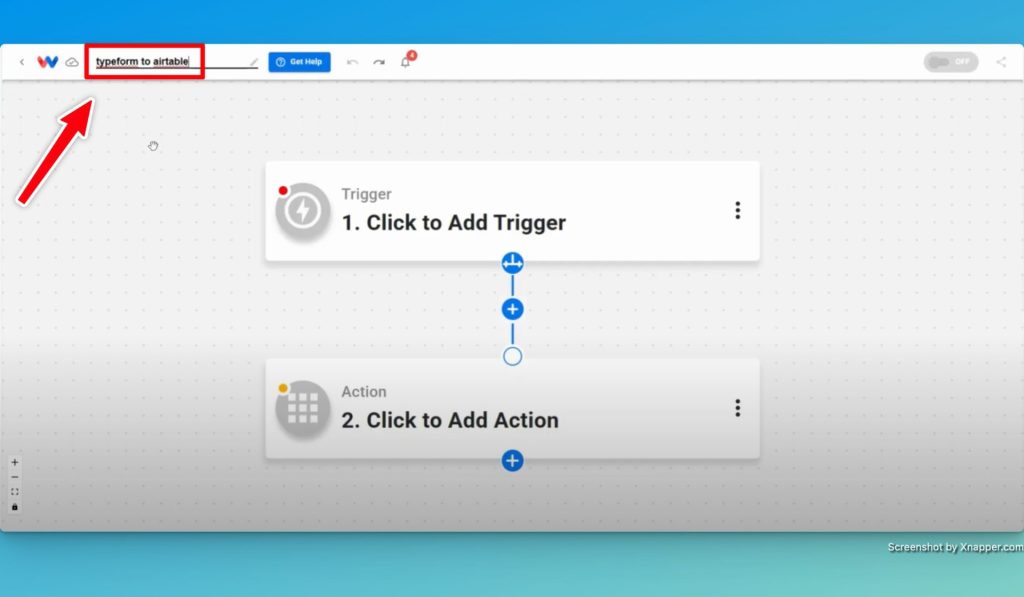
Step 1: Create a New Workflow #
- Launch Workload: Open Workload and create a new workflow.
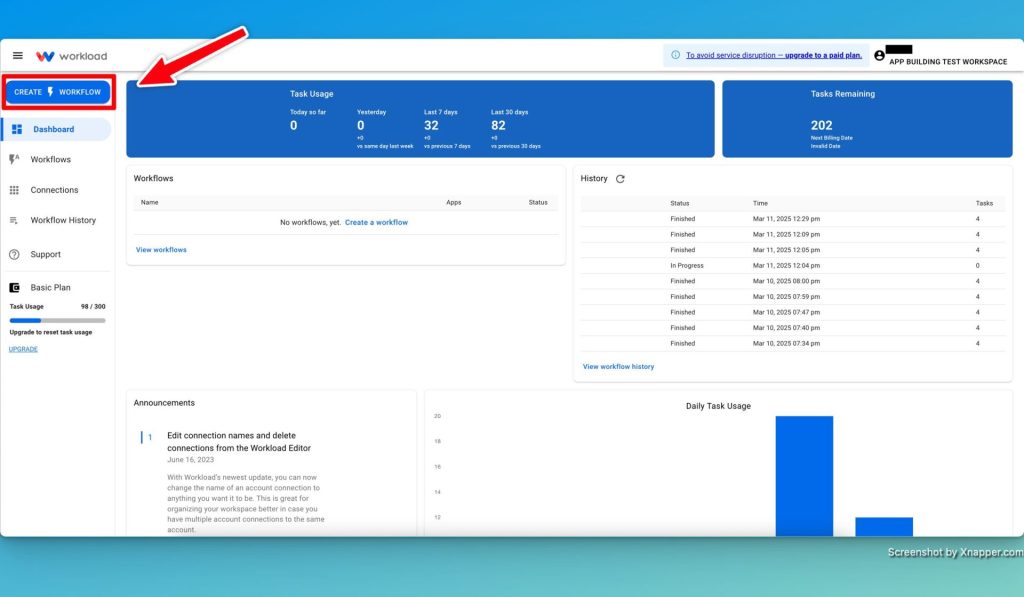
- Title the Workflow: Give your workflow a descriptive title.
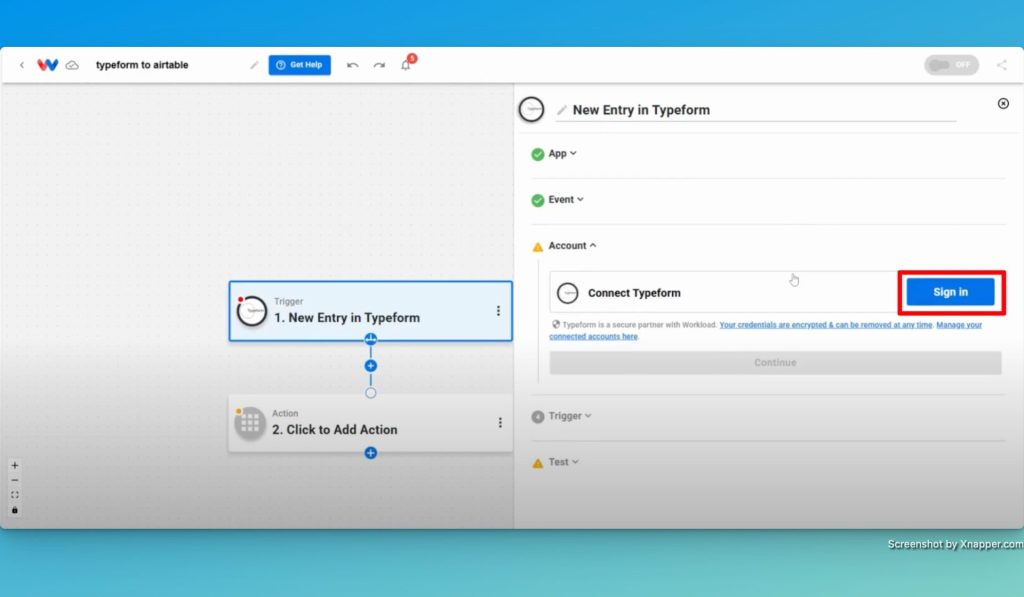
Step 2: Setup your Typeform Trigger #
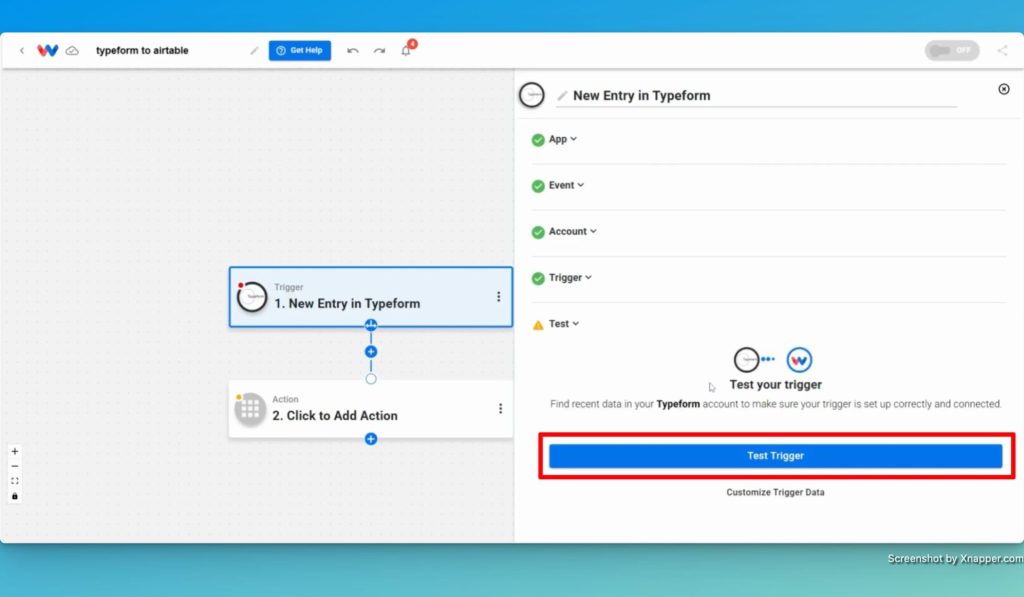
- Choose Trigger App & Event: Select Typeform as the trigger app, then “New Entry” as the event.

- Connect Typeform: Securely link your Typeform account by clicking the “Sign In” button or choosing an existing connection.
- Select Form: Select the form you want to monitor to trigger the workflow.
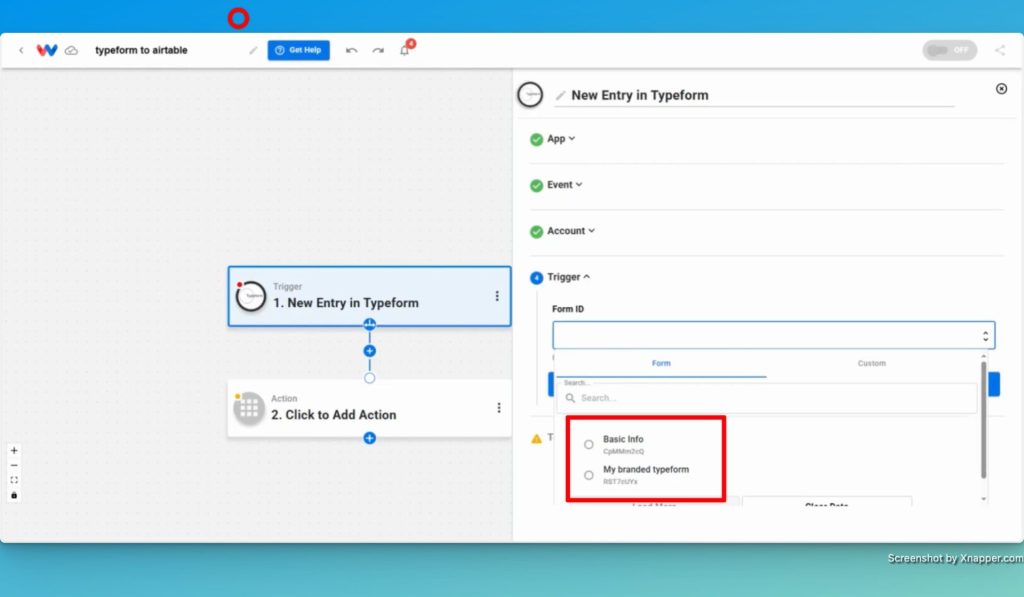
- Test Trigger: Test the trigger and make sure that you get a response.
Step 3: Create your Airtable Action #
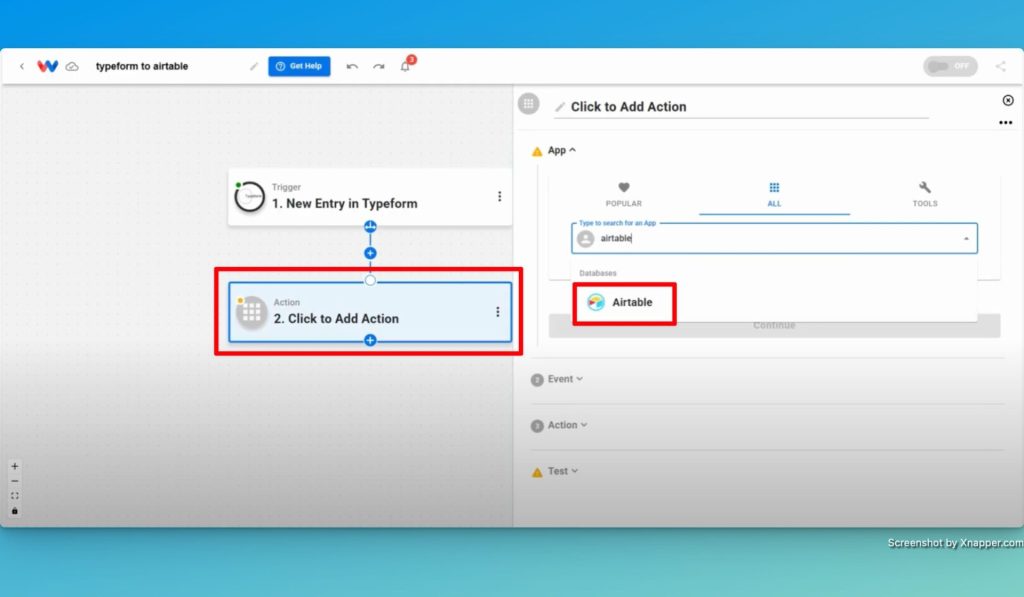
- Choose Action App & Event: Click in the action step and choose the Airtable app. Then, select “Create Record” as the event.
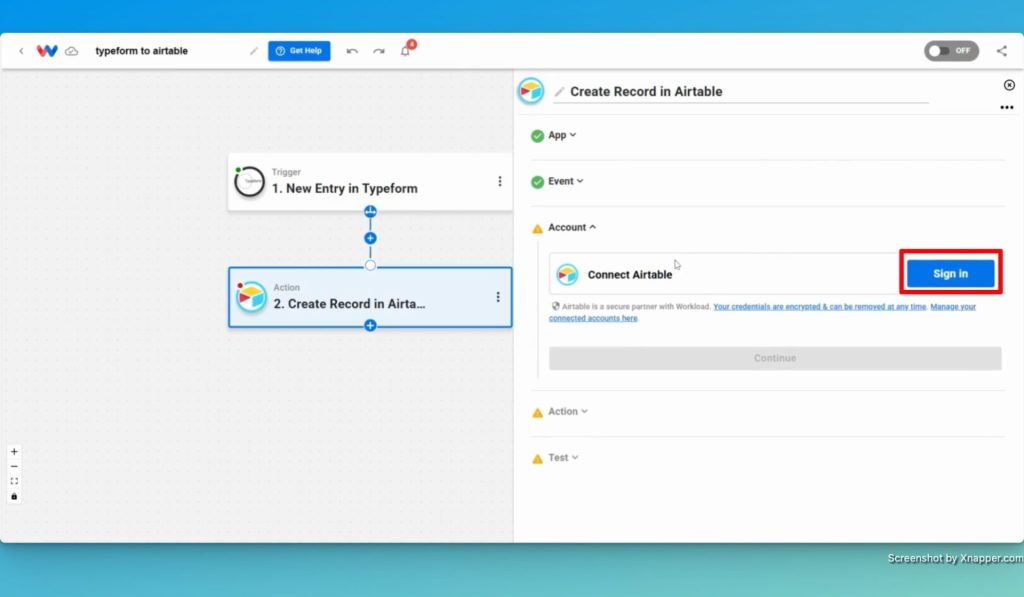
- Securely Connect Airtable: Connect your Airtable account by signing in or selecting an existing Airtable connection.
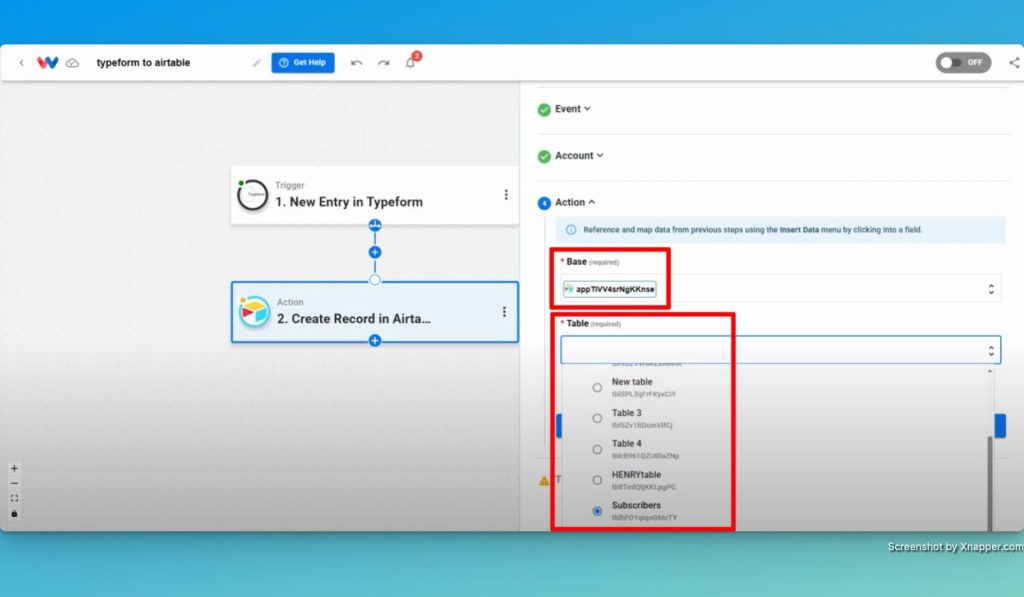
- Choose your Base & Table: Now, choose your base (e.g. Workload Testing Base) and then choose the specific table (e.g., Subscribers Table) where you want to create the new record.
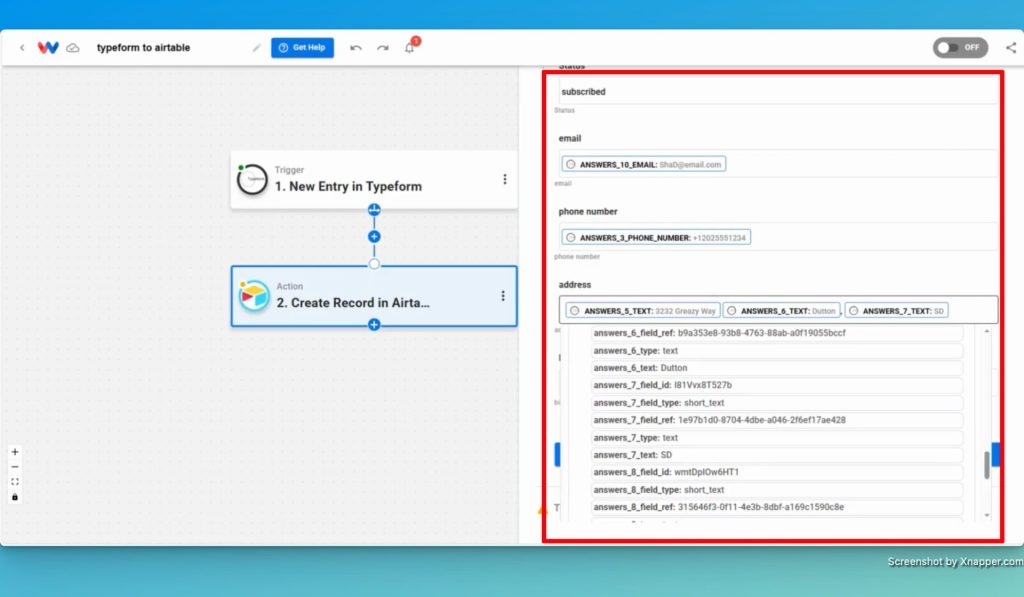
- Map Fields: Now, map the fields that you want to include from Typeform to your new Airtable record. To start, you might want to focus on some of these fields. Please be aware that you may need to format the fields to fit Airtable’s requirements.
- First Name
- Last Name
- Email Address
- Phone Number
- Address
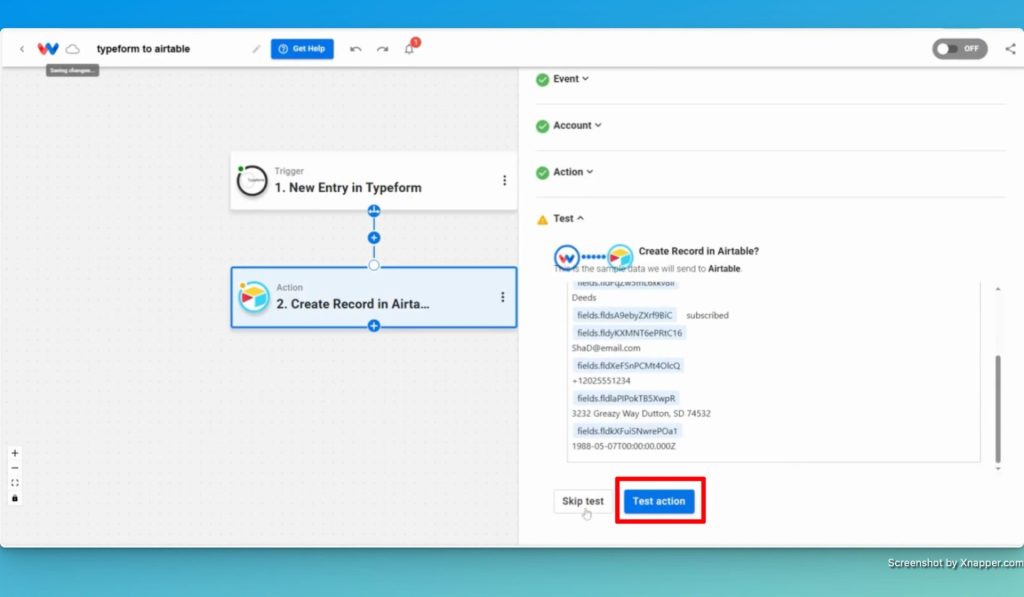
- Test the Action: Click the “Test” button and make sure that the Airtable record populates
Step 4: Test and Activate Your New Typeform to Airtable Integration #
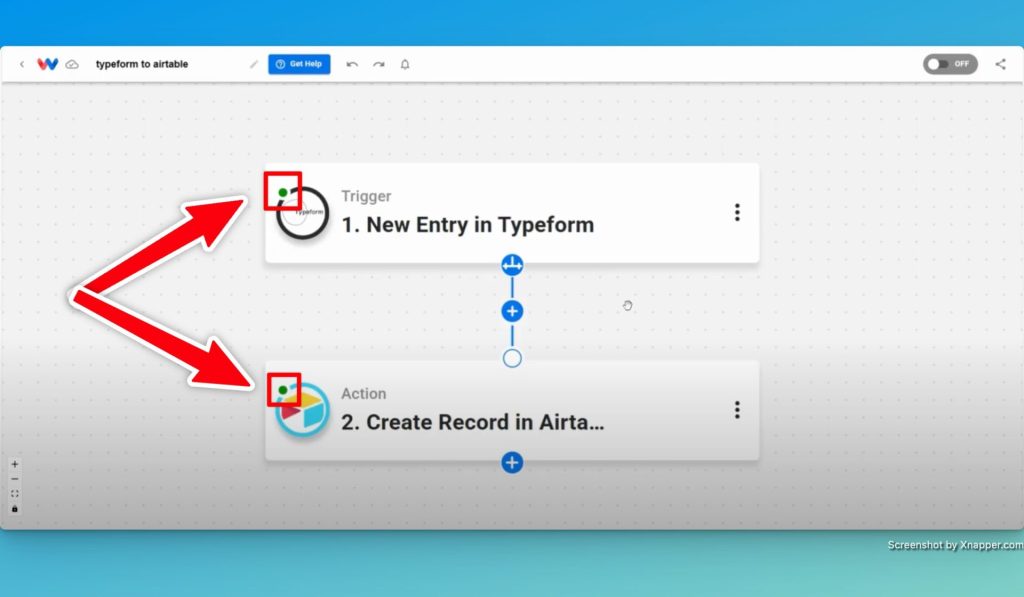
- Review the Workflow: Review the steps of your workflow to make sure that the indicator of each step is green.
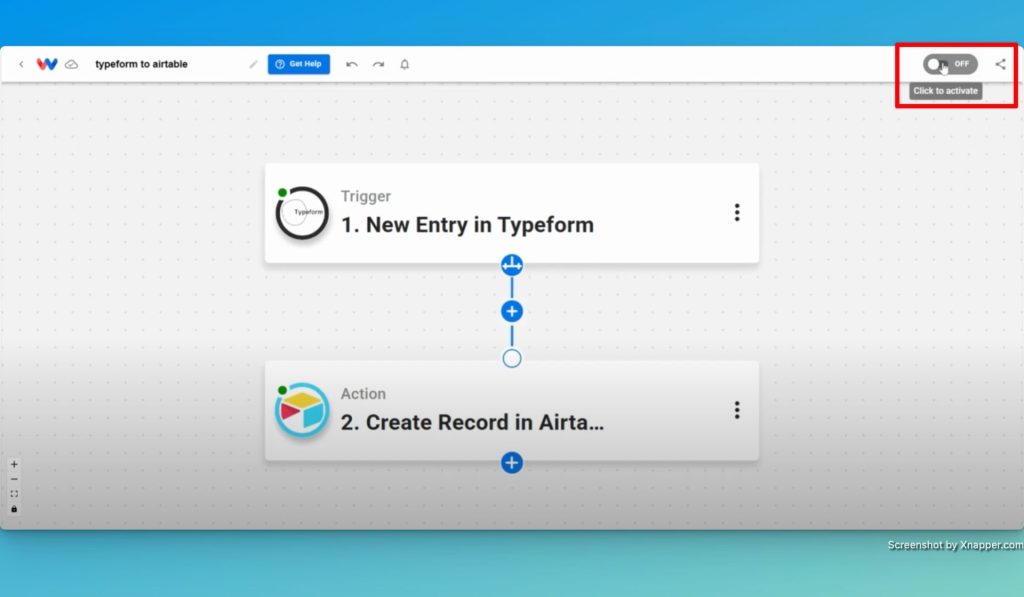
- Activate the Workflow: Finally, in order to start the automation workflow, you will need to toggle the on/off switch to “on”. Your new entries in Typeform will now automaticcaly create records in Airtable.
Finishing Up #
Together, we have now constructed a simple yet powerful integration that connects Typeform to Airtable. Now, you can automatically create a new Airtable record any time a new entry is submitted in Typeform, eliminating manual data entry. This will save you valuable time and boost your data management efficiency, allowing you to focus on what truly matters.
For more tips, be sure to visit Workload University or check out our Workload Help page.
Spend less time on tasks- more on your goals!


