Struggling to keep your Trello board organized? Our innovative Trello Google Forms Automation workflow effortlessly converts every new Google Form response into a Trello card. Consequently, you no longer need to manually transfer data, which means you can focus on the tasks that truly matter. Moreover, this automated system streamlines your process and keeps your board consistently up-to-date, so you save time and boost your productivity.
If you need extra help, you can watch our step-by-step video on the Workload YouTube channel. Additionally, visit Workload University or our Workload Help page for more automation tips.
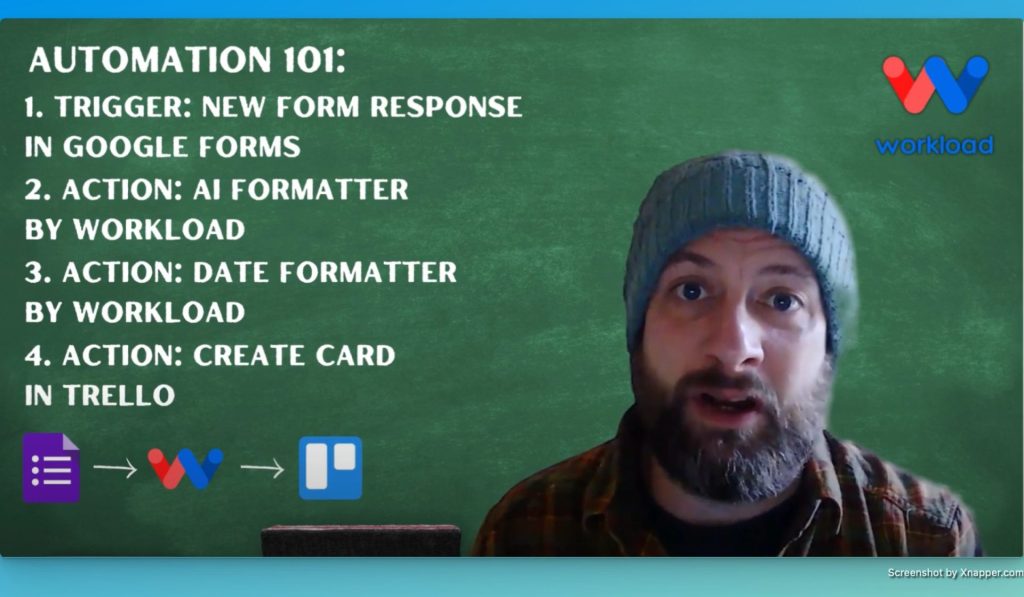
Overview: Trello Google Forms Automation #
In this workflow, you will:
- Trigger on New Form Responses: Capture every new response from Google Forms automatically.
- Format the Response Data: Use AI Formatter to extract key details and merge separate date and time fields with Date Formatter.
- Create a Trello Card: Automatically add a card to your Trello board with the formatted information.
Before you begin, please ensure you have:
- A connected Google Forms account.
- A Trello account with an active board.
- A Workload account to create and manage your workflow.
Step 1: Setting Up Your Workflow in Workload #
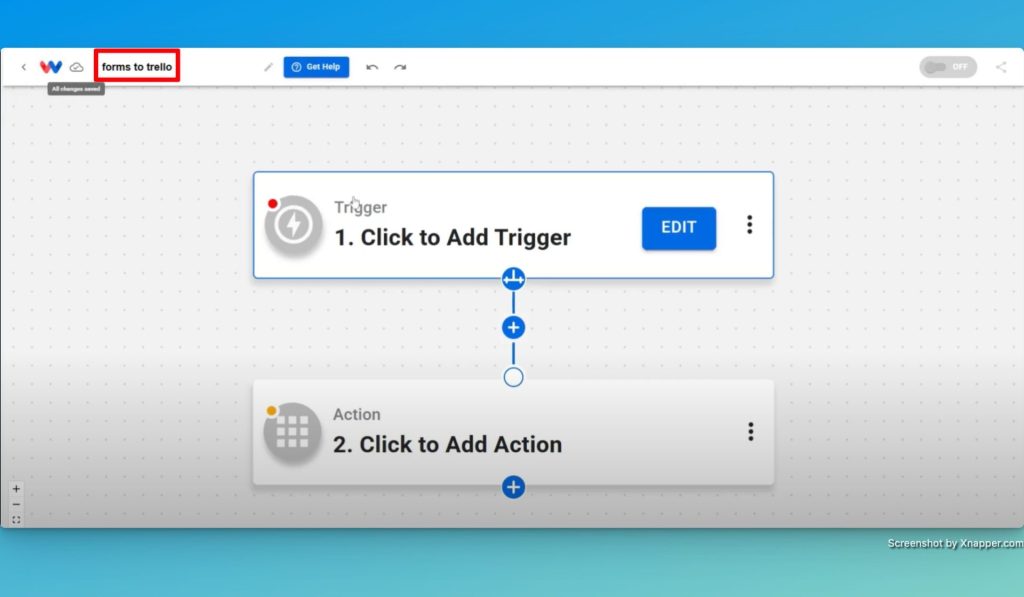
- Launch the Workload Editor: Open the Workload editor and create a new workflow.
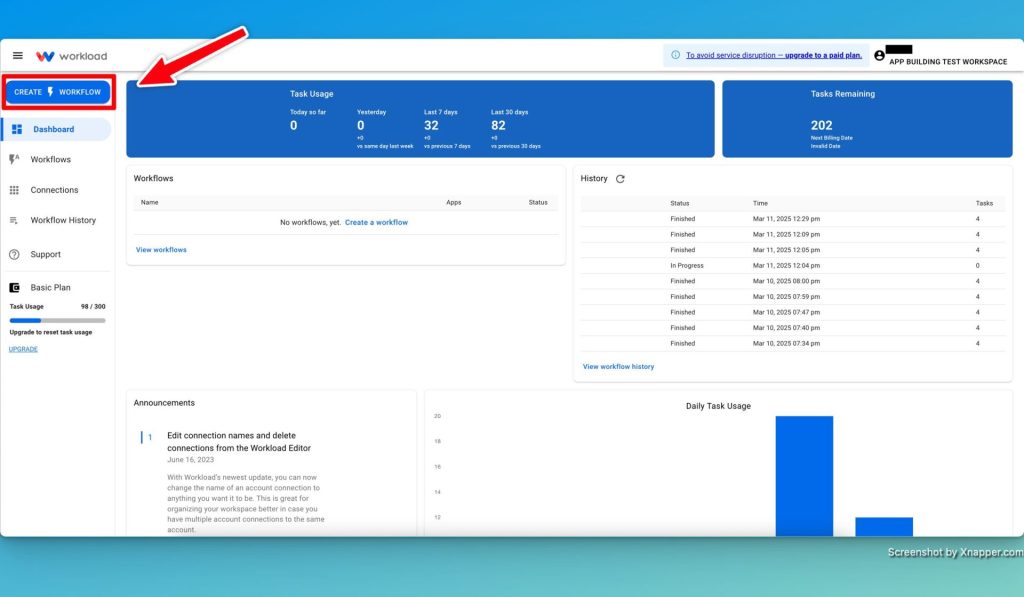
- Title Your Workflow: Name it something descriptive like “Forms to Trello” for easy identification.
- Select the Trigger App: Choose Google Forms as your trigger and then set the event to “New Form Response” so that every new response starts the workflow.
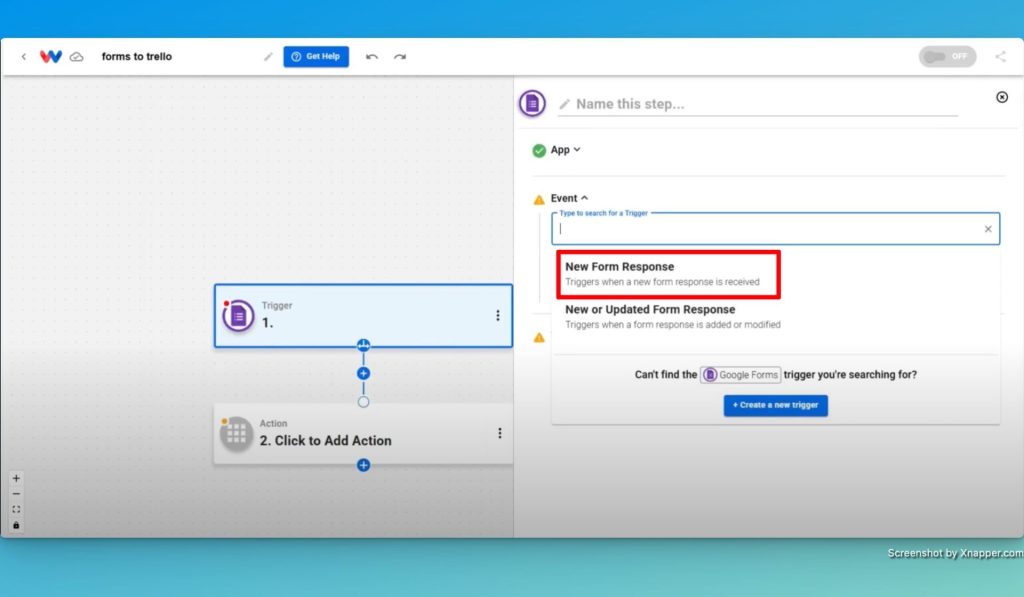
- Connect Your Account: Securely connect your Google Forms account.
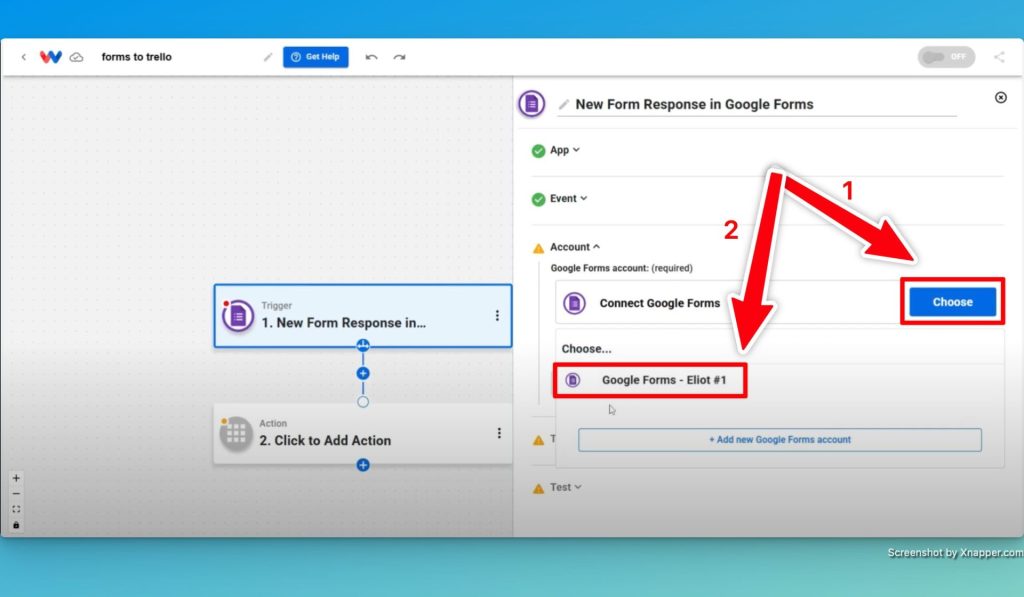
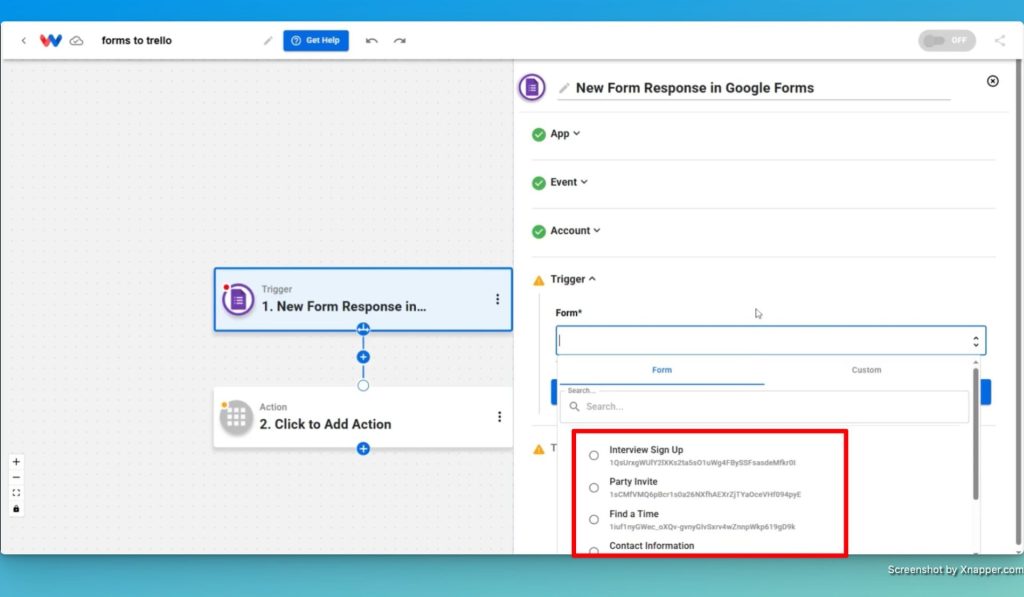
- Choose Your Form: Select the specific form (for example, your interview signup form) to monitor.
Step 2: Formatting the Form Response #
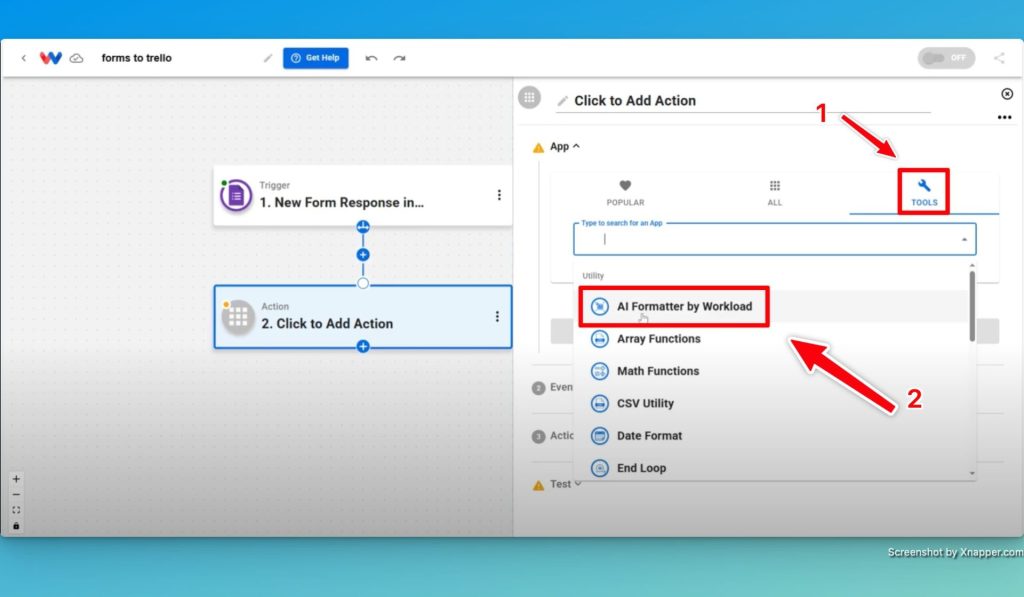
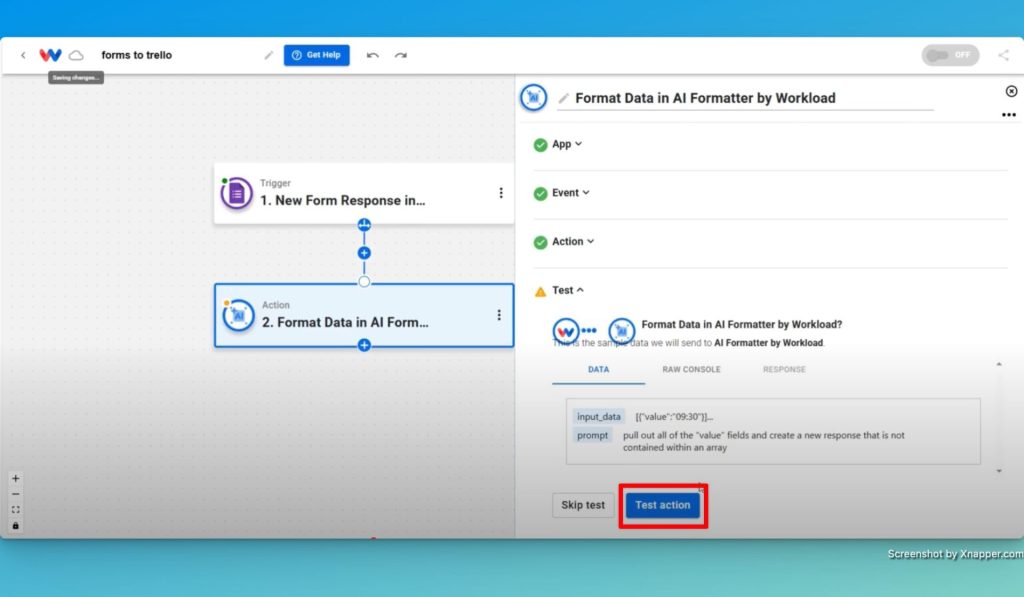
- Add the AI Formatter Step: Click the tools icon and select the AI Formatter by Workload and then choose the event action “Format Data“.
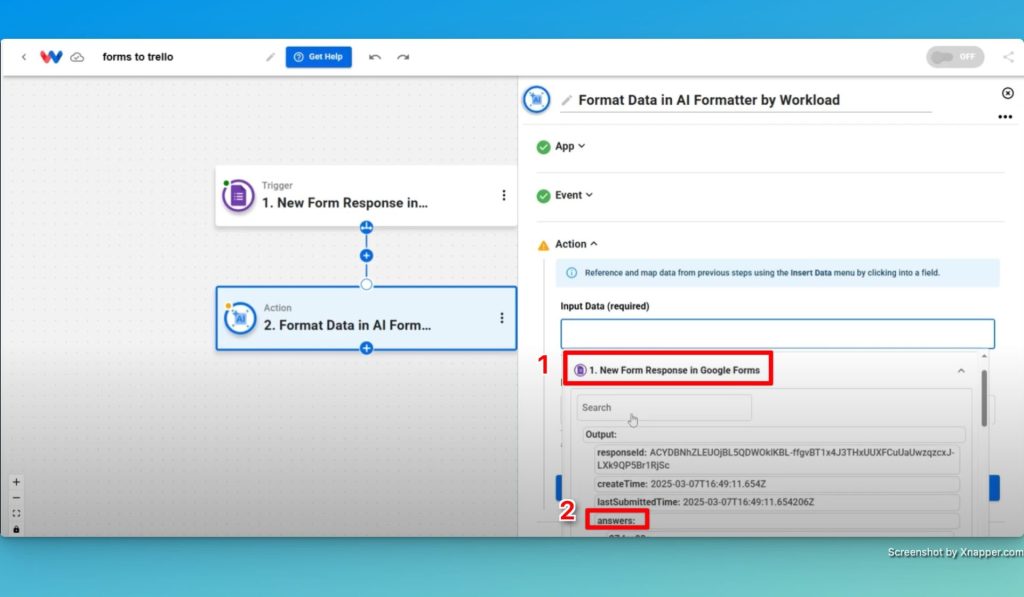
- Select the Answers Array: Next, choose the entire answers array from your form response.
- Prompt the AI Formatter: Now, prompt the formatter to extract only the value fields into a simplified response.

- Test the AI Formatter: Run a test to ensure that only the key answers appear.
- Merge Date and Time (if needed): If your response has separate date and time fields, add the Date Formatter step and merge them into a single date-time response that Trello can use.
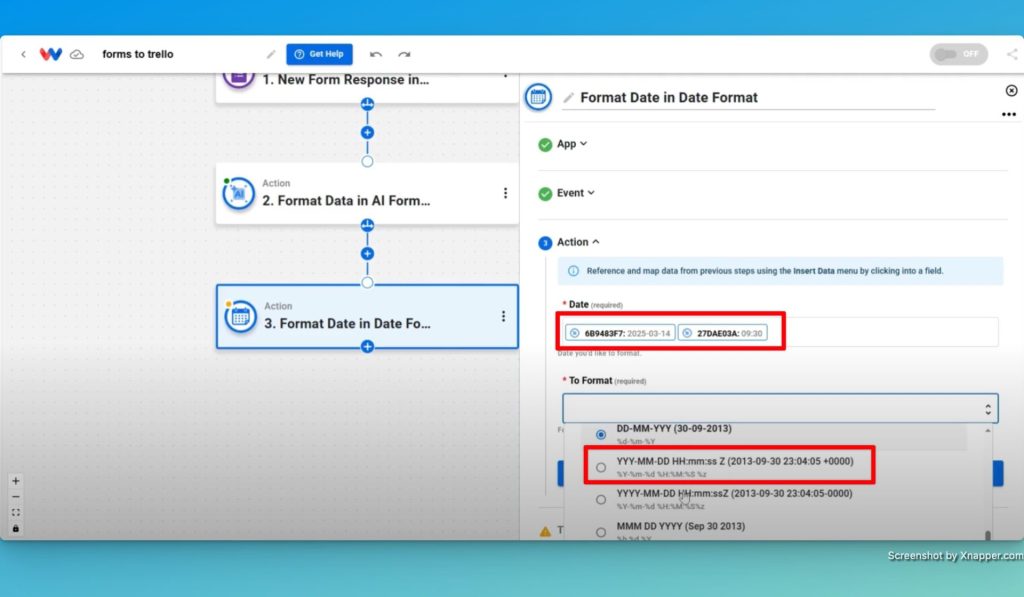
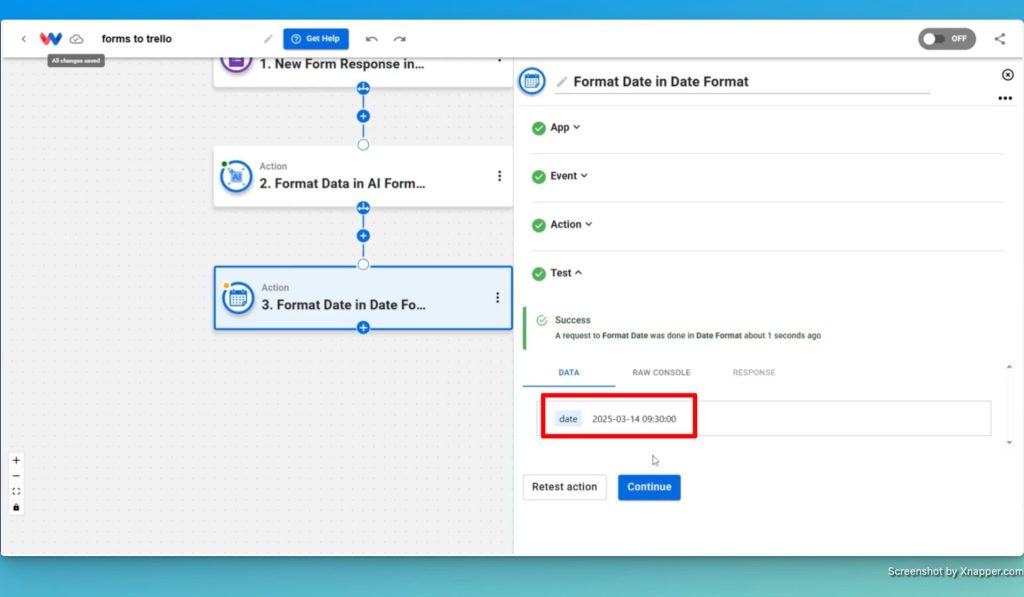
- Test the Date Formatter: Confirm that the date and time now appear as one field.
Step 3: Creating a Trello Card Action #
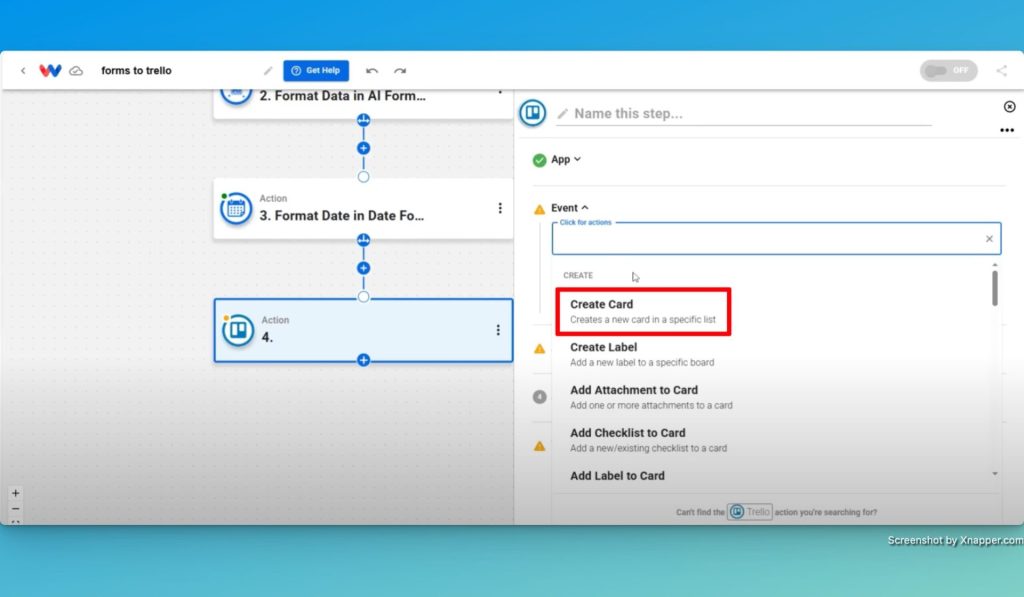
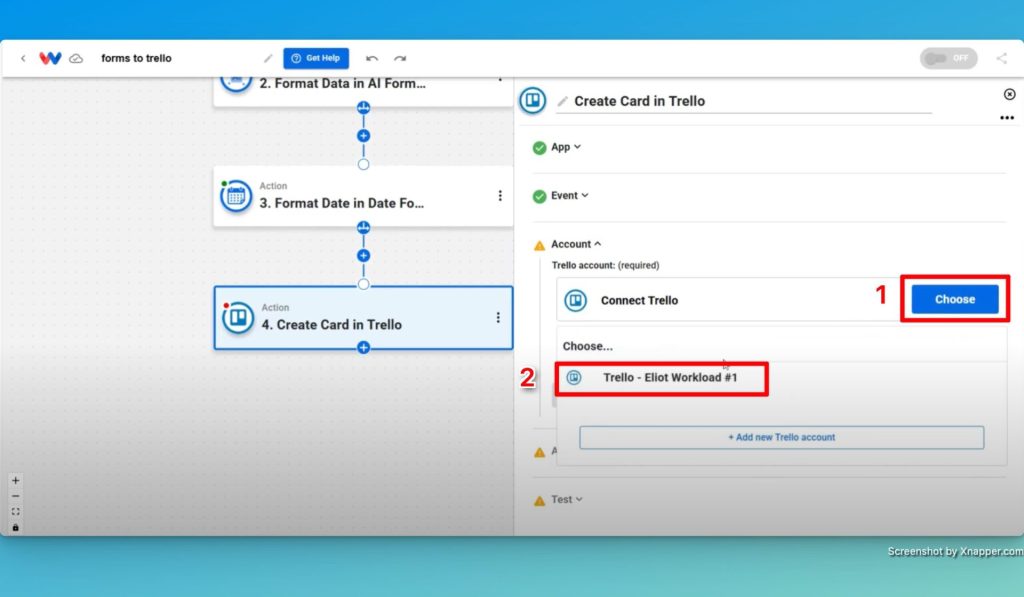
- Add the Trello Action: Select the “Create Card” action.
- Connect Your Trello Account: Log in to Trello securely.
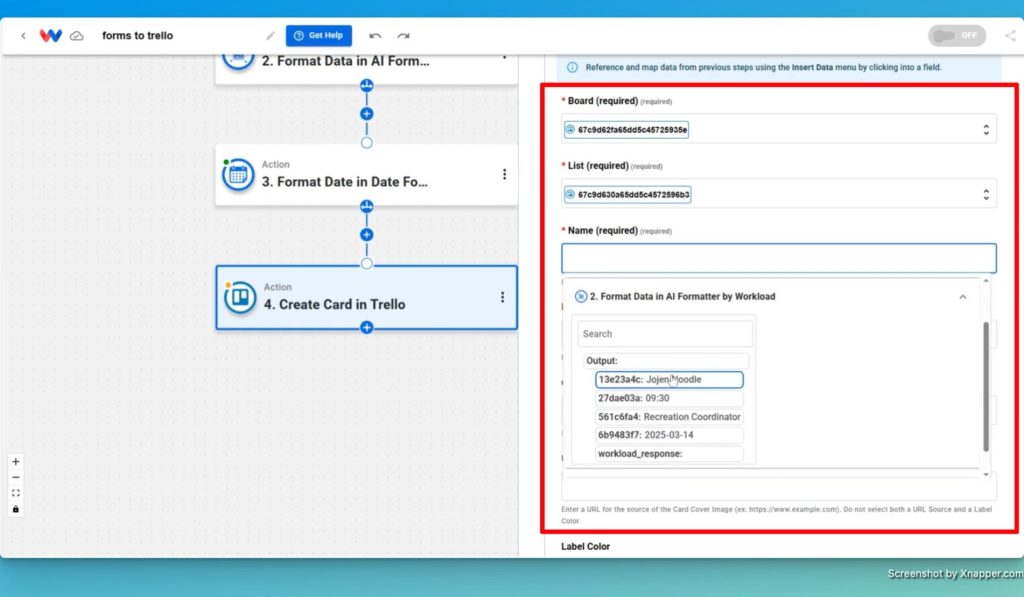
- Configure Card Settings:
- Select Your Board: Choose the board where new cards will be added.
- Choose Your List: Pick the list (for example, “To-Do”) where the card should appear.
- Map the Card Name: Use the formatted answer (e.g., the respondent’s name) as the card title.
- Add a Description: Include details such as the interview role or other relevant data.
- Assign a Label: Optionally, assign a color label (e.g., yellow) to distinguish this workflow.
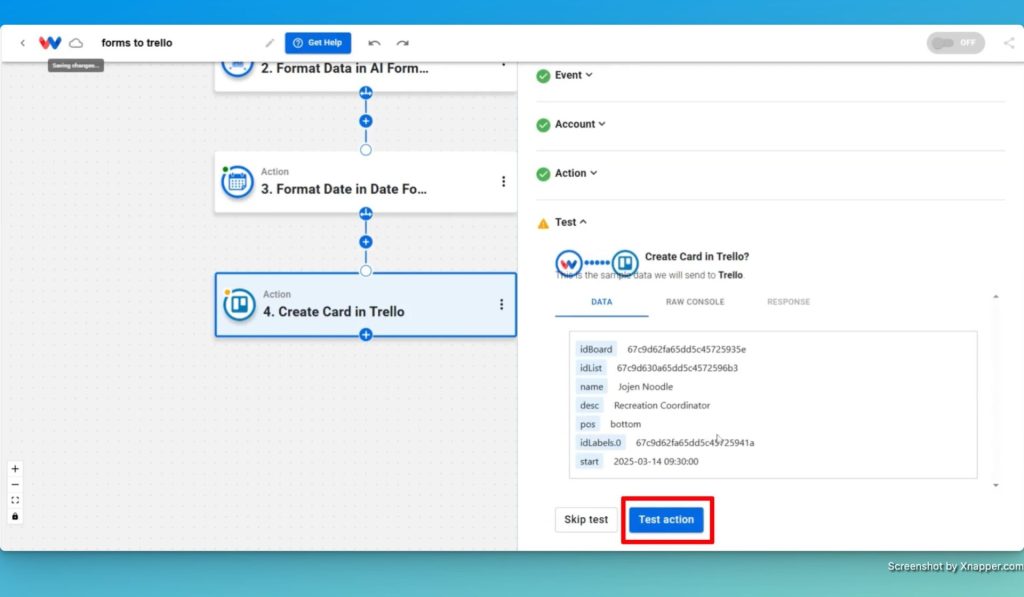
- Set the Start Date: Map the merged date-time field to the card’s start date.
- Test the Trello Action: Run a test to ensure that Trello receives the correct information and creates the card.
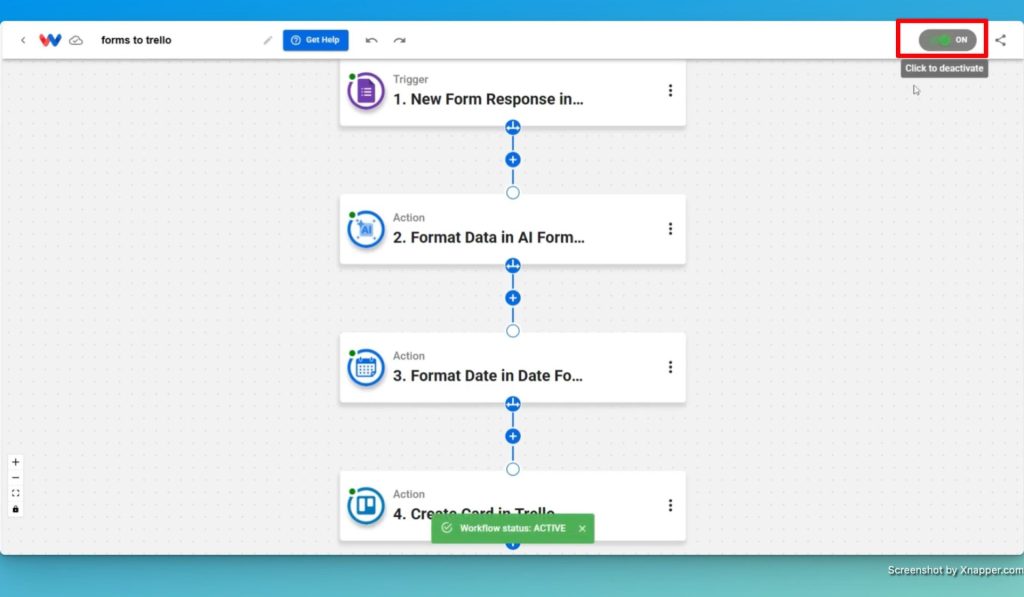
- Activate Your Workflow: Once all steps are set up and tested, activate your workflow.
Conclusion: Trello Google Forms Automation #
After completing these steps, activate your workflow to kick off your new Trello Forms Automation. Now, every time you receive a new form response, Workload automatically creates a Trello card with all the necessary details. This setup not only saves time but also keeps your Trello board organized.
By automating this process, you avoid manual work and enhance your productivity. Moreover, you let your tasks flow effortlessly, allowing you to focus on what really matters.
For more automation tips, please visit Workload University or check our Workload Help page.
Happy automating!


