If you’re still moving Shopify order data into Google Sheets manually, it’s time for an upgrade. When you build your own Shopify Orders to Google Sheets Sync workflow in Workload—no coding required—you’ll capture each new paid Shopify order and send it directly to your spreadsheet automatically.
Each time someone places a paid order in your Shopify store, this workflow runs. It collects the information you need, uses AI to clean it up, and then adds it to Google Sheets. This workflow saves you hours of manual data entry by automatically logging every new paid Shopify order into Google Sheets in real time. It keeps your sales reports, inventory counts, and customer lists up to date without any coding.
Need help getting started? Watch our video with Eliot from Workload for a full walkthrough where he will teach you how to build this workflow step‑by‑step. Check out Workload University or our Help Center for more tutorials and help documents.
Overview: What does this workflow do? #
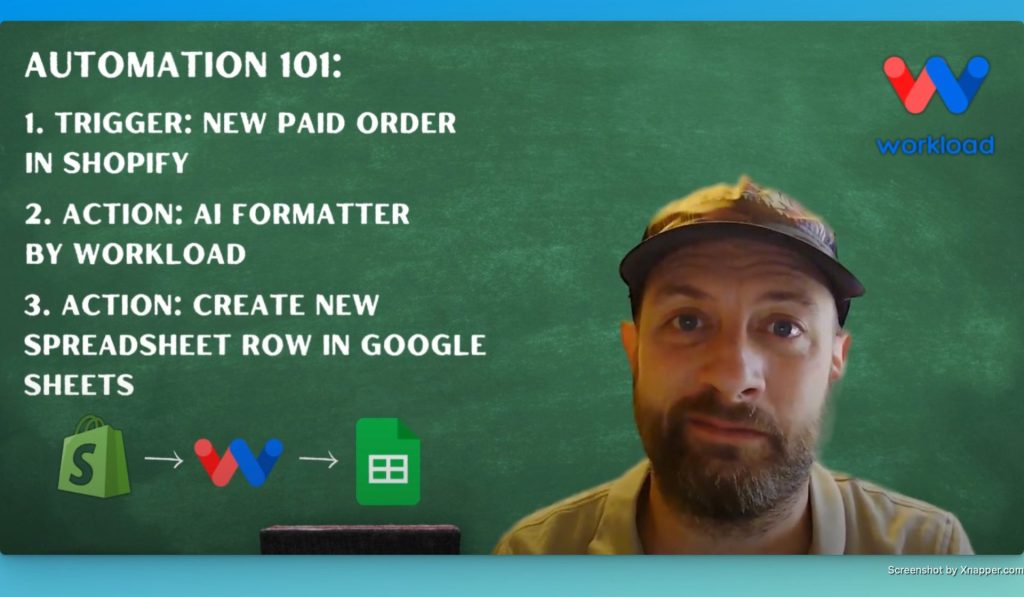
This workflow has three main functions:
- Watches for New Paid Orders: It triggers when a customer completes a purchase on Shopify.
- Formats the Data with AI: It cleans up the complex Shopify response and pulls the details you need.
- Adds the Order to Google Sheets: A new row is added automatically with the clean, organized data.
What You’ll Need:
- A Shopify store with paid orders
- A Google Sheets spreadsheet ready to receive data
- A Workload account (free to get started)
Step‑by‑Step: Build Your Workflow #
Step 1: Set up the Trigger (Shopify) #
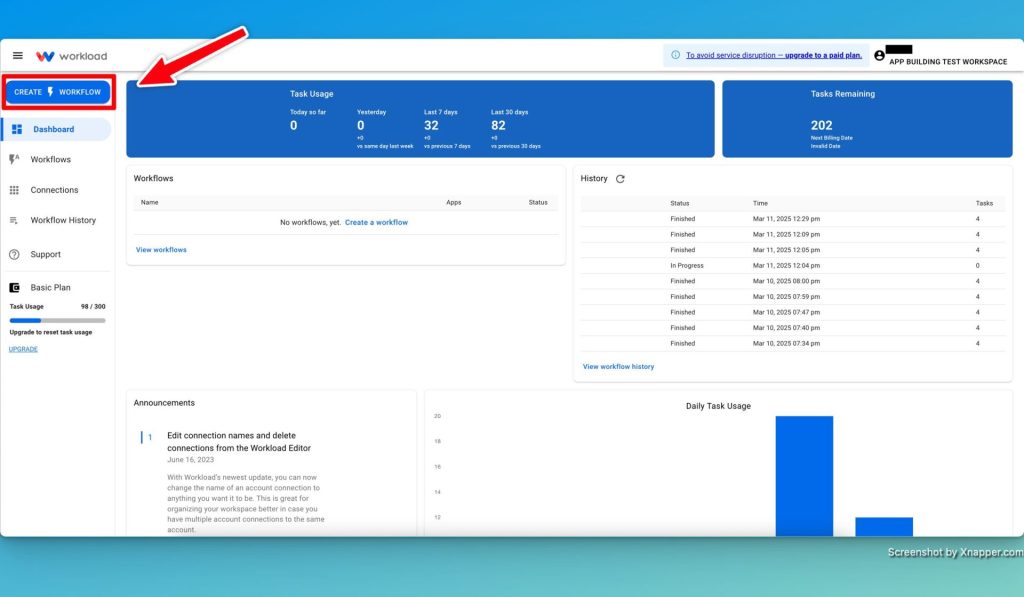
- Create Workflow: Open Workload and click Create Workflow
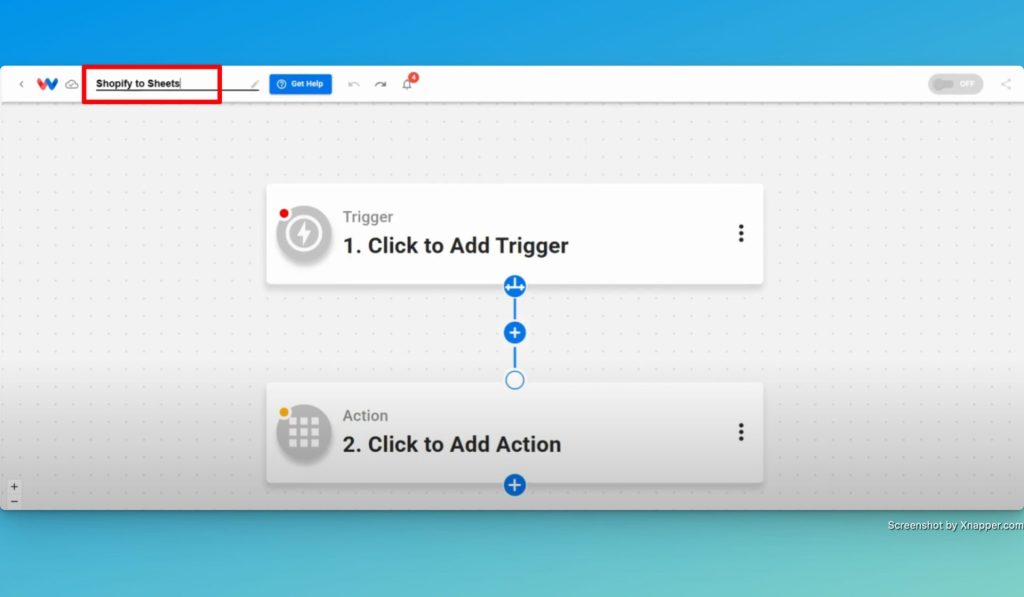
- Name the Workflow: Give the workflow a unique name.
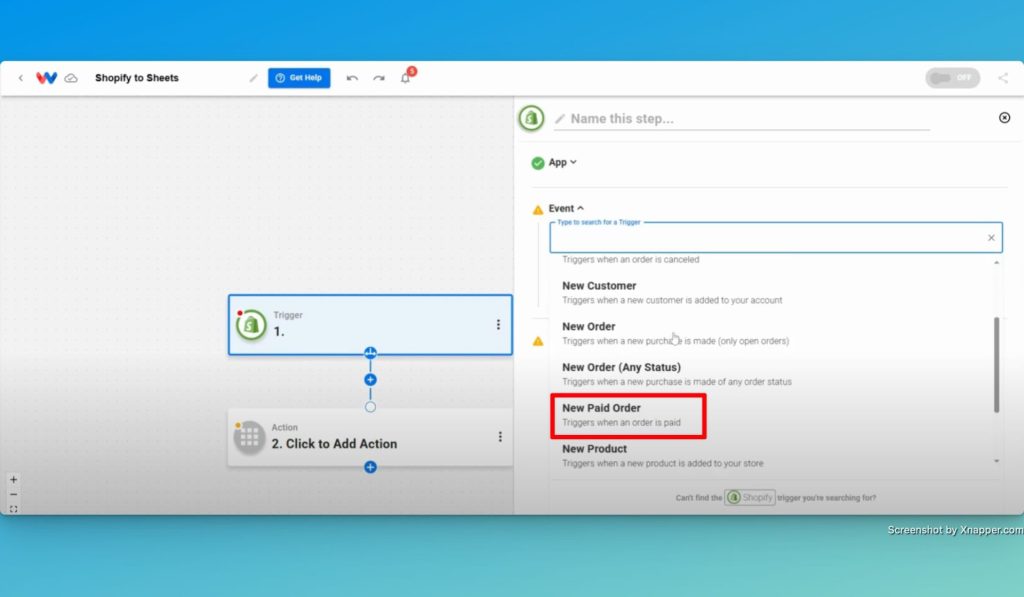
- Choose a Trigger App & Event: Select Shopify as the trigger app. Next, choose New Paid Order as the app event.
- Connect your Shopify account: Securely connect your Shopify account by clicking Sign In or by choosing an existing connection.

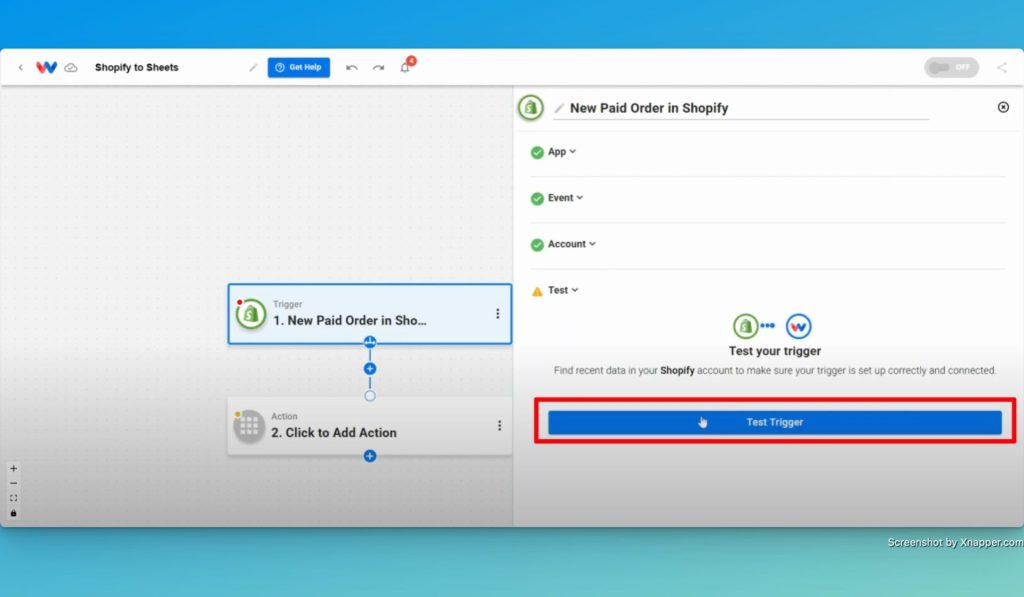
- Test the trigger: Click the Test Trigger button and make sure you get valid results.
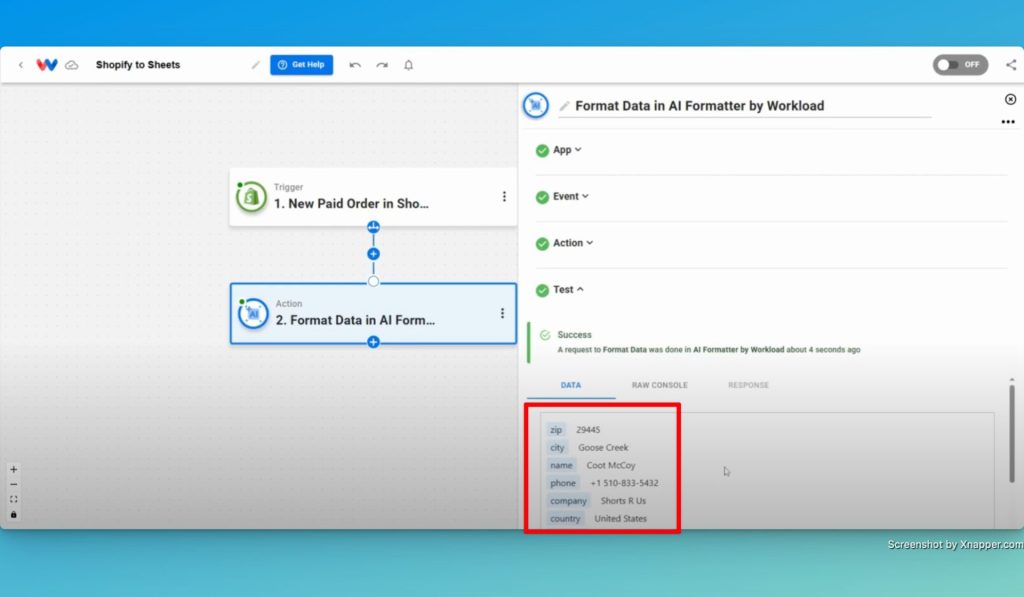
Step 2: Format Buyer Info (AI Formatter by Workload)
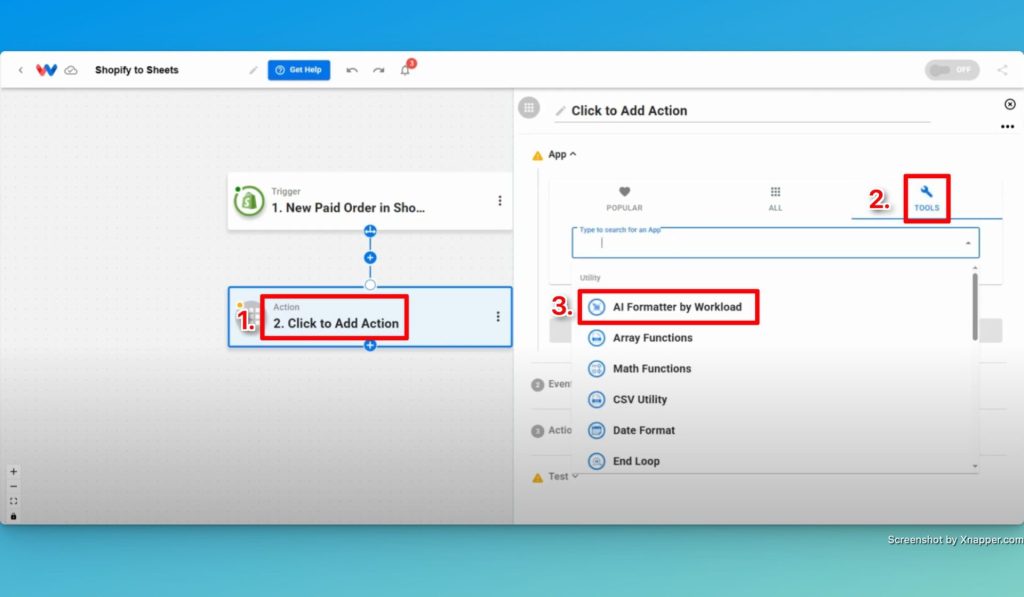
- Add a new Action App: Choose AI Formatter by Workload from the Tools menu as the app.
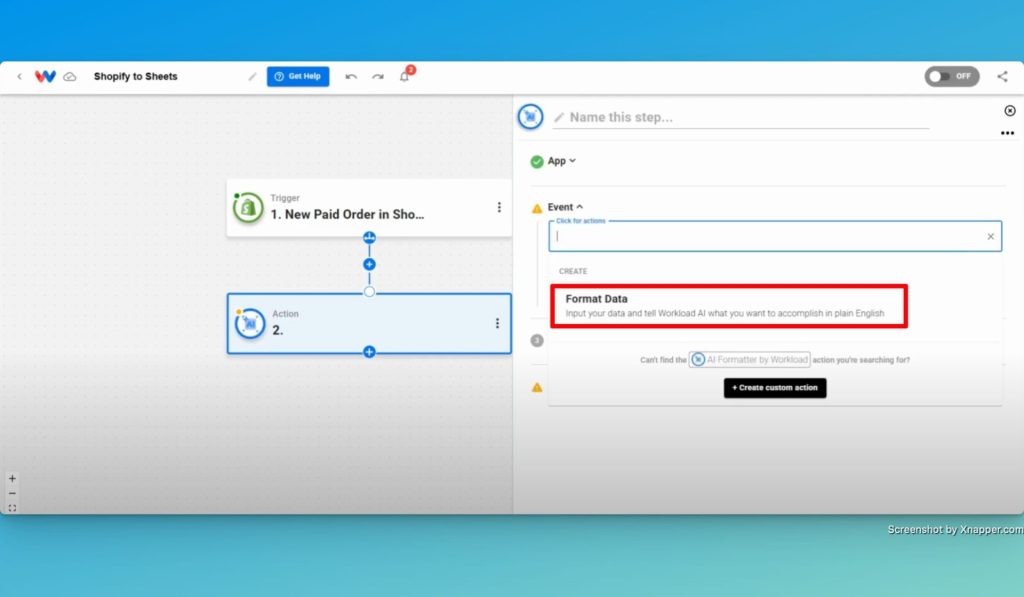
- Choose Event: Select Format Data from the dropdown menu.
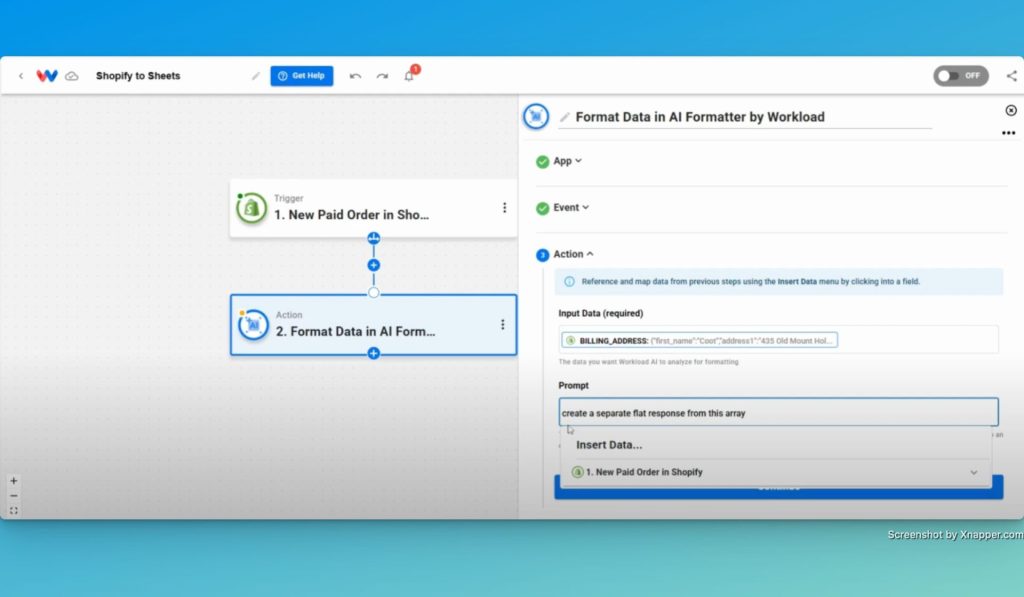
- Choose Source Data: Select the array that contains the data you want to use by clicking on the New Paid Order button within the box and then choose an array of data. (ex: billing_address)

- Prompt the AI Formatter: Create a prompt that tells the system exactly how you want the data to be formatted. (ex: Create a separate flat response from this array.)
- Test the Action: Click Test to make sure the response is formatted so that all of the data is flattened.
- Add Additional Formatting Steps (if needed): If you need access to data in more than one array, add additional steps to format that data as well.
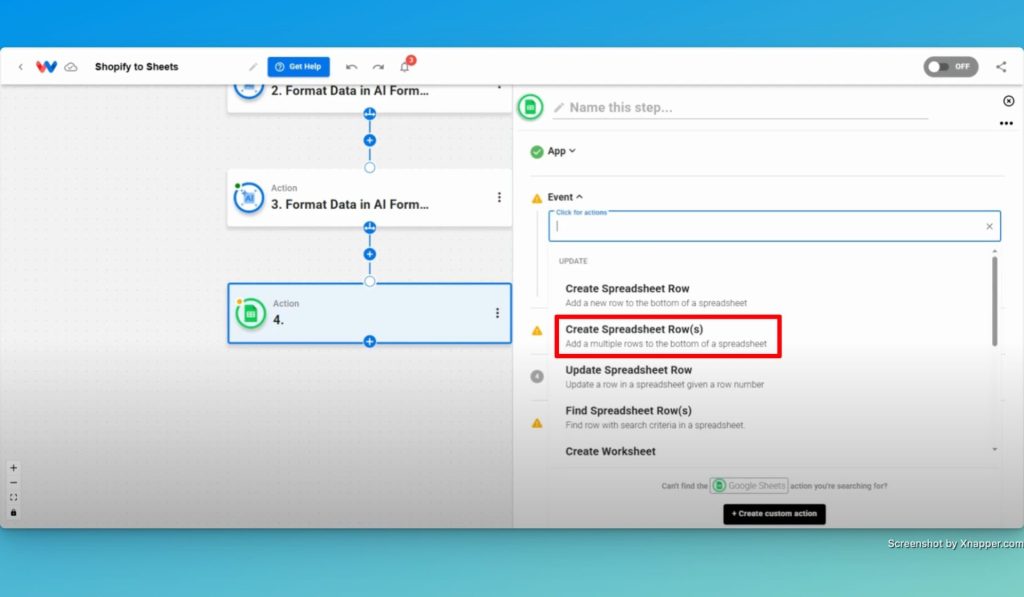
Step 4: Map Data to Google Sheets #
- Add an Action: “Google Sheets → Create Spreadsheet Row(s)”
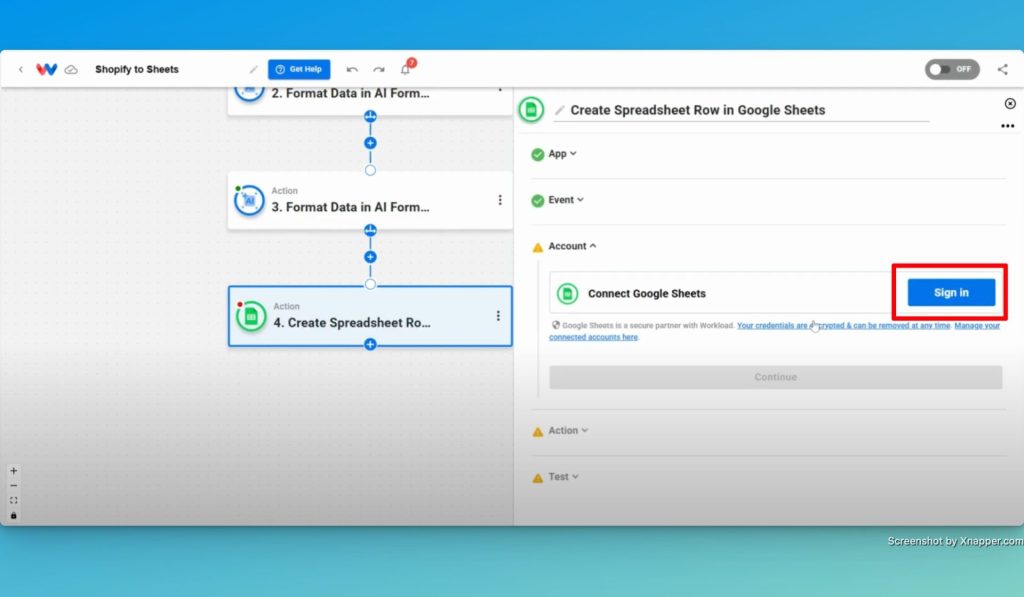
- Connect Google Sheets: Securely connect your Google account to Workload.
- Choose Spreadsheet & Worksheet: Pick the location for the new row(s).
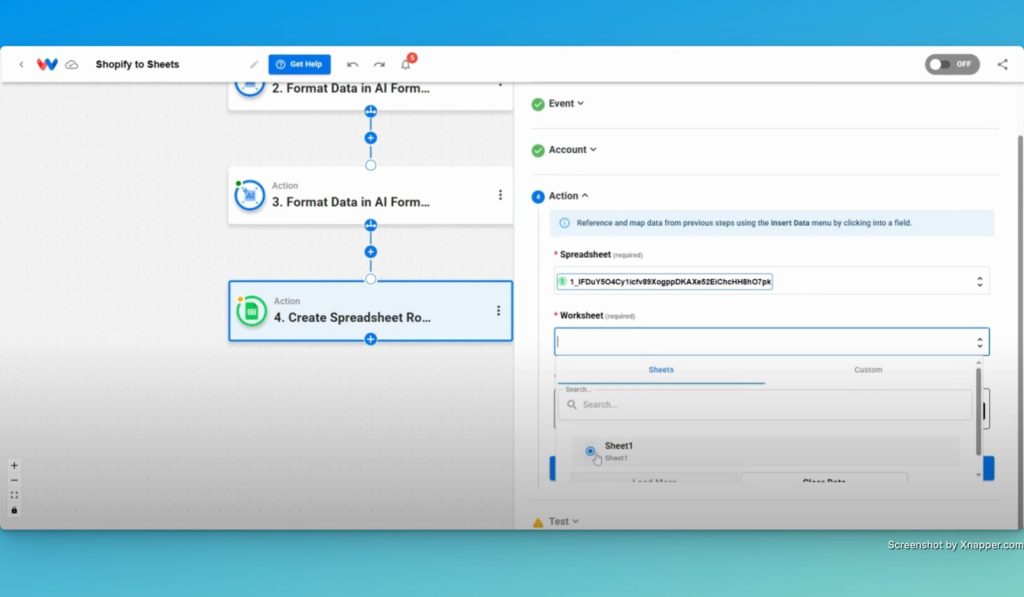
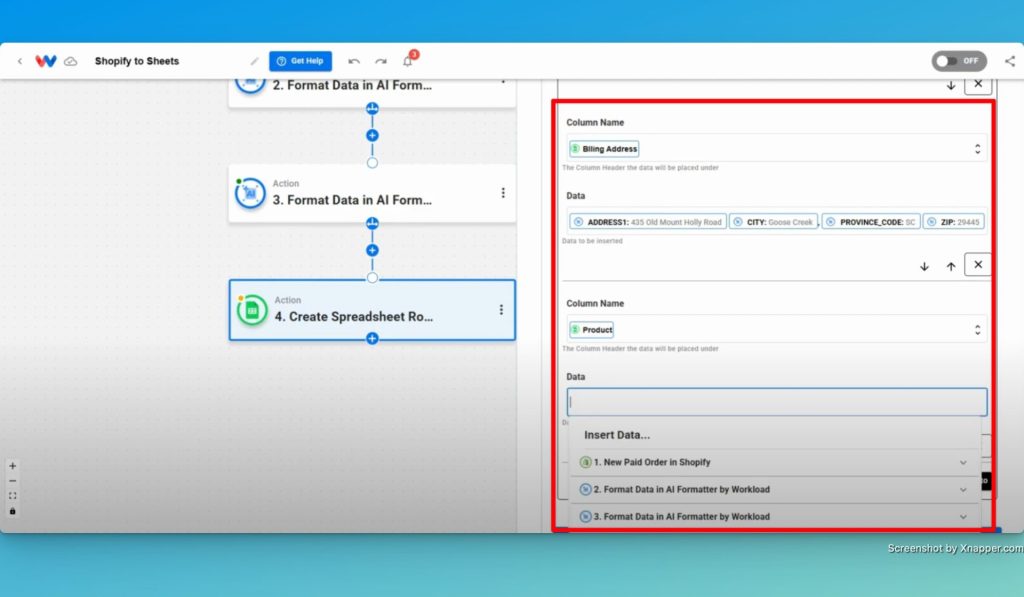
- Customize Column Data: Click +Add to and then choose the column name and data that you want to use. (Note: Available data is specific to the selected sheet and worksheet.)
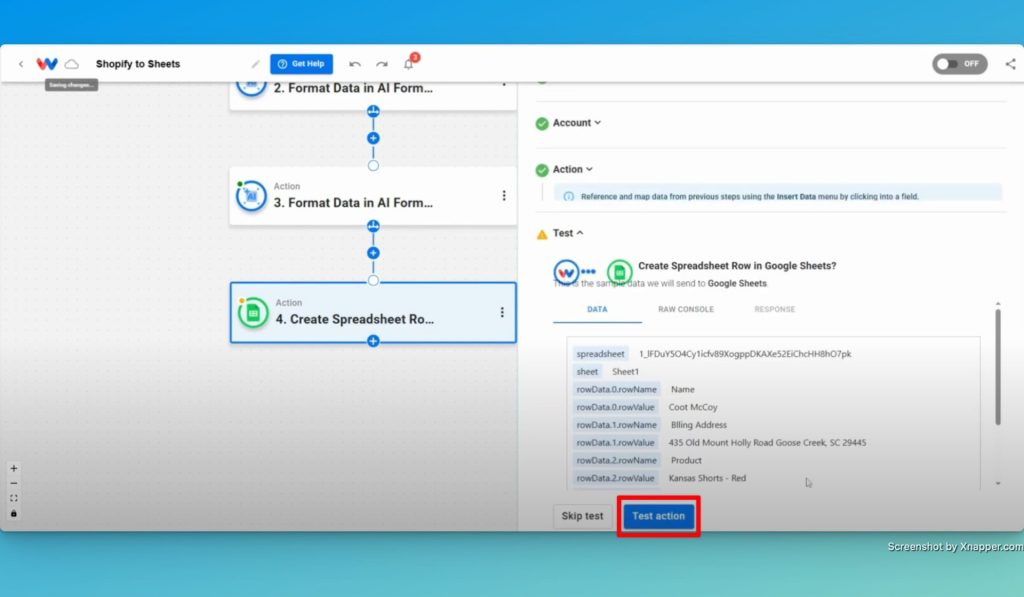
- Test Action: Click Test action to confirm that the data lands in your sheet.
Step 5: Activate Your Workflow #
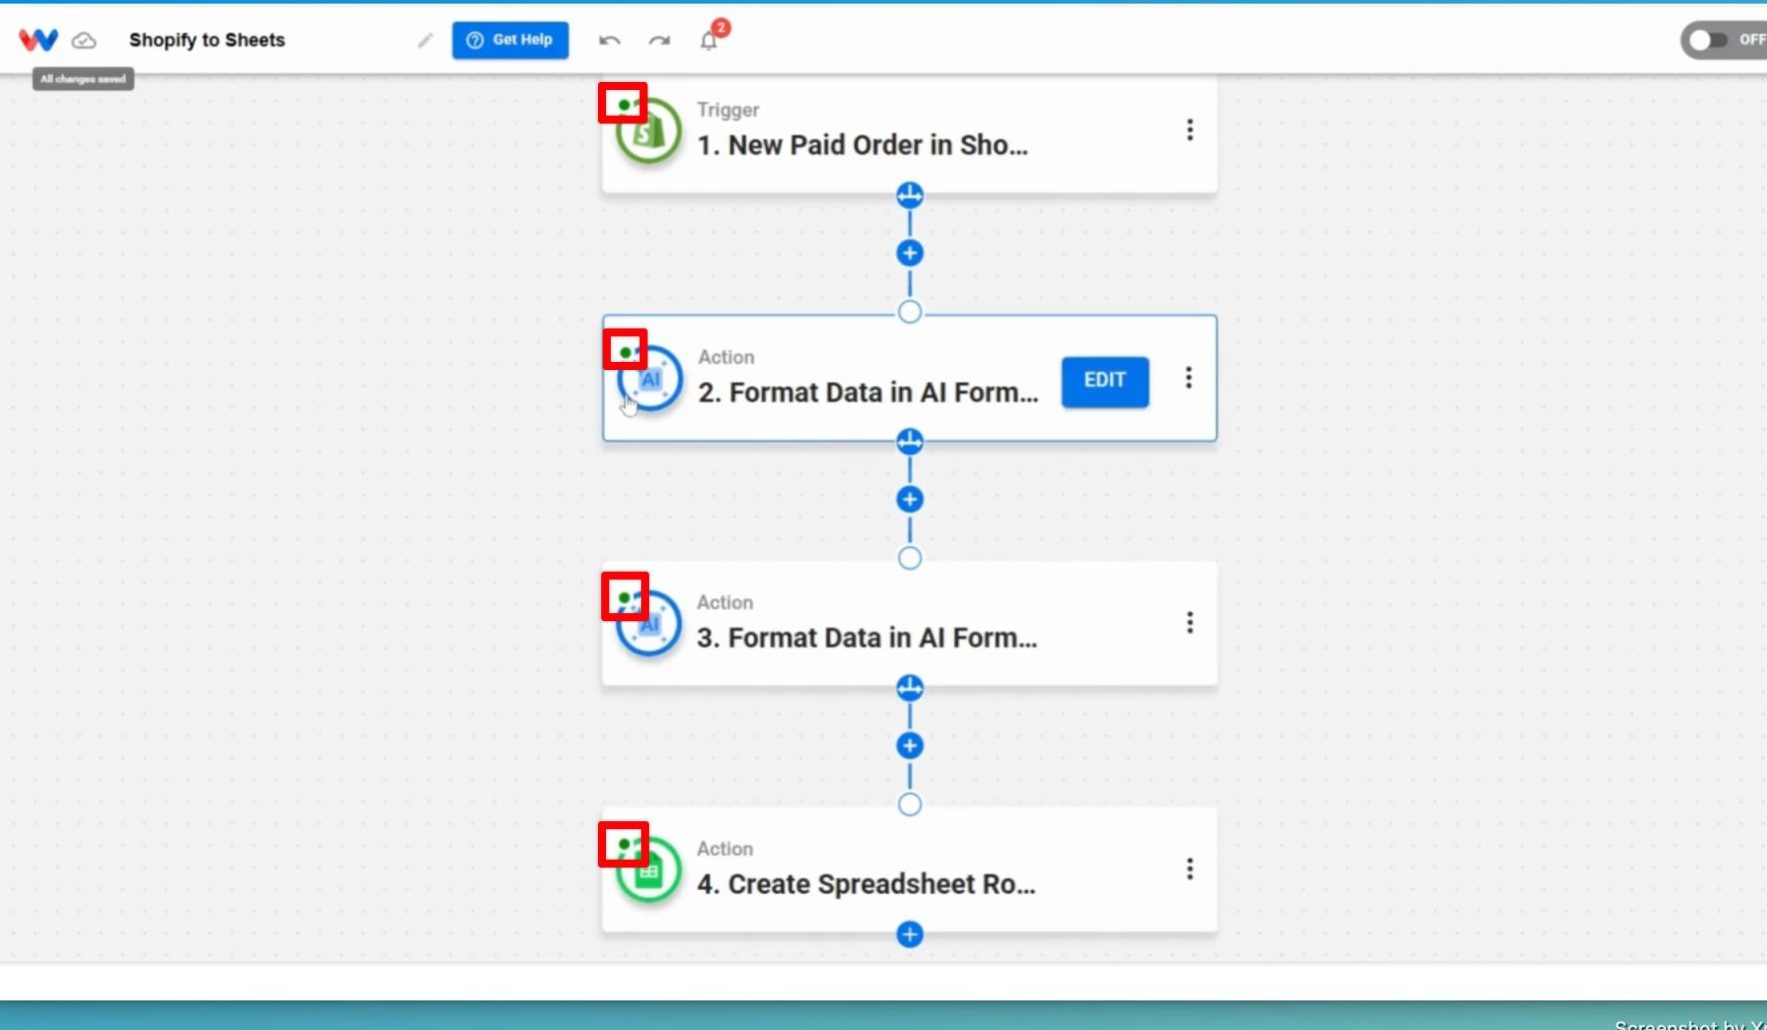
- Check Each Step: Verify each step was a green indicator.
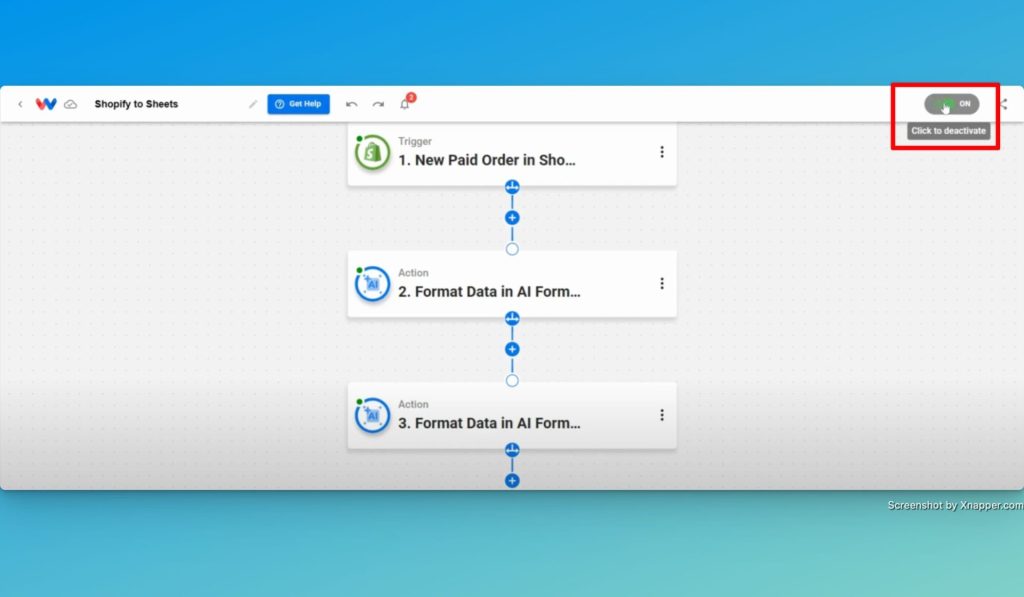
- Activate Workflow: Turn the workflow on—you’re live!
Finishing Up #
When you create your own customized Shopify Orders to Google Sheets workflow, it will help take the stress out of order management. Instead of wrangling Shopify’s complex data, Workload does the heavy lifting for you. Your Google Sheet gets exactly what you need—fully customized, accurate, formatted order data, updated in real time. Want to customize the workflow even further? Add email addresses, order timestamps, or any other Shopify field you need.
Looking to automate more tasks? Check out Workload templates that help you to build your own customized workflows.
Need more help? Visit Workload University or our Workload Help Center.
Automate work—simplify your day!


