If you’re still pinging your team manually whenever Shopify records a new sale, it’s time for an upgrade. When you build your own Shopify Order to Slack Message workflow in Workload—no coding required—you’ll automatically detect each new paid Shopify order and send a formatted alert directly to your Slack channel.
The workflow will start the moment a customer pays for an order in your Shopify store. Then, it pulls the customer and product details you need, formats the data, and then posts a clean, customizable message to Slack. This workflow saves you hours of manual messaging by instantly notifying your team of every paid Shopify order in real time. It keeps your customer service and fulfillment teams aligned without any coding.
Need help getting started? Check out our tutorial video with Eliot from Workload—he’ll walk you through exactly how to build this workflow, step by step. You can also check out Workload University or our Help Center for more tutorials and help documents.
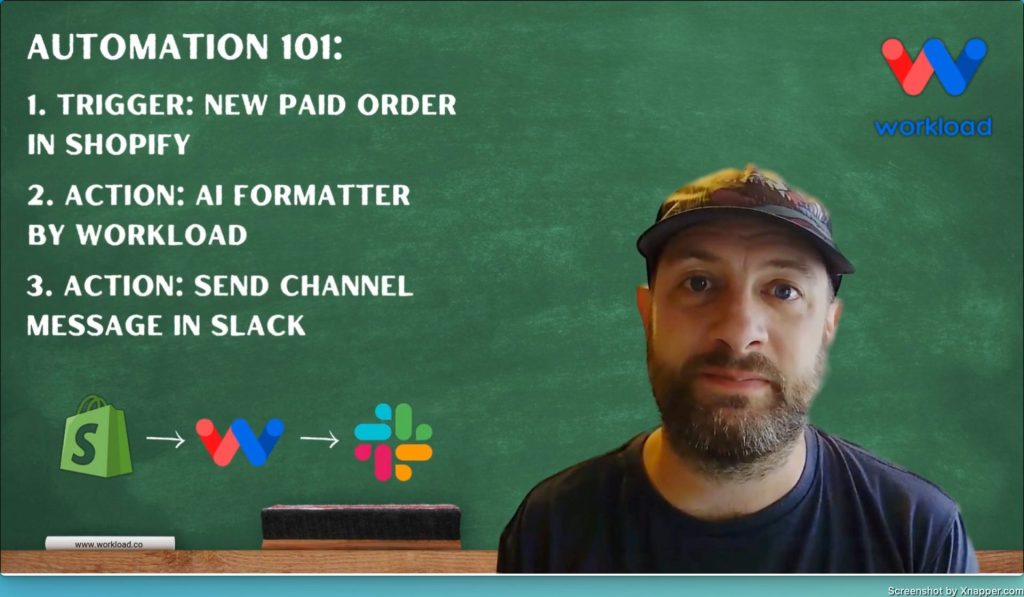
Overview: A High Level Look at a Shopify Order to Slack Message Workflow #
This workflow has three main functions:
- Watches for New Paid Orders: It triggers when a customer completes a purchase on Shopify.
- Formats the Data with AI: It cleans up the complex Shopify response and pulls the details you need.
- Adds the Order to Google Sheets: A new row is added automatically with the clean, organized data.
What You’ll Need:
- A Shopify store with paid orders
- A Google Sheets spreadsheet ready to receive data
- A Workload account to build your workflow
Step-by-Step: Build Your Shopify Order to Slack Message Workflow #
Follow these steps to set up your Shopify Order to Slack Message workflow:
Step 1: Set up the Trigger (Shopify) #
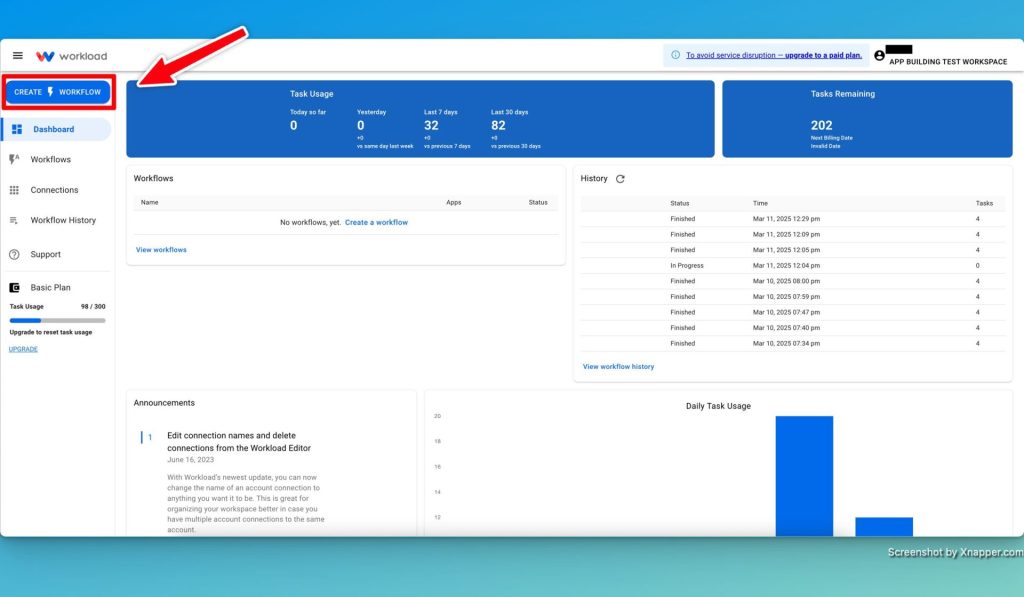
- Create Workflow: Open Workload and click Create Workflow.
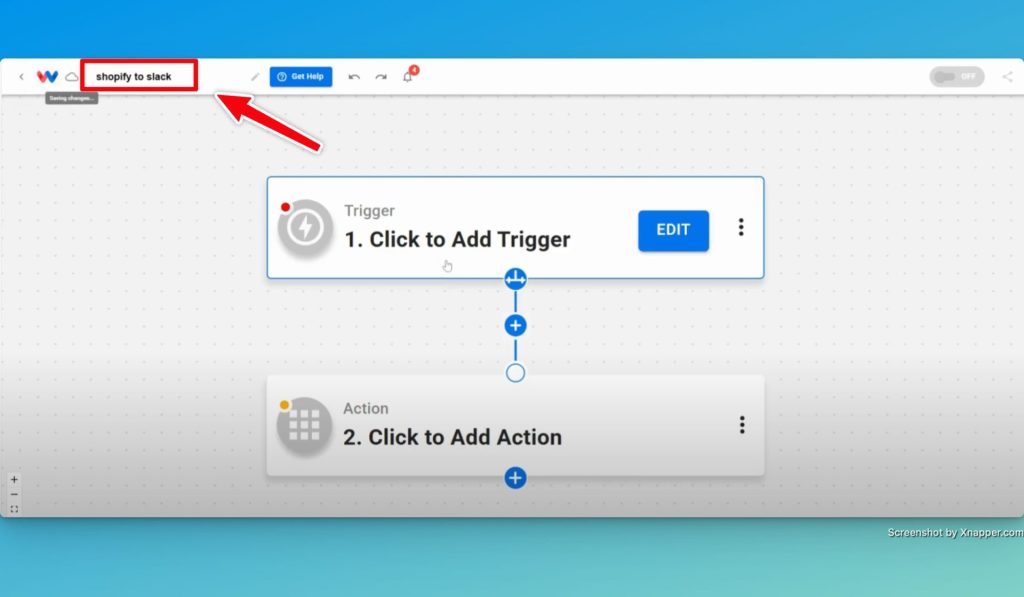
- Name the Workflow: Enter a unique name for the workflow.
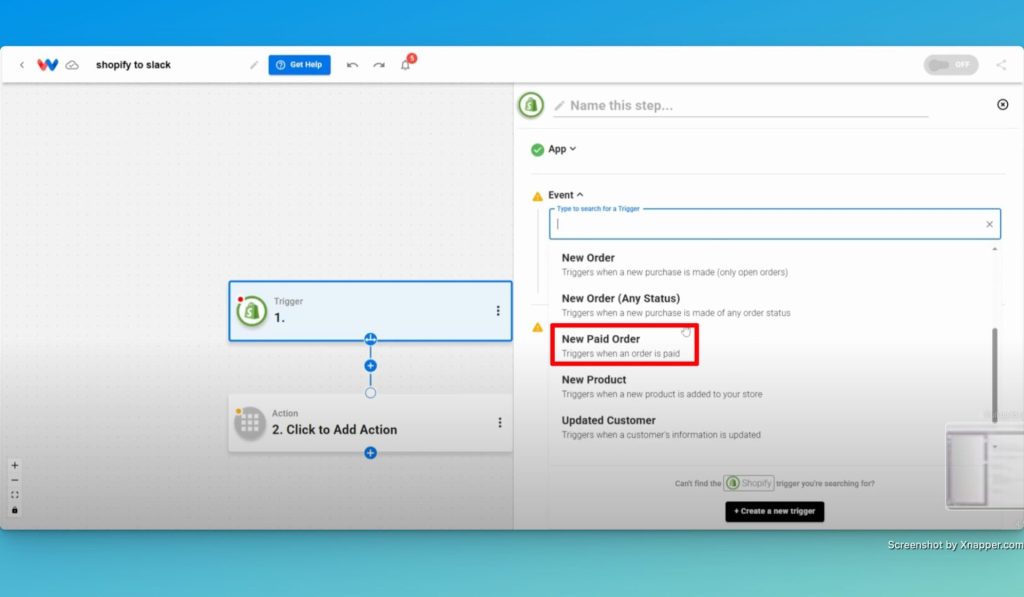
- Choose a Trigger App & Event: Select Shopify as the trigger app and New Paid Order as the event.
- Connect Your Shopify Account: Click Sign in to securely connect your Shopify account or choose an existing connection.
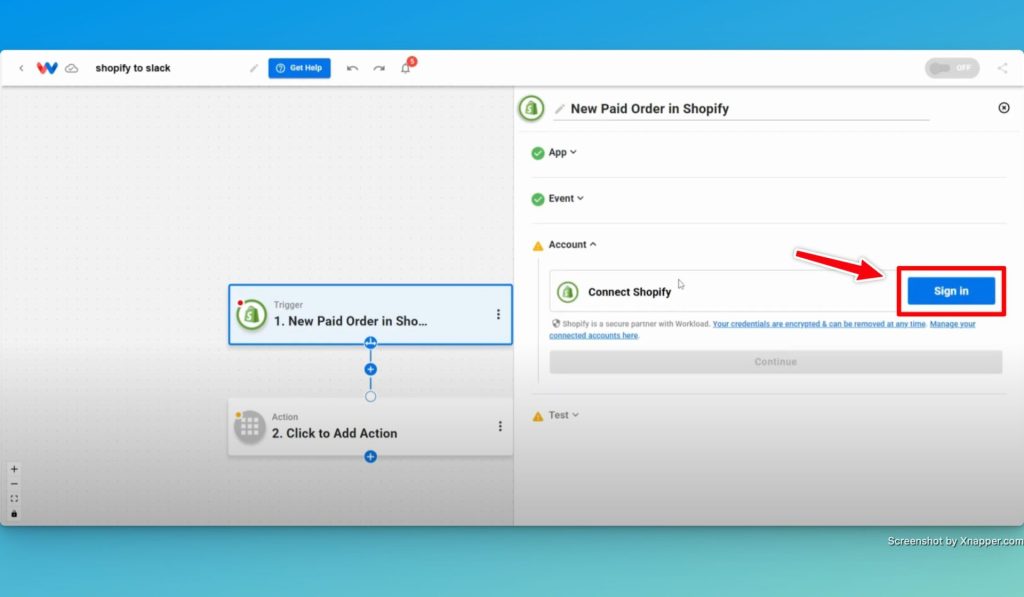
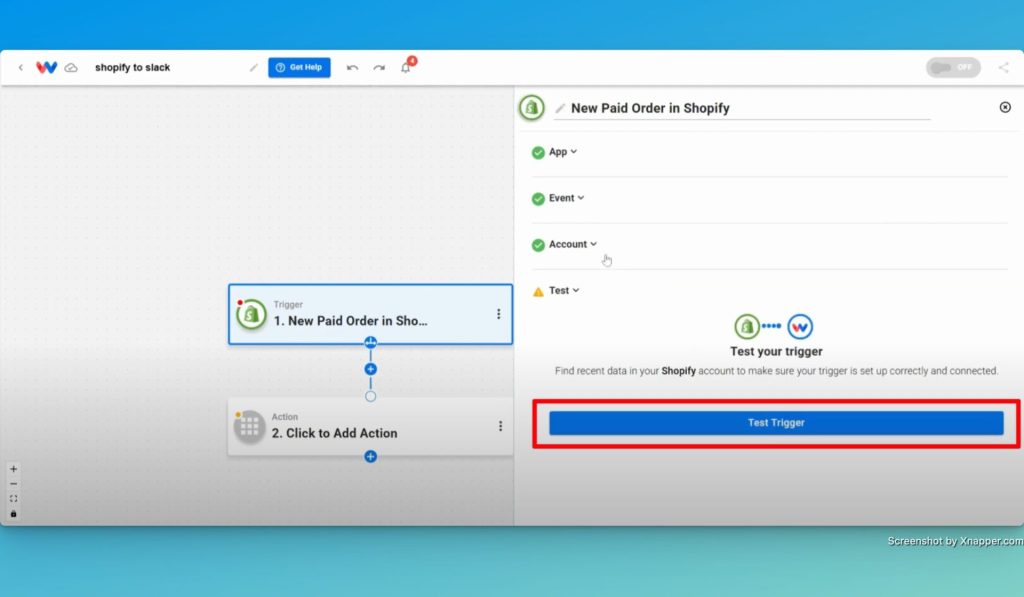
- Test the Trigger: Click Test Trigger to verify you receive a recent paid order response.
Step 2: Format Trigger Data (AI Formatter by Workload) #
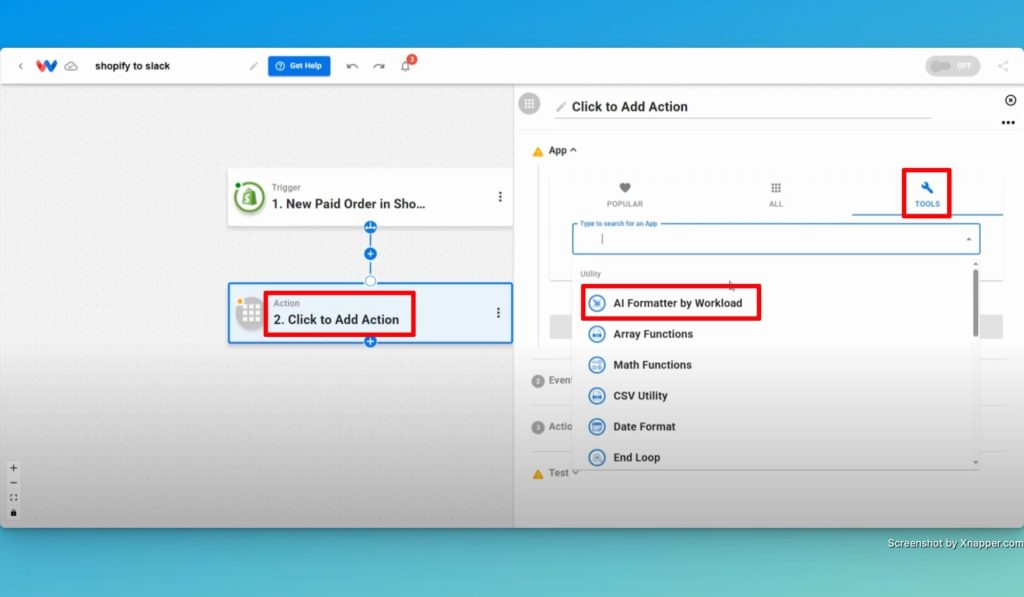
- Add a New Action App: Click + Add Action, select the Tools icon, then choose AI Formatter by Workload.
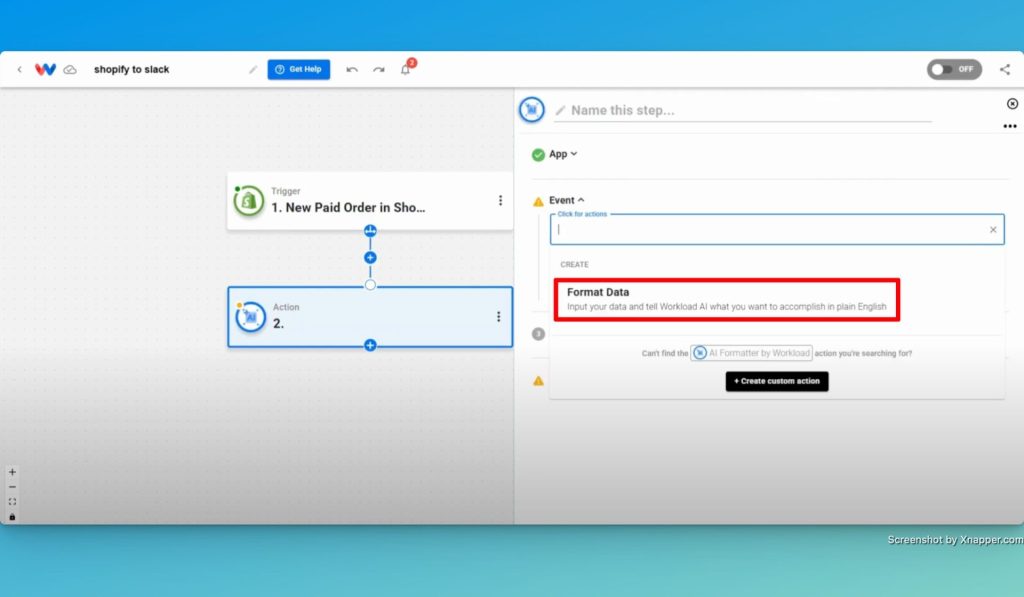
- Choose Event: Select Format Data.
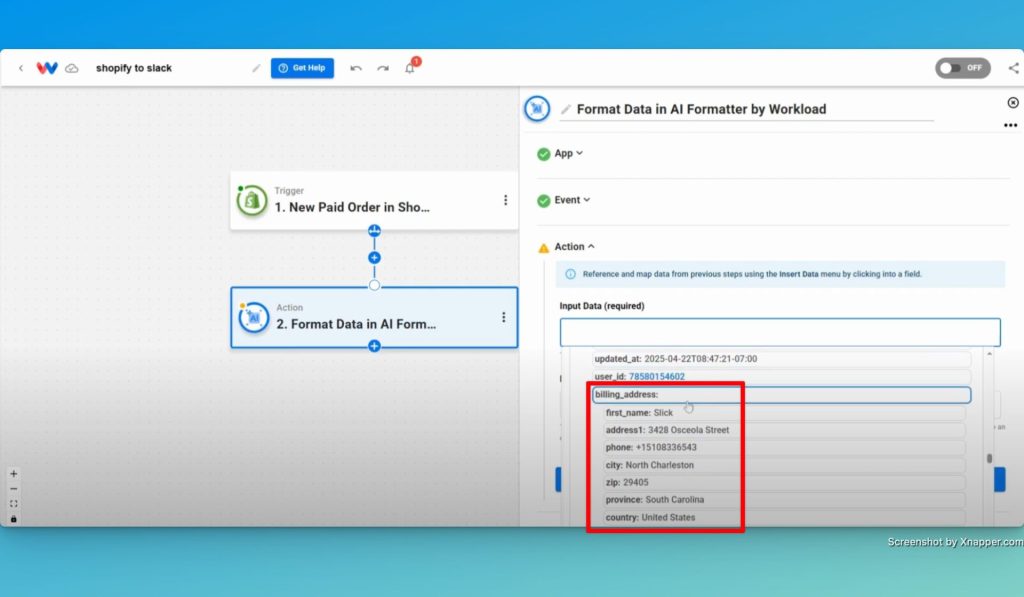
- Choose Input Data: Click the box under “Input Data” and pick the array that contains the data you want to use. (ex: billing_address for the customer details)
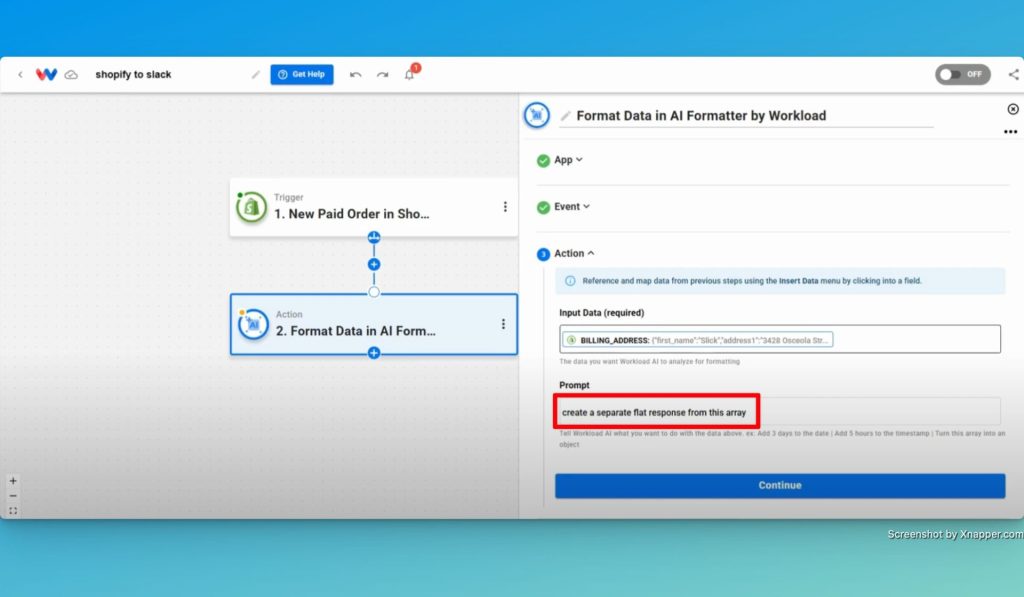
- Prompt the AI Formatter: In the prompt field, write an instruction telling the AI formatter how to format the data (ex: Create a separate flat response from this array)
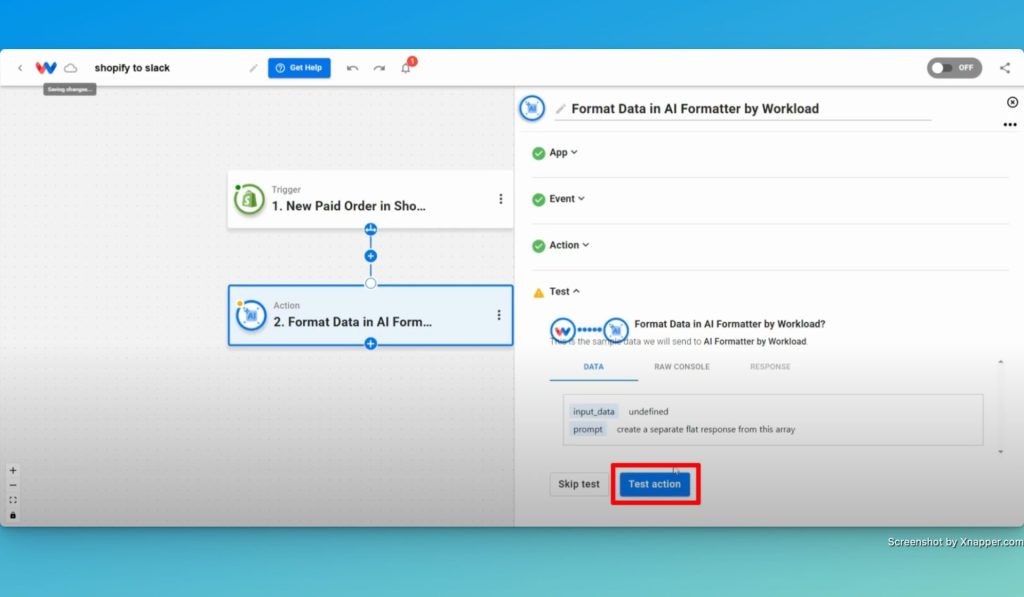
- Test the Action: Click Test Action to confirm the billing address fields return as a flat list.
- Add Additional Formatting Steps (if needed): If you need use to data in more than one array, add additional steps to format that data as well.
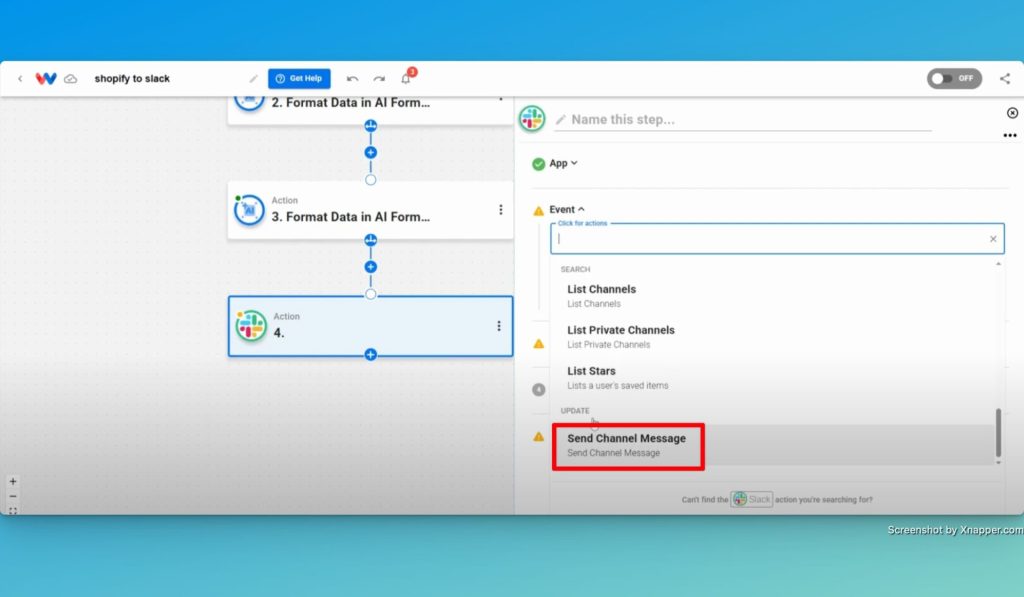
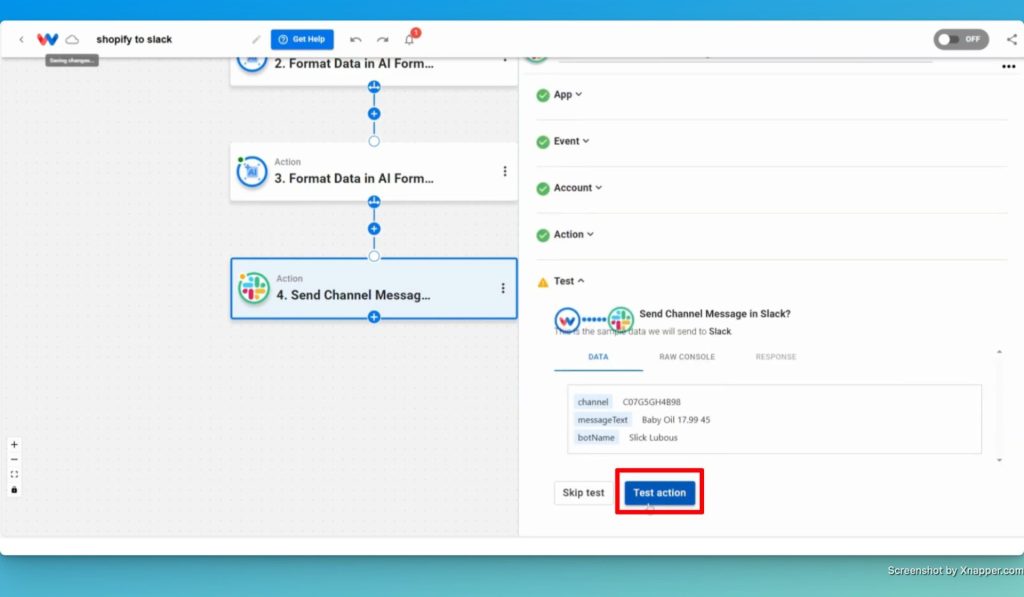
Step 3: Send Slack Channel Message (Slack) #
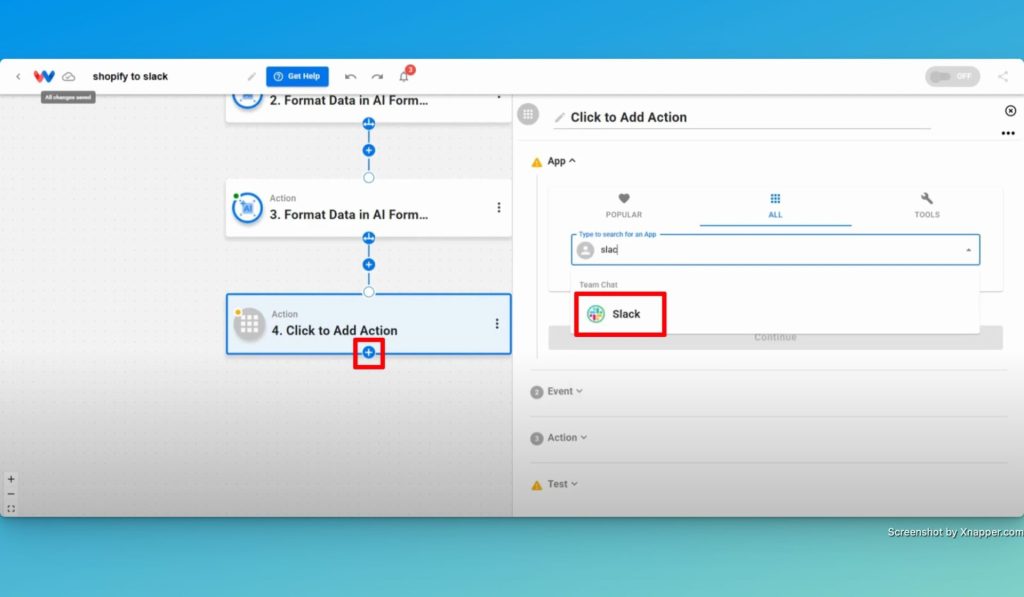
- Add an Action: Click + to add an action and then choose Slack as the app.
- Select the Event: Choose Send Channel Message as the action event
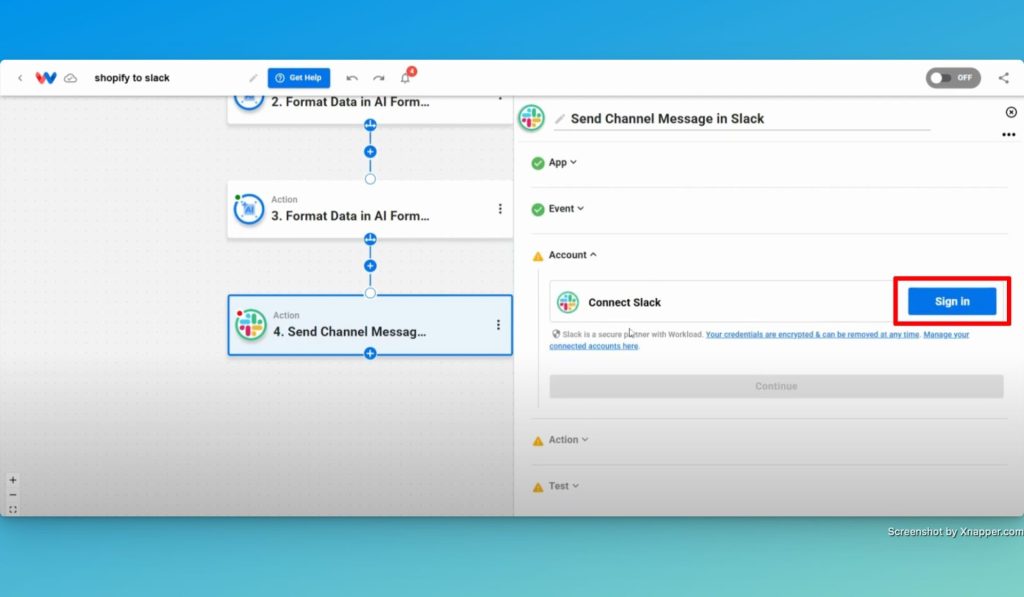
- Connect Your Slack Workspace: Click Sign in to securely connect your Slack account or select an existing connection.
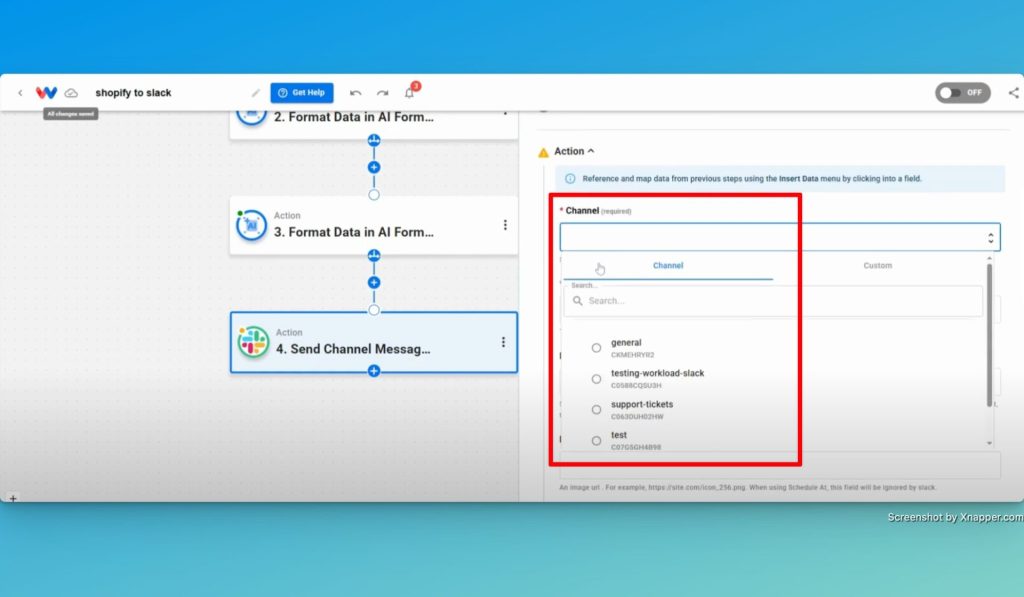
- Choose Channel: Select the Slack channel where you want notifications to appear.
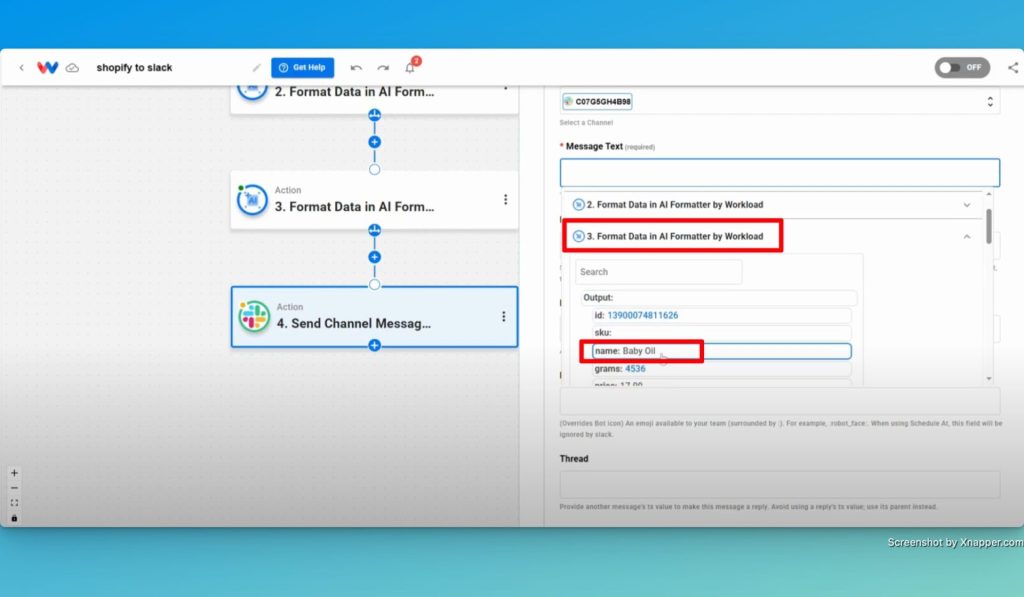
- Customize Message Text: Create a template of the message you want to send using the flattened fields from Steps 2 and 3. (For example:
- Test the Action: Click Test Action to ensure the message posts correctly in Slack.
Step 4: Activate Your Workflow #
- Check Each Step: Verify every node in the workflow editor shows a green indicator.
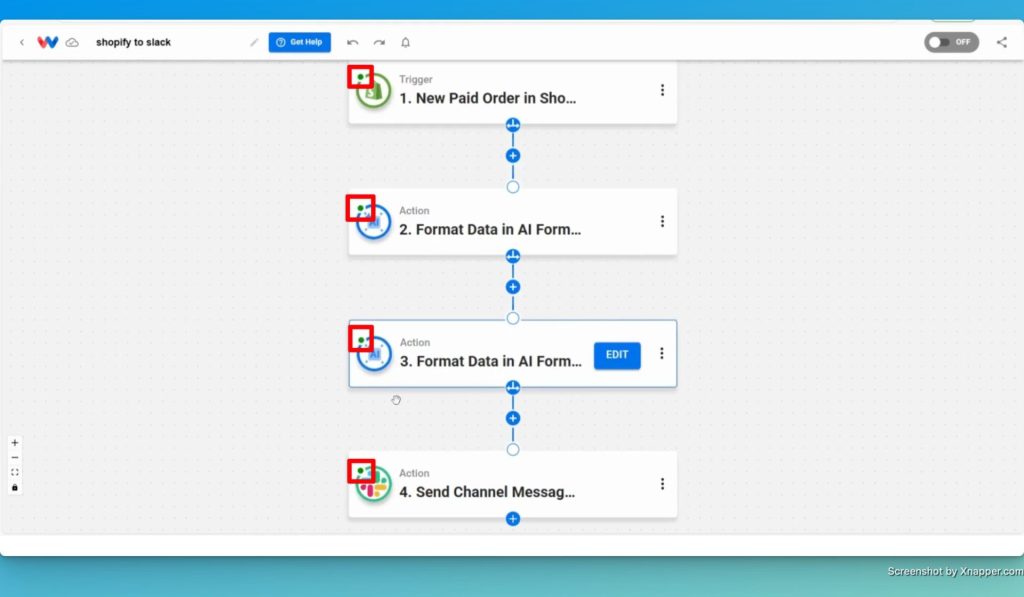
- Activate Workflow: Toggle the workflow On.

Finishing Up #
You just built a Shopify Order to Slack Message workflow that keeps your team instantly informed whenever a new paid order comes in. With this setup, you’ll never miss a sale—your team stays in the loop, ready to take action fast. It’s a simple, no-code way to streamline communication and stay organized as your orders roll in.
Want to automate even more tasks? Use Workload templates to help you build your own workflows. For additional help, visit Workload University or our Help Center. With Workload, automation doesn’t need to be complicated—it just needs to work.
Automate your work—simplify your day!


