Introduction #
In this guide to Odoo Contact Creation, you’ll discover how to automate your contact creation process using Forms by Workload. We explain each step clearly so you can streamline your workflow quickly.
For a video of this step-by-step blog post check it out on our Workload YouTube channel. If you need additional tutorials, check out our Workload University page.
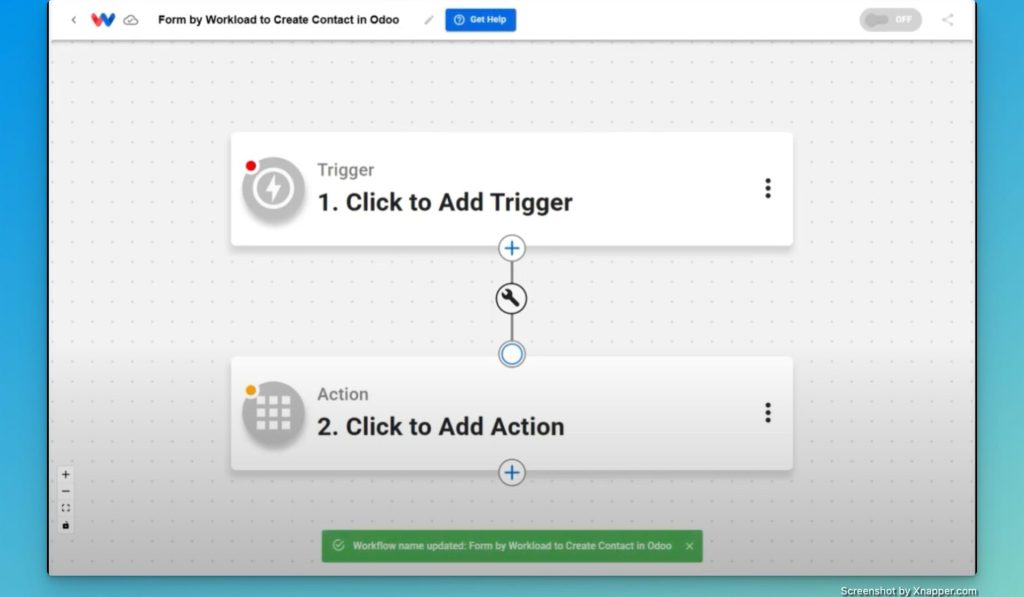
Step 1: Create a New Workflow in Workload #
- Access Your Dashboard: Log into your Workload dashboard.
- Create a New Workflow: Click the Create Workflow button in the upper left corner. This opens the workflow editor where you begin your Odoo ERP Contact Creation process.
- Name Your Workflow: Enter a clear title such as “Creating a Form by Workload to Create a Contact in Odoo“.
Learn more about setting up workflows on the Workload help site.
Step 2: Set Up Your Form #
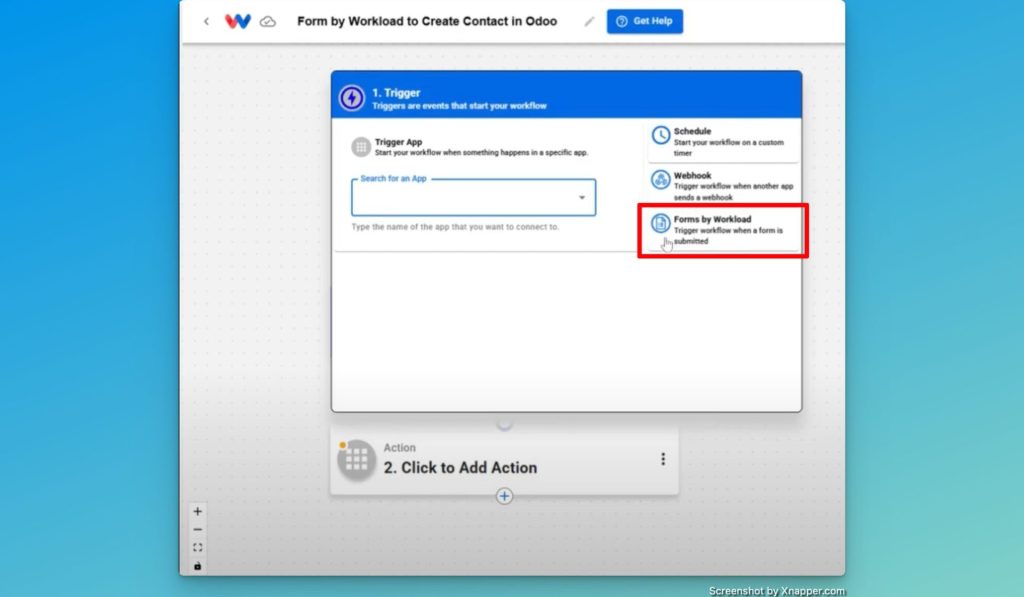
- Select the Trigger: Click the Click to Add Trigger button in your editor. On the right-hand side, choose Forms by Workload.
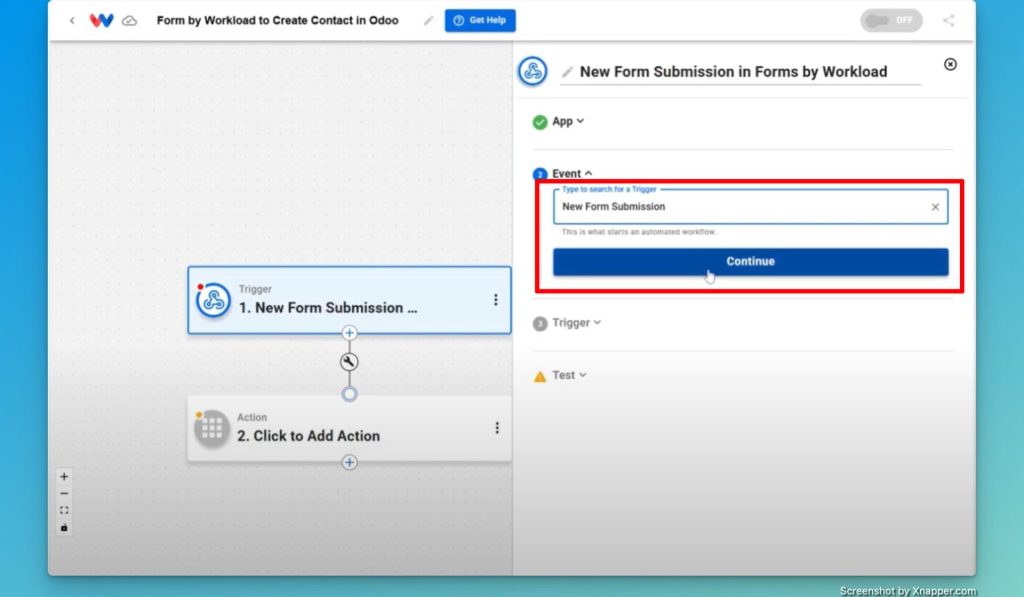
- Choose the Event: Select New Form Submission and hit Continue.
- Design Your Form:
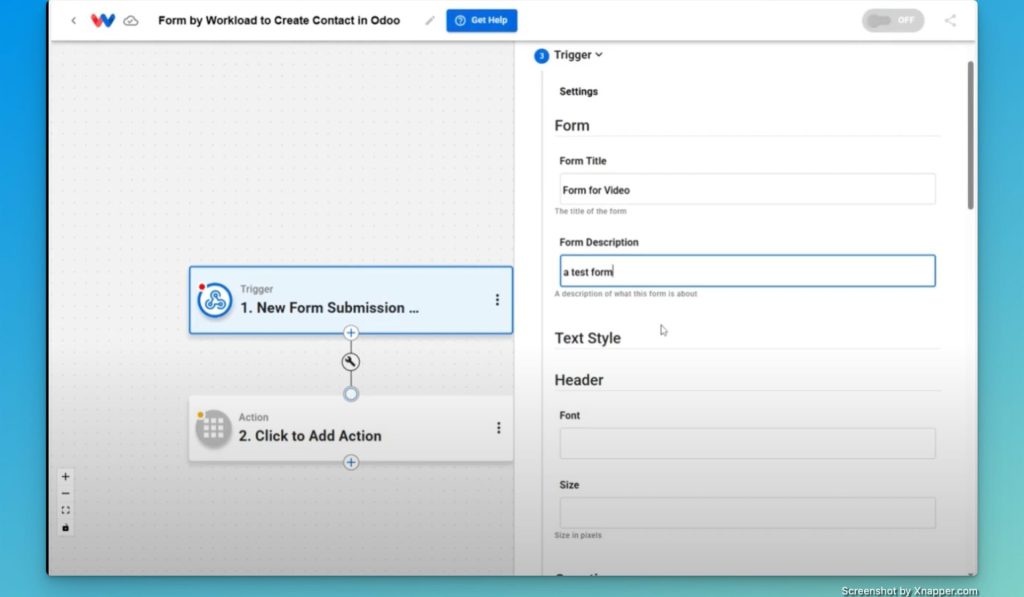
- Title & Description: Set your form title (e.g., “Form for Video”) and add a description (e.g., “A test form”).
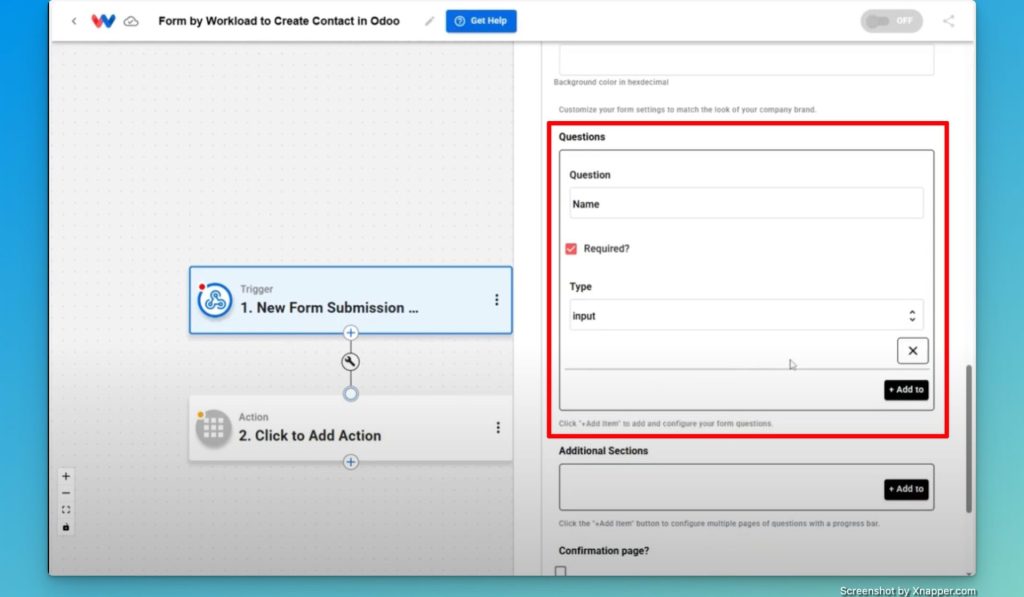
- Add Questions:
- First Question: For this example, add a question labeled Name and select if this question is Required and the Type of allowed response.
- Add Additional Questions: To add additional questions, click the “+ Add to” button and repeat the process. You can add as many questions as you like to gather all the data you need.
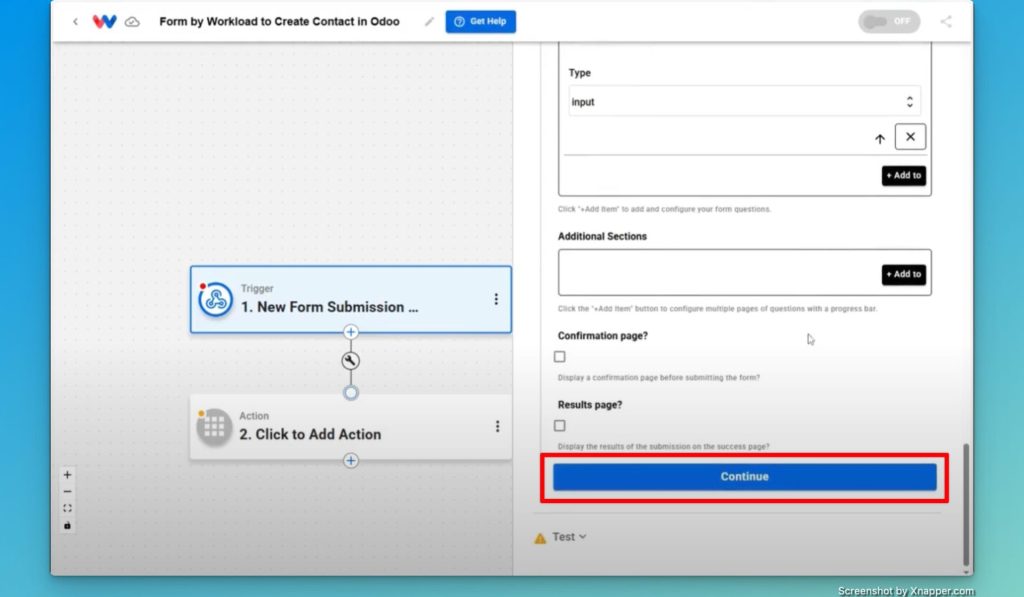
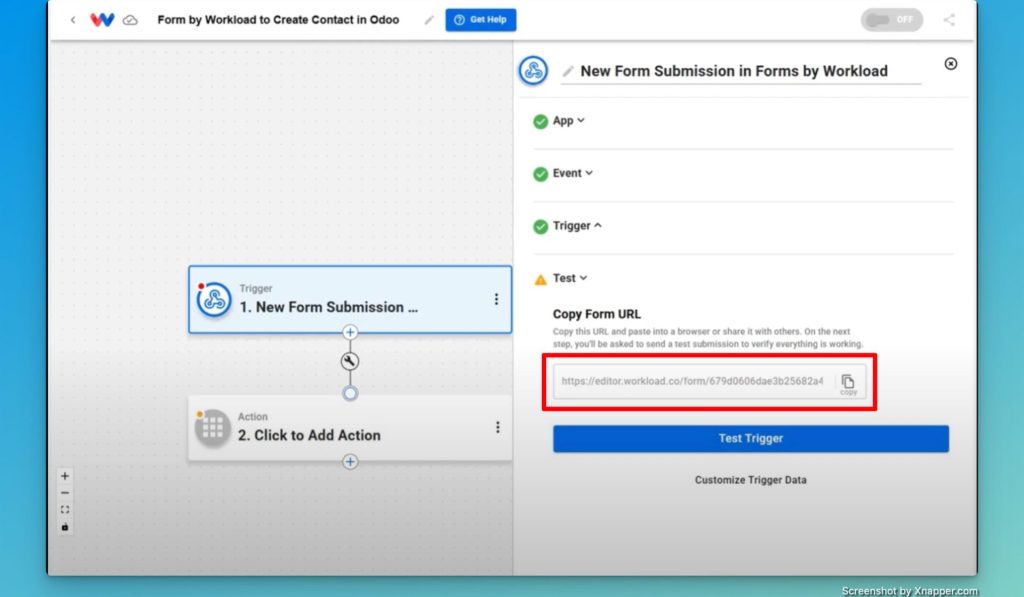
- Generate the Form URL: When you have finished building your form, click Continue to receive a unique URL for your form.
- Copy the URL: You can share this URL with your clients so they can access the form.
Step 3: Test the Form Trigger #
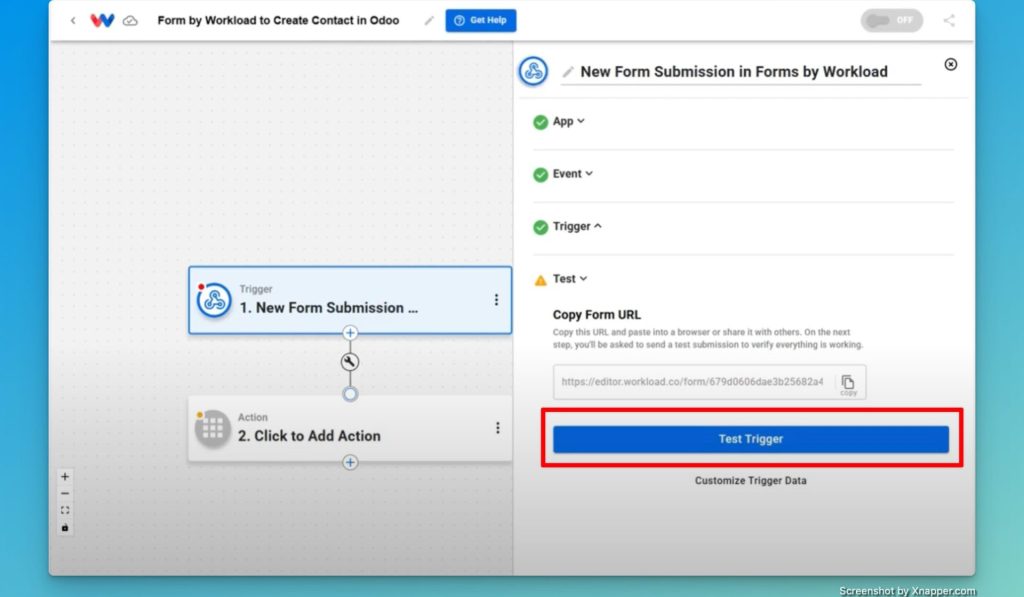
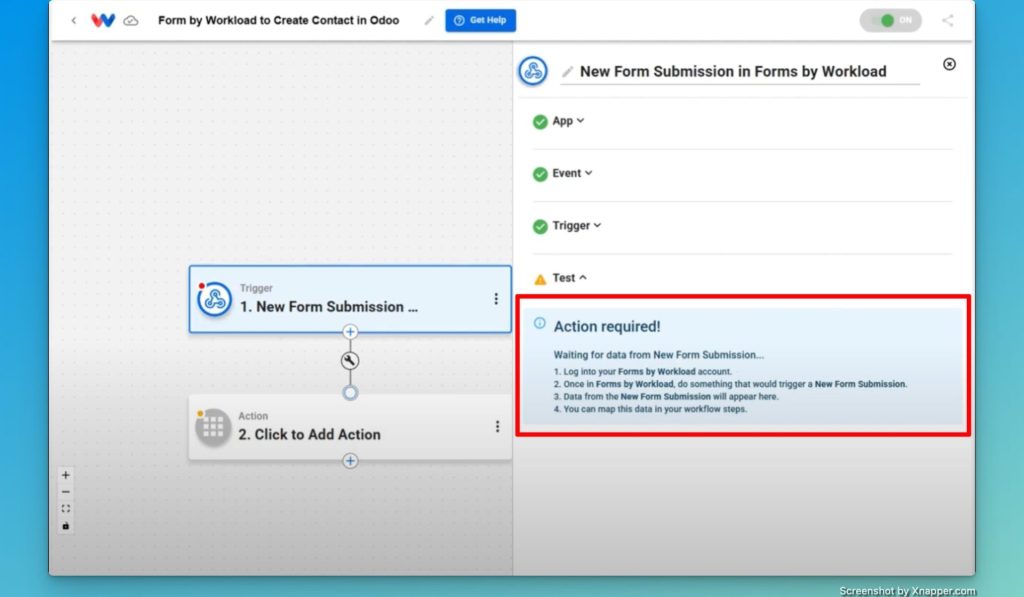
- Test Trigger Message: Back in the workflow editor, click Test Trigger. You will see an “action required” message because no form data has been submitted yet.
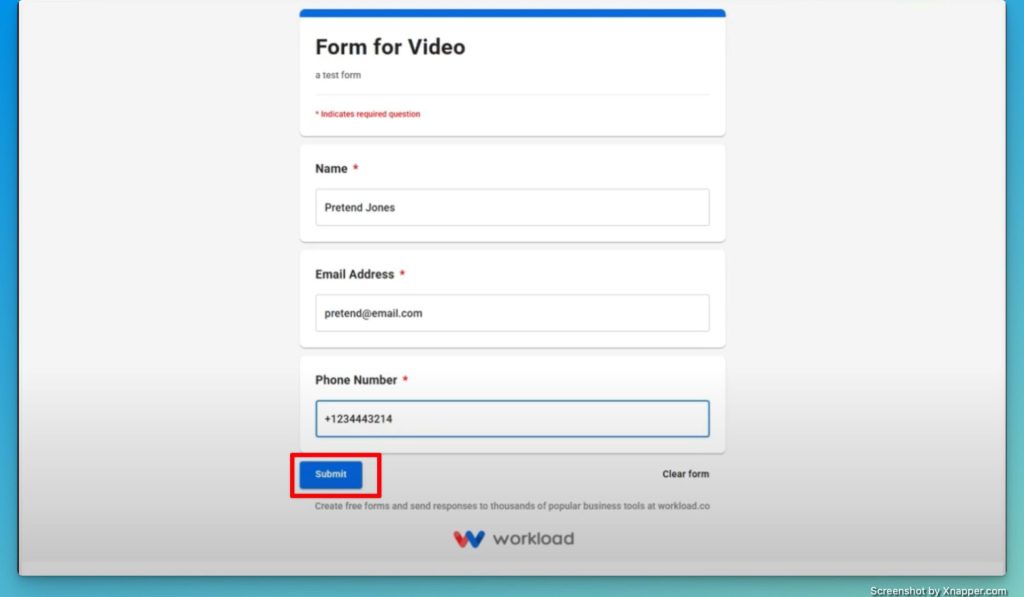
- Submit a Test Entry: Open a new tab and paste the unique URL. Fill out the form with sample data and click “Submit“.
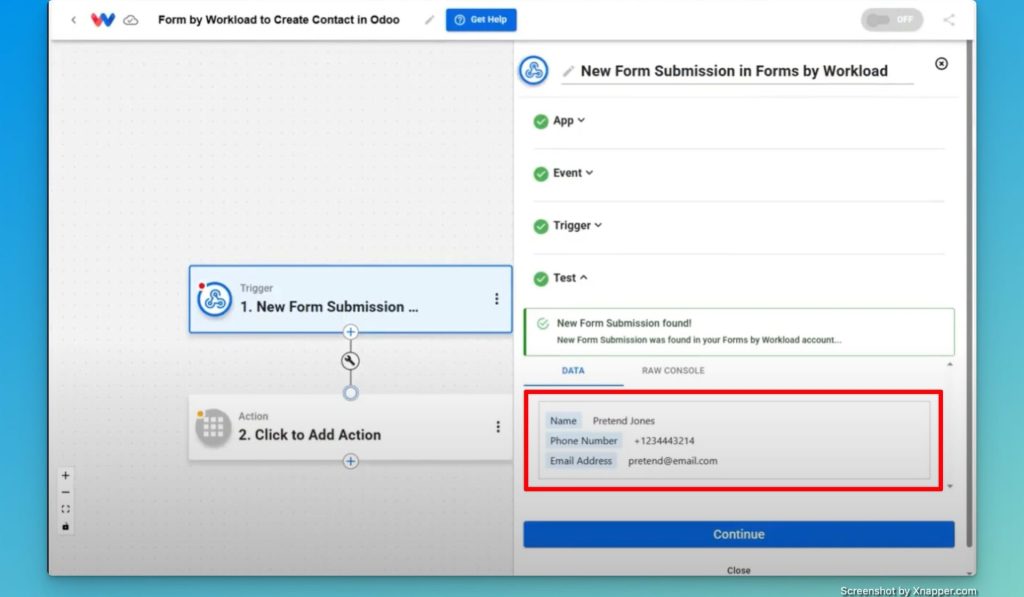
- Verify Data in Workflow: Return to your workflow editor. The form inputs should now appear, confirming that the trigger has detected the submission.
Step 4: Configure the Odoo ERP Contact Creation Action #
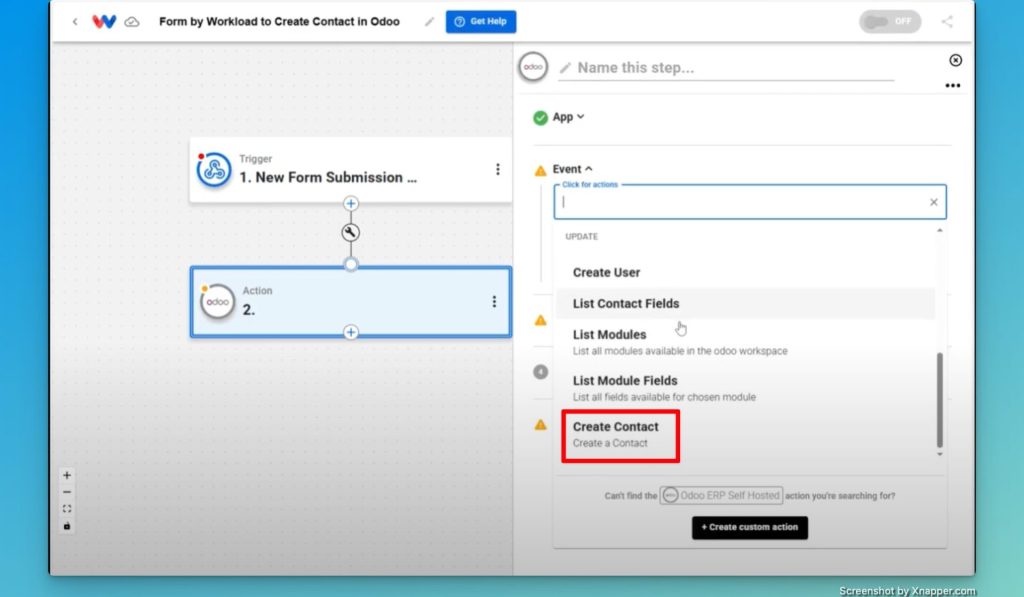
- Add an Action: Click the action button in your workflow editor.
- Select Odoo ERP: Search for and select Odoo ERP Self-Hosted.
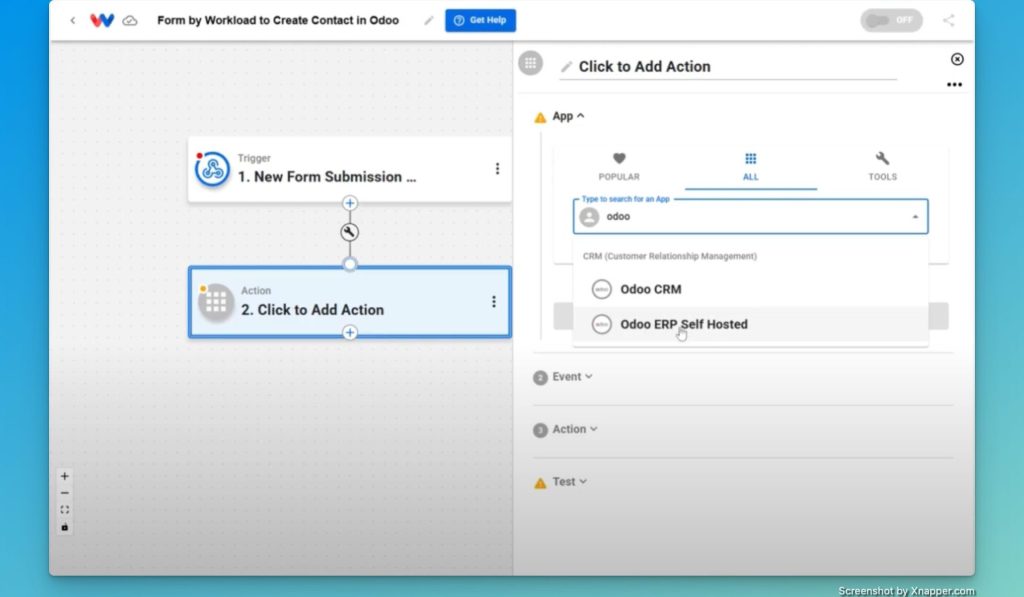
- Choose the Event: Select Create Contact.
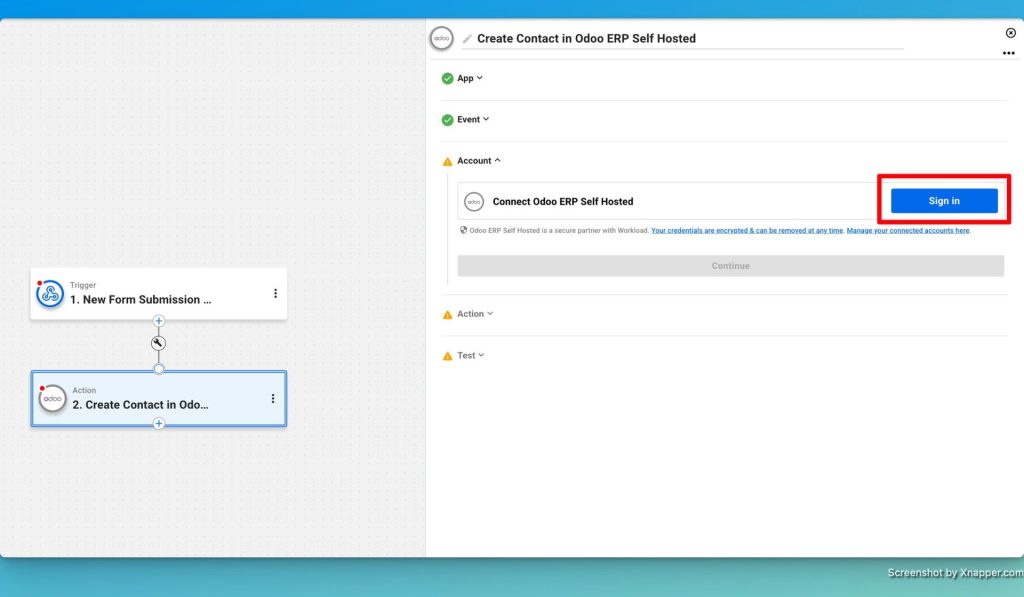
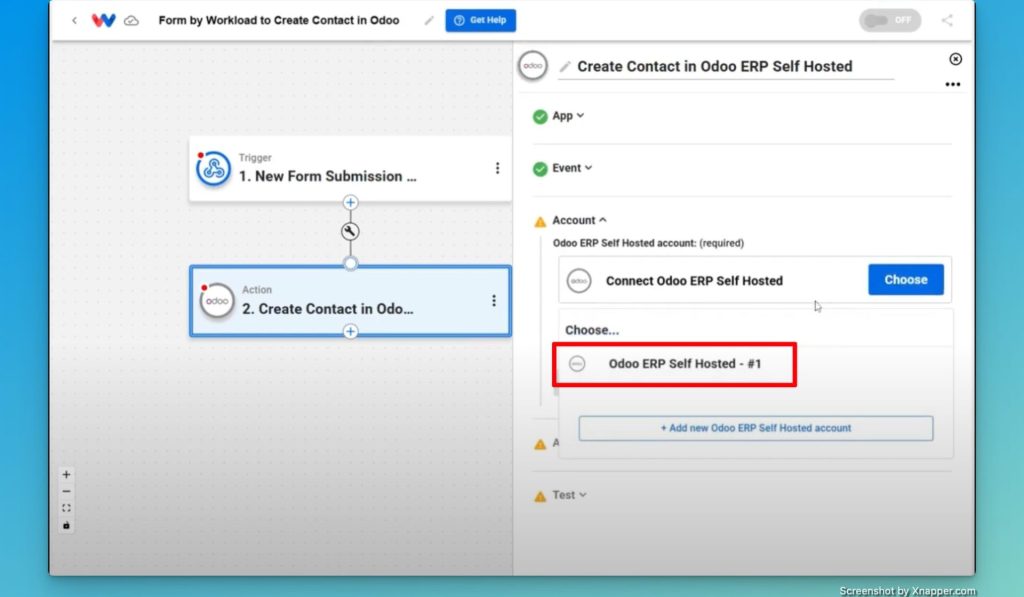
- Connect your Odoo ERP account: If this is your first time connecting your Odoo ERP Self Hosted account, you will need to click the Sign In button. (Note: If you have previously connected your Odoo ERP Self Hosted account, you can simply choose the saved connection you want to use.
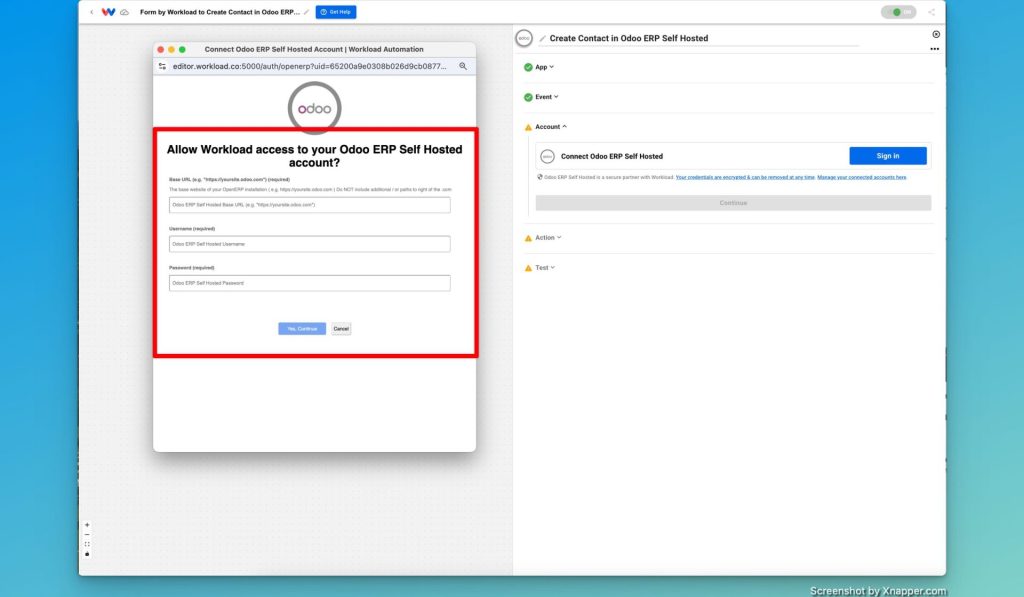
- Enter Odoo ERP account credentials: click Yes, Continue.
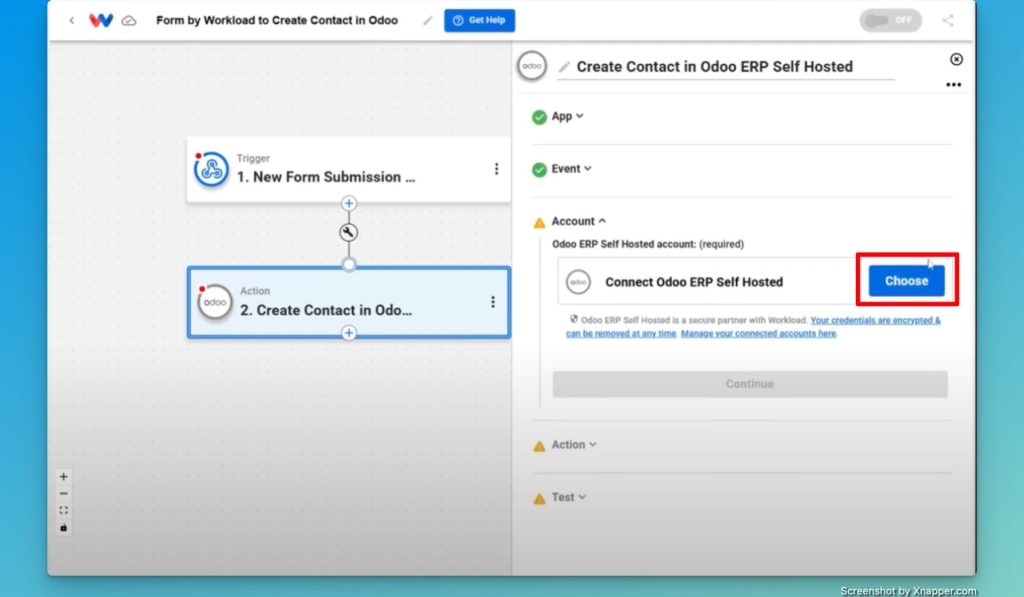
- Choose your account: Select the account connection you want to use by clicking the “Choose” button and then selecting your account.
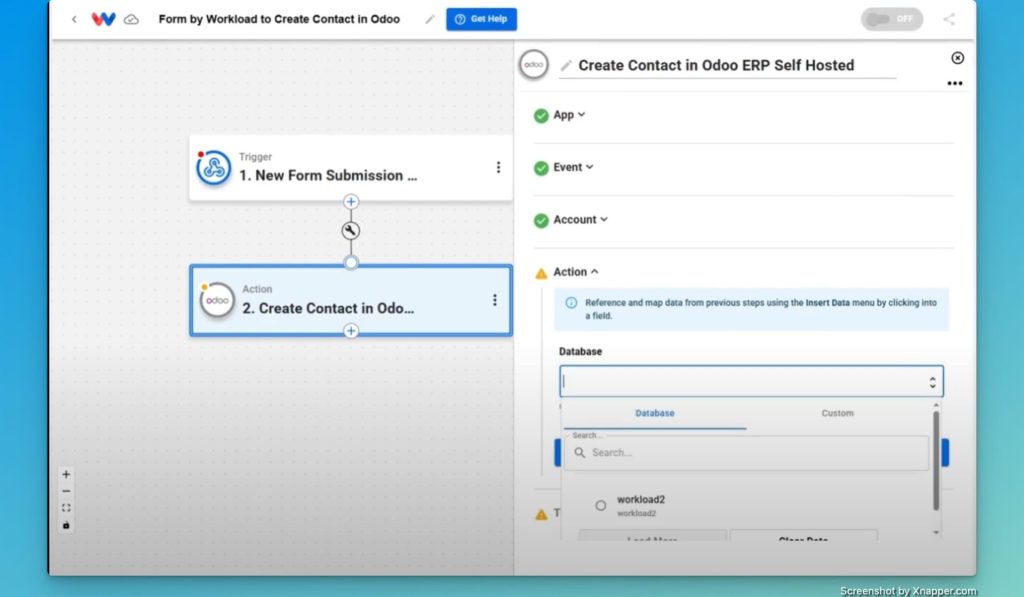
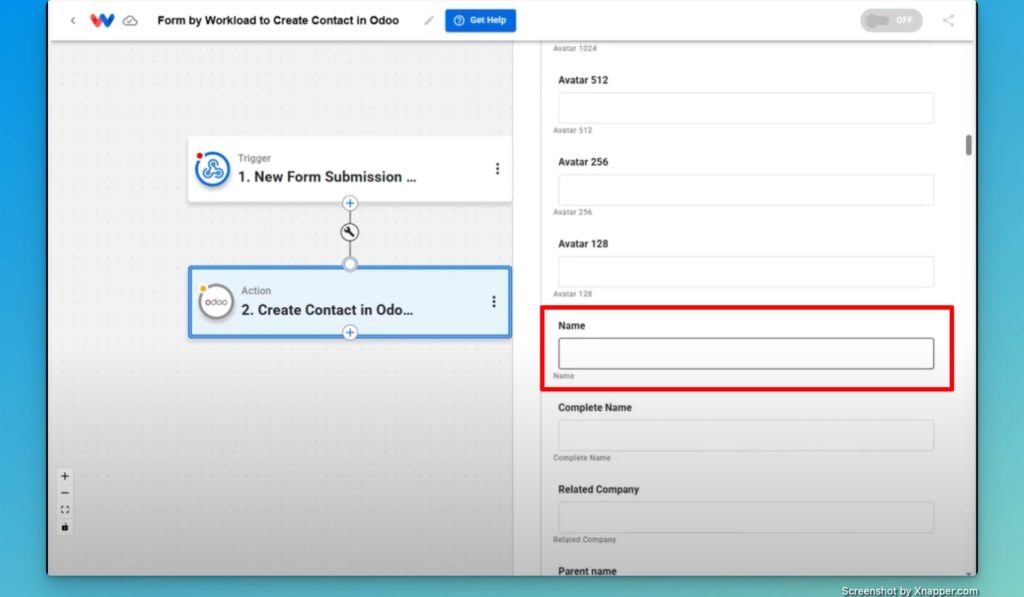
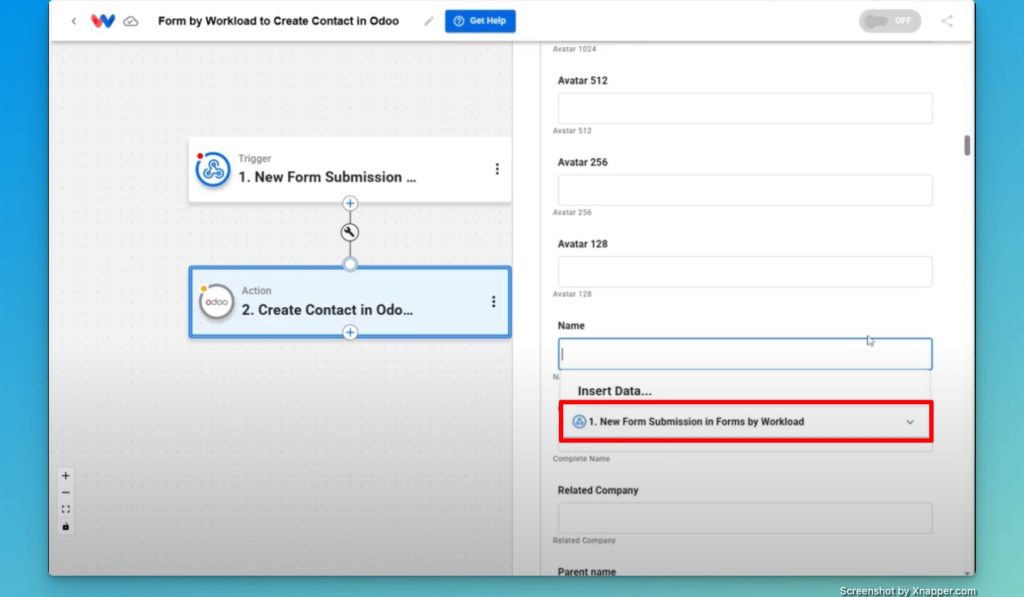
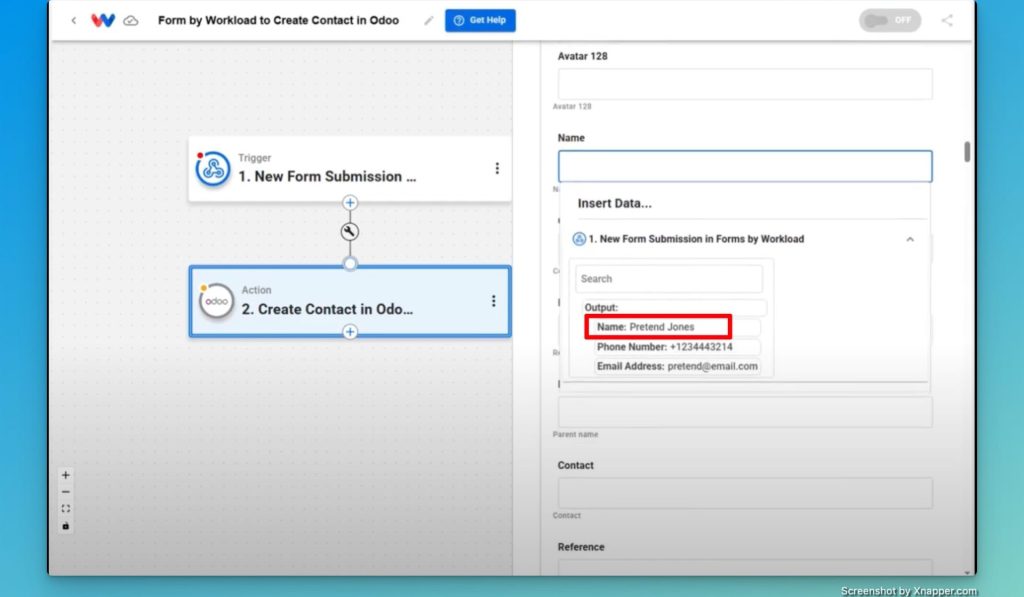
- Map the Data Fields:
- Select the Database: Choose the database where the new contact will be stored.
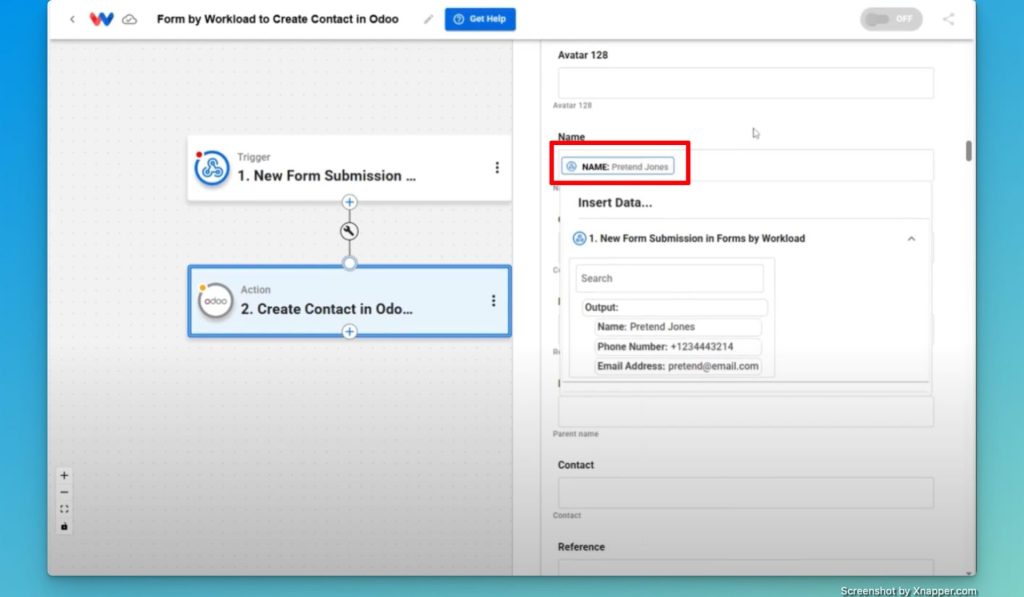
- Map Form Inputs:
- Click in the Name field and select the corresponding value from your form submission (e.g., “Pretend Jones”).
- Repeat this for Email Address and Phone Number.
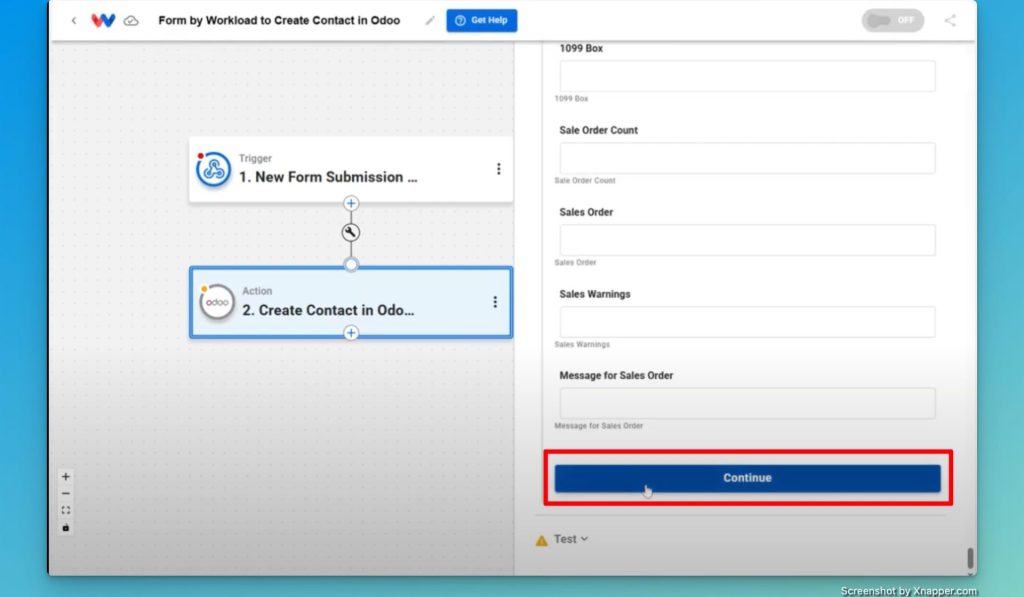
- Review and Continue: Scroll to the bottom and click Continue. You will see the raw data that will be sent to Odoo ERP to create the contact.
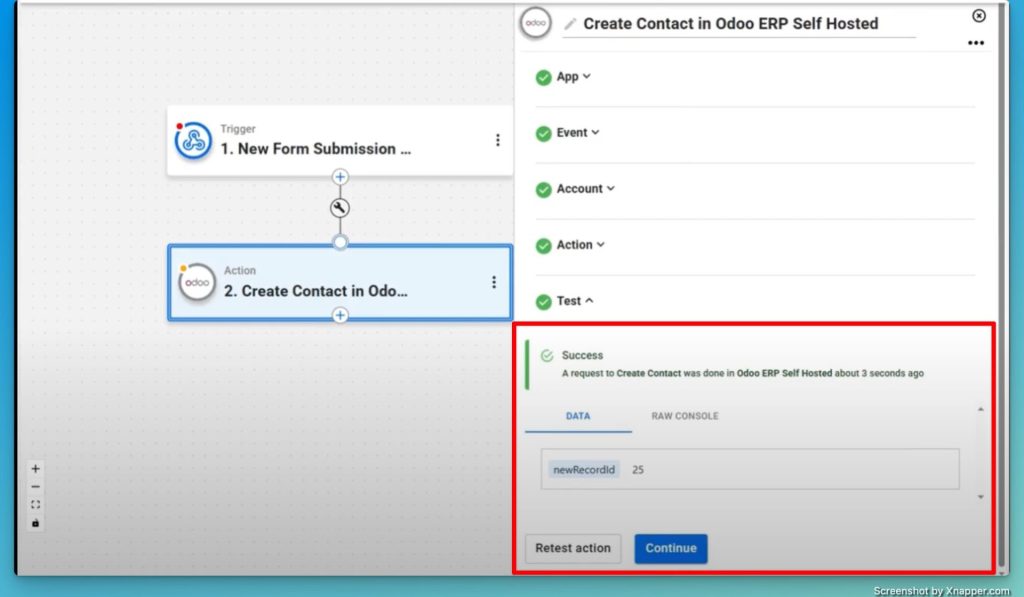
Step 5: Test and Activate Your Odoo ERP Contact Creation Workflow #
- Test the Action: Click Test Action. The system should confirm the creation of a new record (e.g., record ID 25).
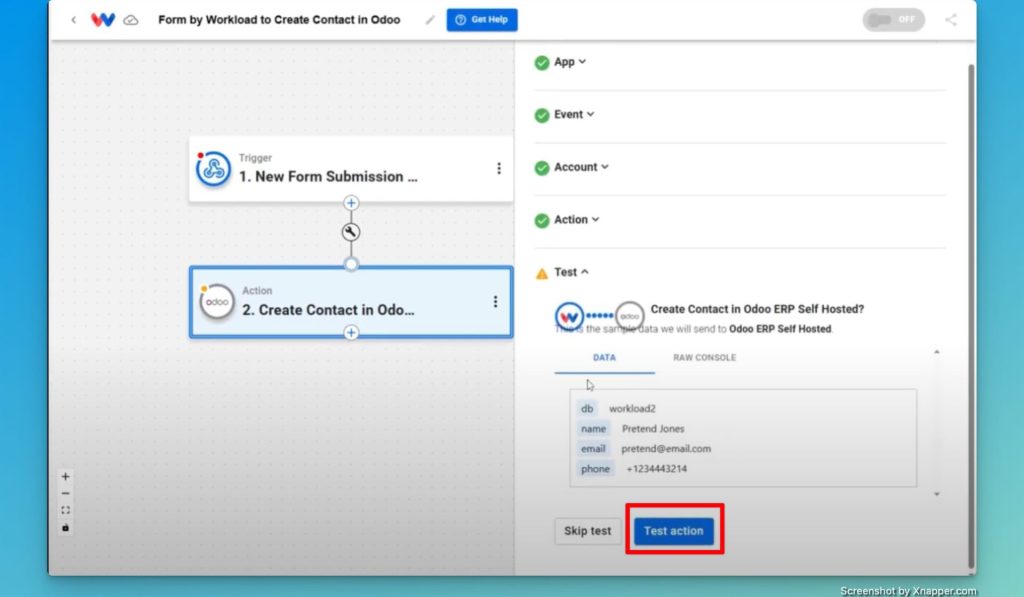
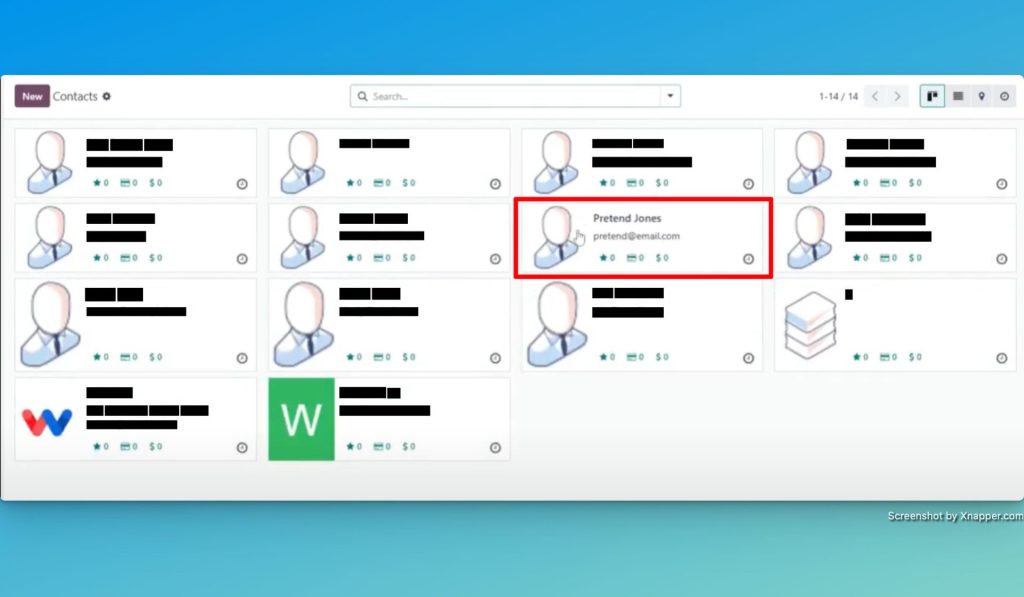
- Check in Odoo ERP: Log into your Odoo ERP account, navigate to your contacts, and verify that the new contact (e.g., “Pretend Jones”) appears.
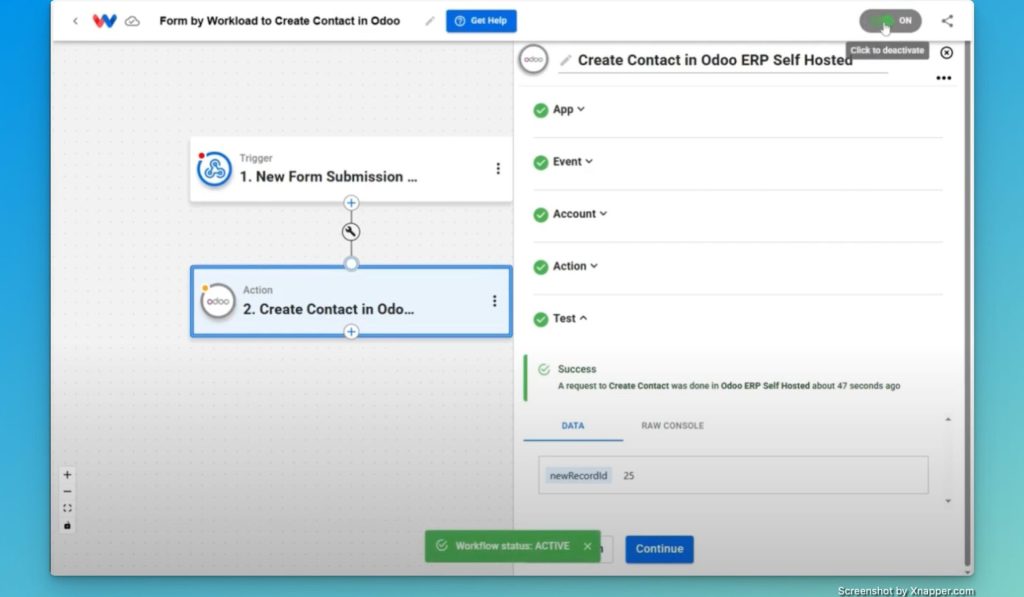
- Navigate back to the workflow editor: Click Continue.
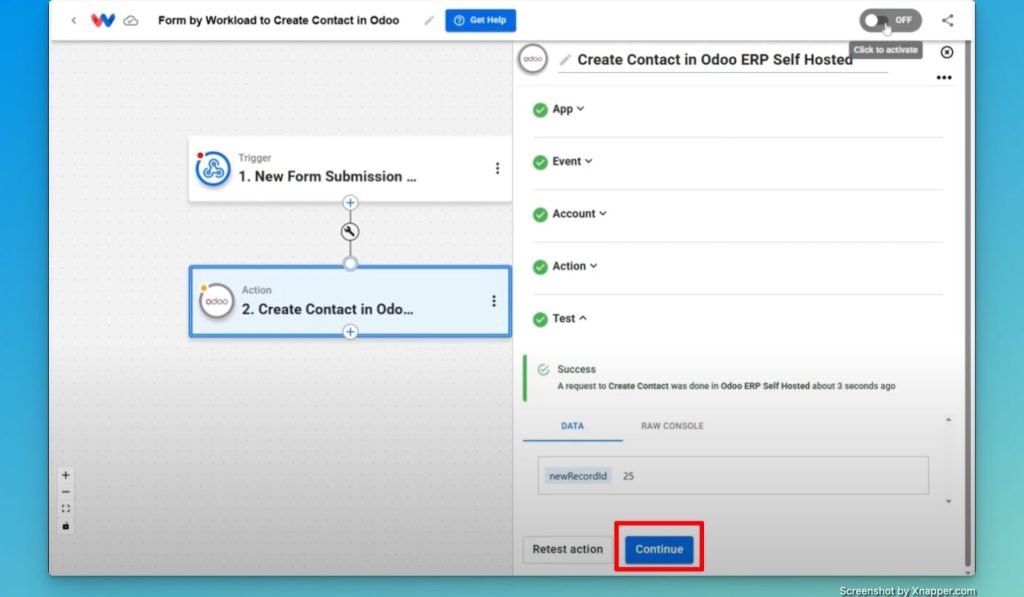
- Activate the workflow: Now, every time someone submits the form, a new contact will automatically be created in Odoo ERP.
To test the workflow, submit the form again using a different set of data.
For example:
- Name: Charlie McTest
- Email: charlie.mctest@email.com
- Phone: 555-444-3212
After submitting the form, go to your Odoo ERP contacts list and verify that the new entry has been added.
Conclusion #
You just created a new contact in Odoo ERP using Workload Forms! This integration saves you time by instantly updating your contacts with every form submission.
Happy automating!


