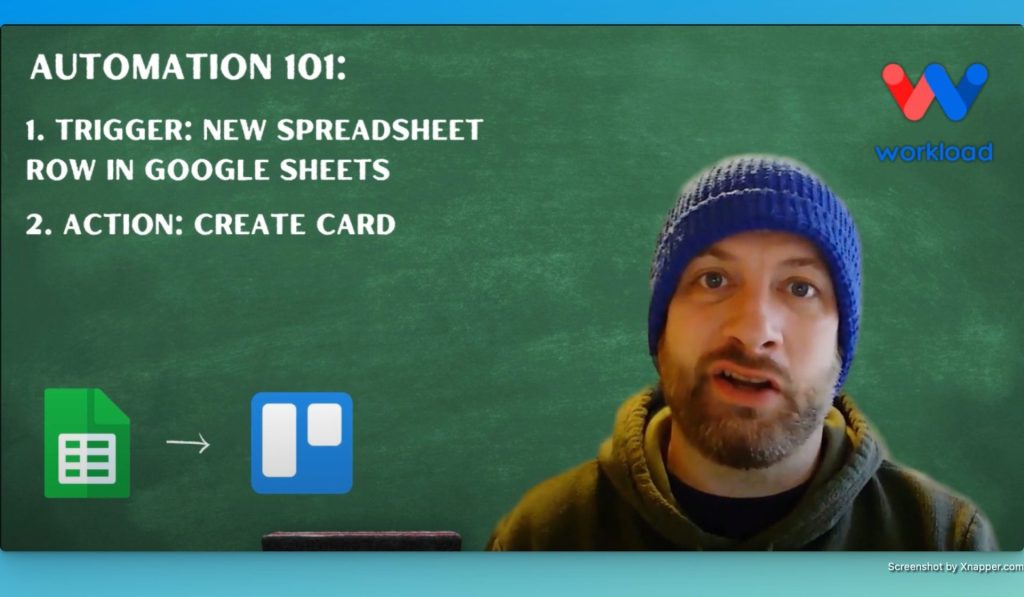
Keeping track of tasks in Trello can become overwhelming, but automation with Workload makes it easy. With our Google Sheets Trello Automation workflow, every new row in your Google Sheets instantly becomes a Trello card. Workload handles the process automatically, ensuring that all key details are captured. As a result, you stay organized and save valuable time.
If you need extra help, you can watch our step-by-step video on the Workload YouTube channel. Additionally, you can visit Workload University or our Workload Help page for more automation tips.
Overview: Google Sheets Trello Automation #
In this workflow, you will:
- Trigger on New Google Sheets Rows: First, capture every new row automatically.
- Extract Key Row Details: Next, pull relevant information such as the row name, description, and date.
- Create a Trello Card: Finally, add a card to your selected Trello board with these details.
Before you begin, ensure you have:
- A connected Google Sheets account.
- A Trello account with an active board.
- A Workload account to create and manage your workflow.
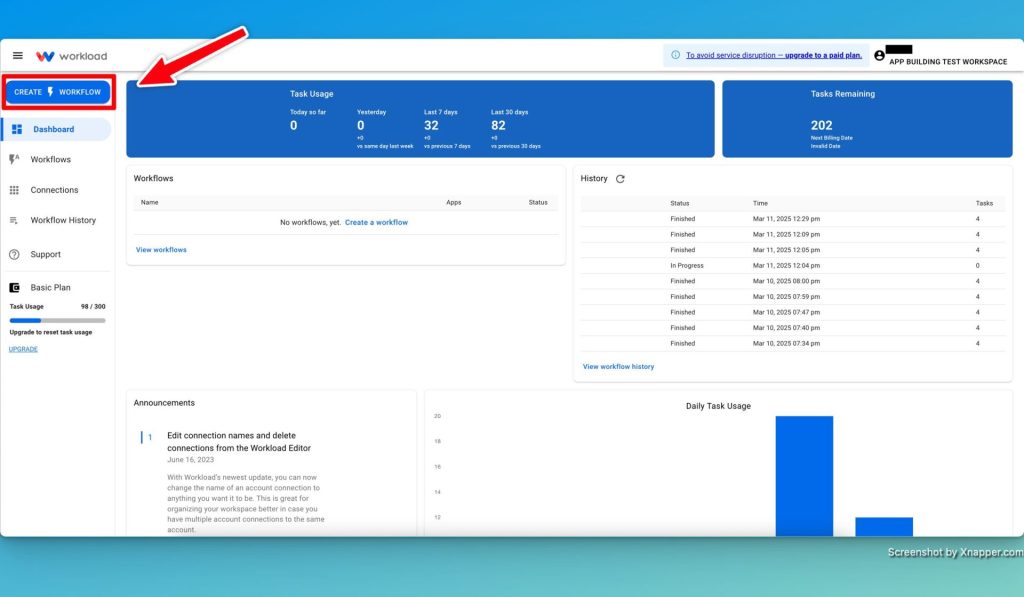
Step 1: Setting Up Your Workflow in Workload #
- Launch the Workload Editor: First, open the Workload editor and create a new workflow.
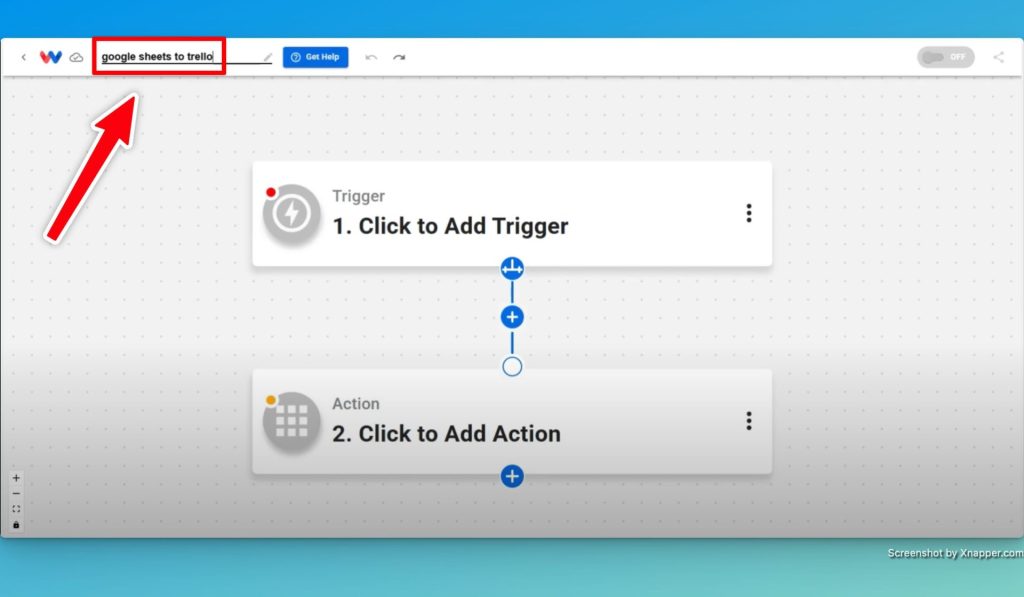
- Title Your Workflow: Then, name it something descriptive like “Google Sheets to Trello” so that you can easily identify it later.
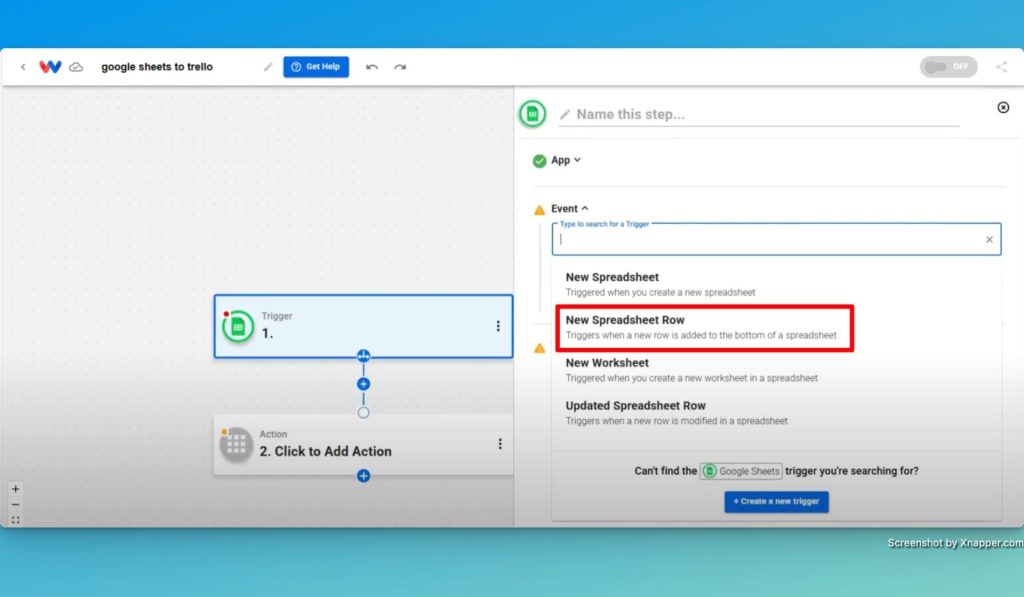
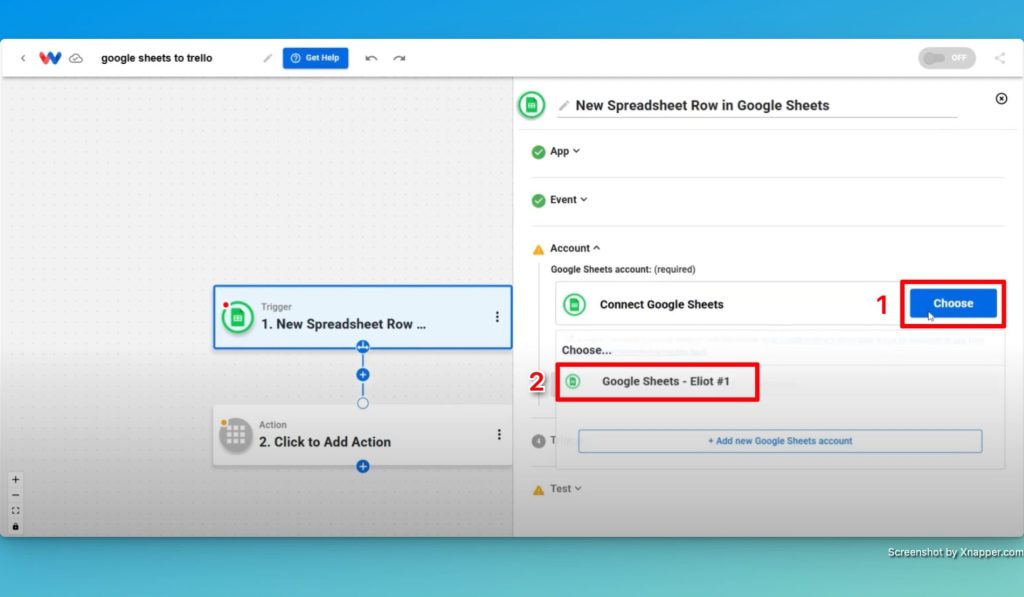
- Select the Trigger App: Next, choose Google Sheets as your trigger app. Set the event to “New Spreadsheet Row” so that every new entry starts the workflow.
- Connect Your Account: Securely connect your Google Sheets account.
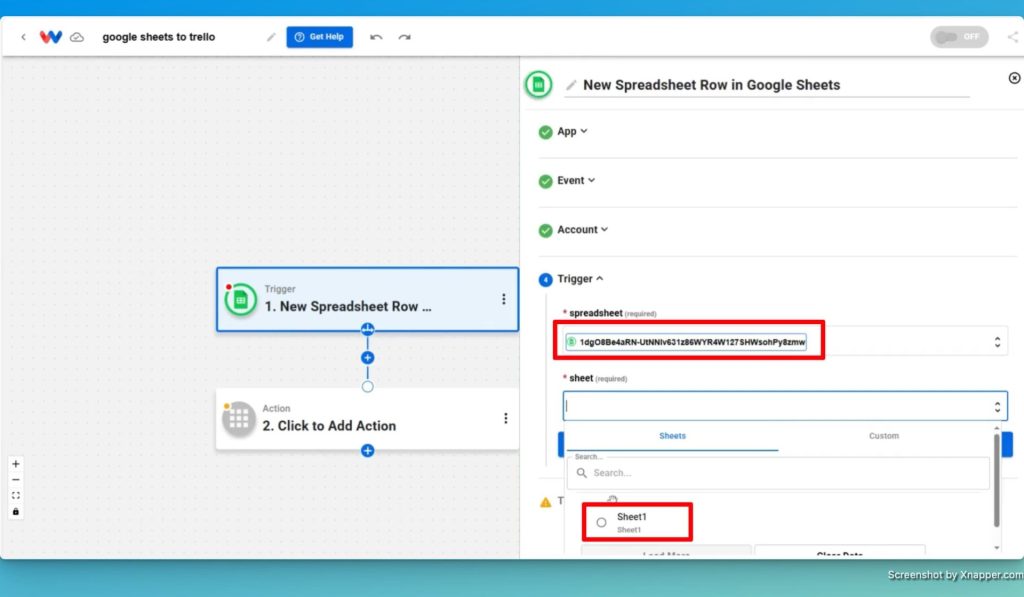
- Choose Your Spreadsheet: Select the specific Google Sheet and worksheet you want to monitor.
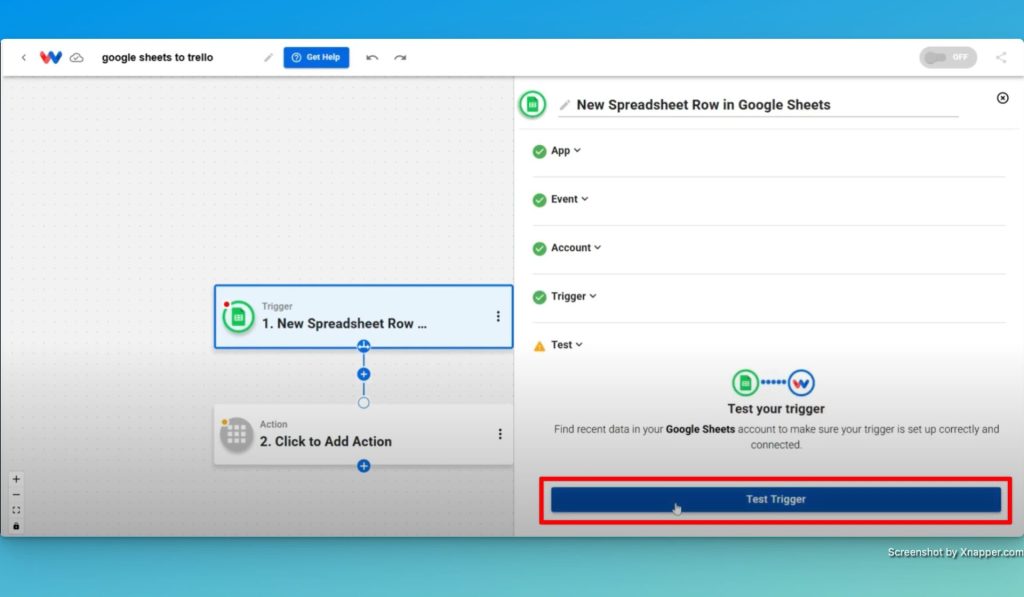
- Test the Trigger: Run a test to fetch sample rows and confirm the trigger works.
Step 2: Configuring the Google Sheets Trigger #
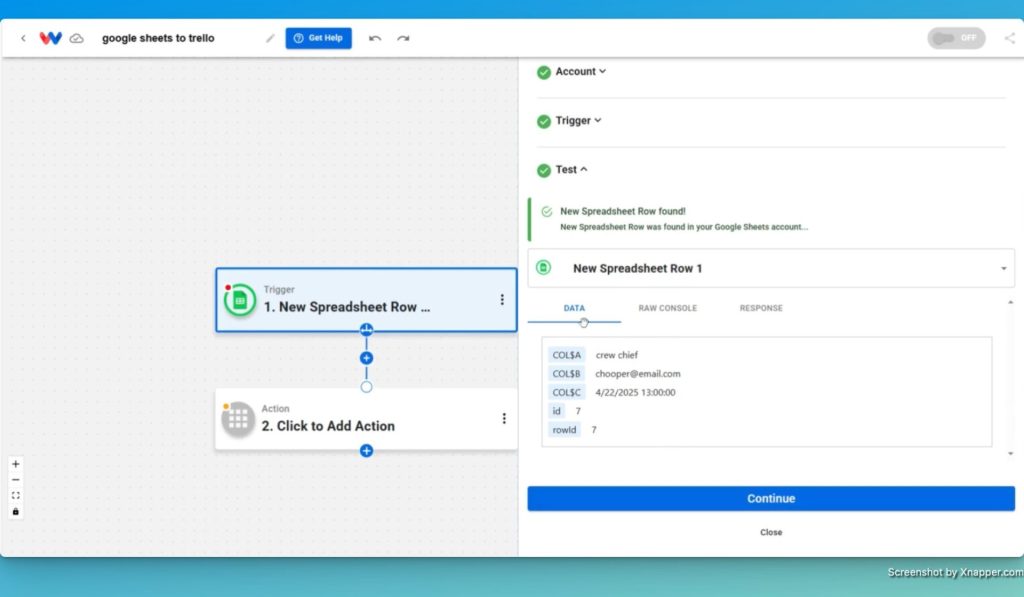
- Review the Data: Check the retrieved details, including:
- Row Name: Captured from the spreadsheet’s column.
- Description: Additional information from another column.
- Date: Used for scheduling in Trello.
- Extract the Information: Decide which fields you want to use in your Trello card.
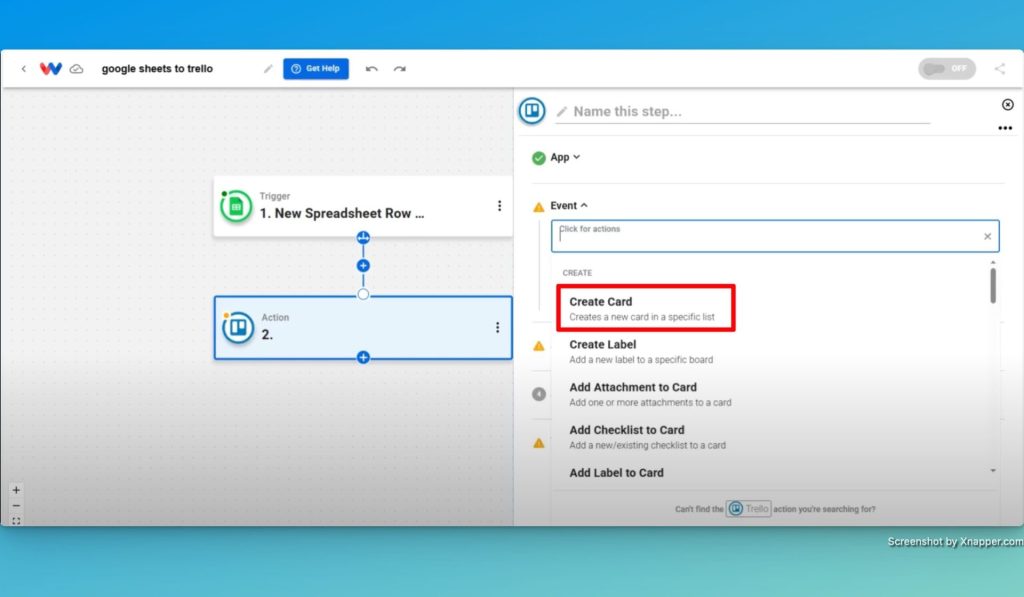
Step 3: Creating a Trello Card Action #
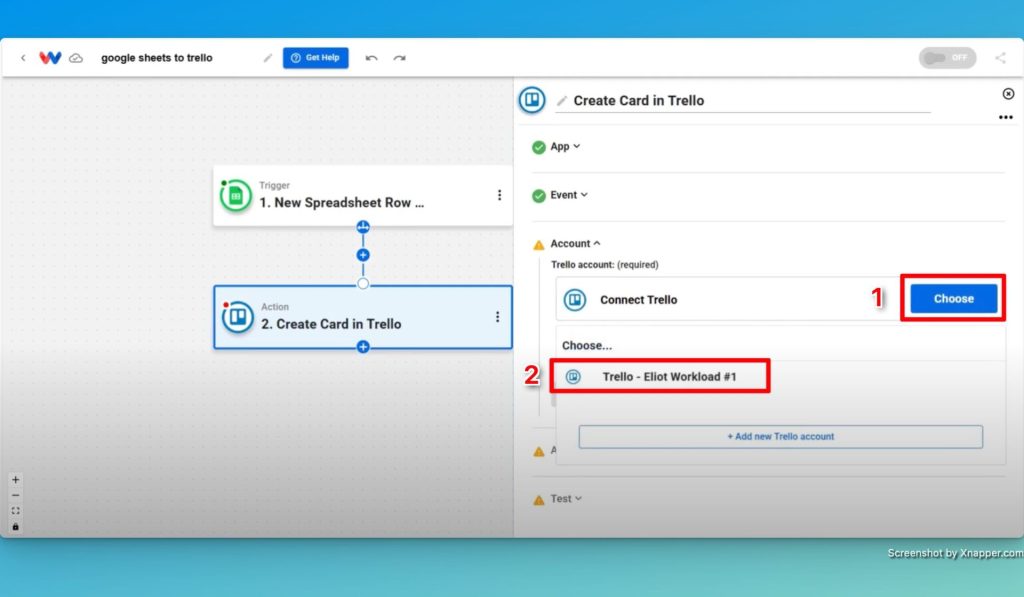
- Add a Trello Action: Create a new step by selecting the “Create Card” action.
- Connect Your Trello Account: Log in to Trello if you haven’t already.
- Configure Card Settings:
- Select Your Board: Choose the Trello board for new cards.
- Pick a List: Select the specific list for new cards (e.g., “To-Do”).
- Set the Card Name: Use the Google Sheets row data to fill in the card title.
- Add a Description: Include relevant details from the spreadsheet.
- Assign a Label: Optionally, use a color label to categorize cards.
- Set a Start Date: Map the Google Sheets date field to Trello’s start date.

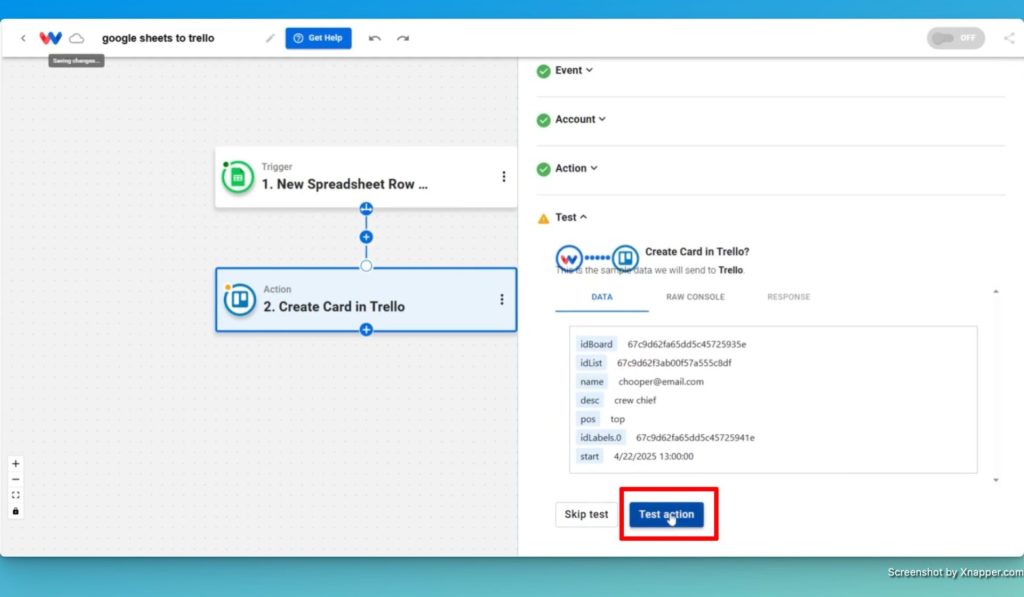
- Test the Action: Run a test to ensure Trello receives the correct information.
Conclusion: Google Sheets Trello Automation #
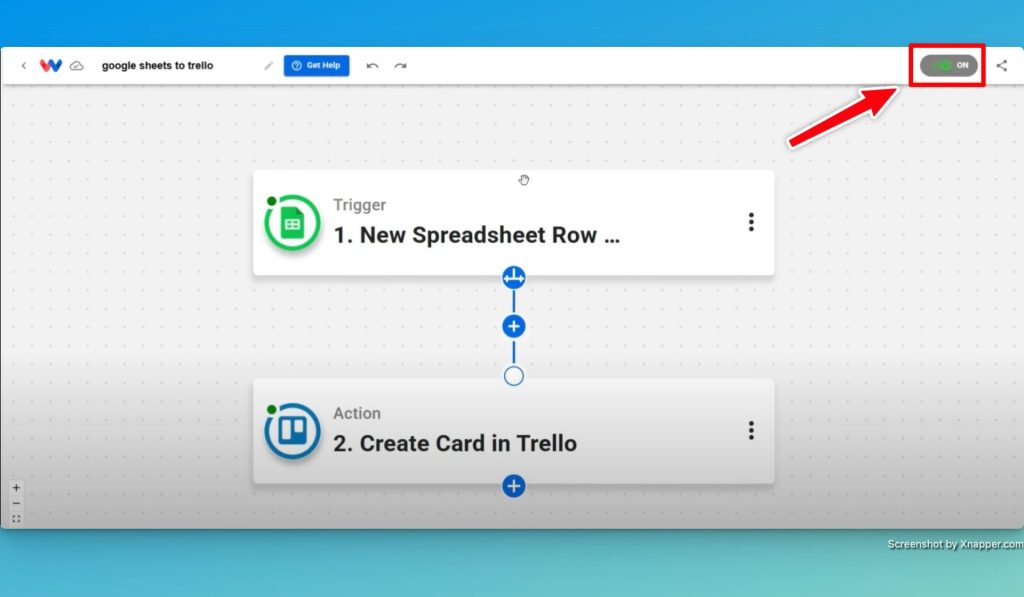
Once you complete these steps, activate your workflow to begin your Google Sheets Trello Automation. Now, every time you add a new row to your Google Sheet, Workload automatically creates a Trello card with all the necessary details. This automation not only saves time but also keeps your Trello board updated effortlessly.
By automating this process, you eliminate manual work and increase efficiency. Moreover, you ensure that your tasks flow seamlessly, allowing you to focus on more important priorities.
For more automation tips, visit Workload University or check our Workload Help page.
Happy automating!


