- Introduction
- Overview of Gmail to Google Sheets Automation
- Step 1: Create a New Workflow for Gmail to Google Sheets Automation
- Step 2: Set Up the Gmail Trigger for Email Automation
- Step 3: Configure the Google Sheets Action for Automation
- Step 4: Test and Activate Your Gmail to Google Sheets Automation Workflow
- Conclusion
Introduction #
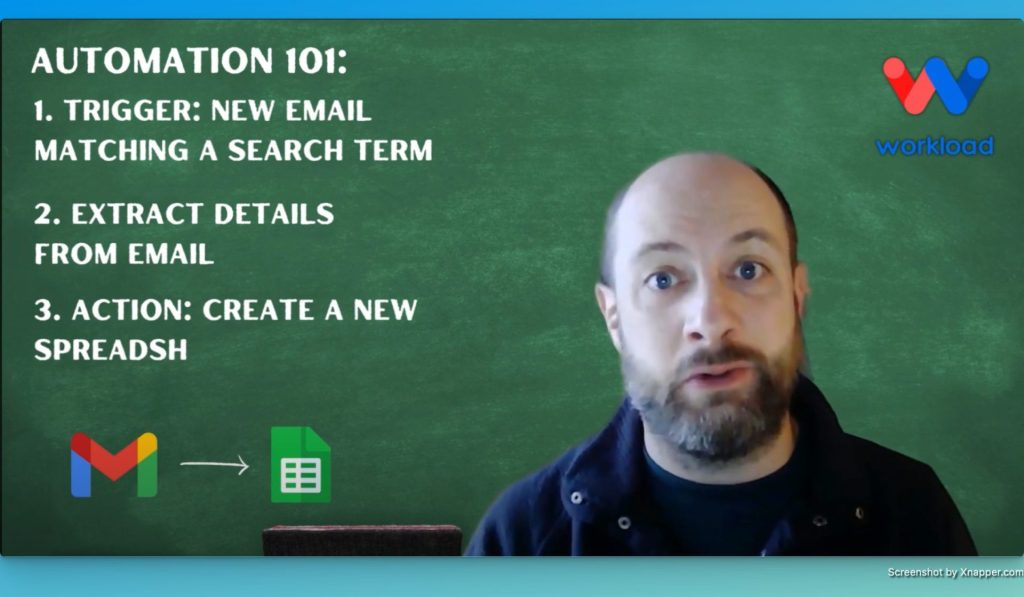
Gmail to Google Sheets automation is a powerful solution that streamlines your email processing. In this guide, we show you how to set up a workflow that extracts data from Gmail and updates your Google Sheets spreadsheet automatically.
For a video of this step-by-step blog post check it out on our Workload YouTube channel. If you need additional tutorials, check out our Workload University page or the Workload Help page.
Overview of Gmail to Google Sheets Automation #
In this workflow, you will learn how to:
- Trigger your automation when a new email matching specific criteria is received in Gmail.
- Extract vital email data using Workload.
- Create a new row in your Google Sheets spreadsheet with the extracted data.
Before you begin, ensure you have:
- A connected Gmail account.
- A pre-created Google Sheets spreadsheet (e.g., “workload test”).
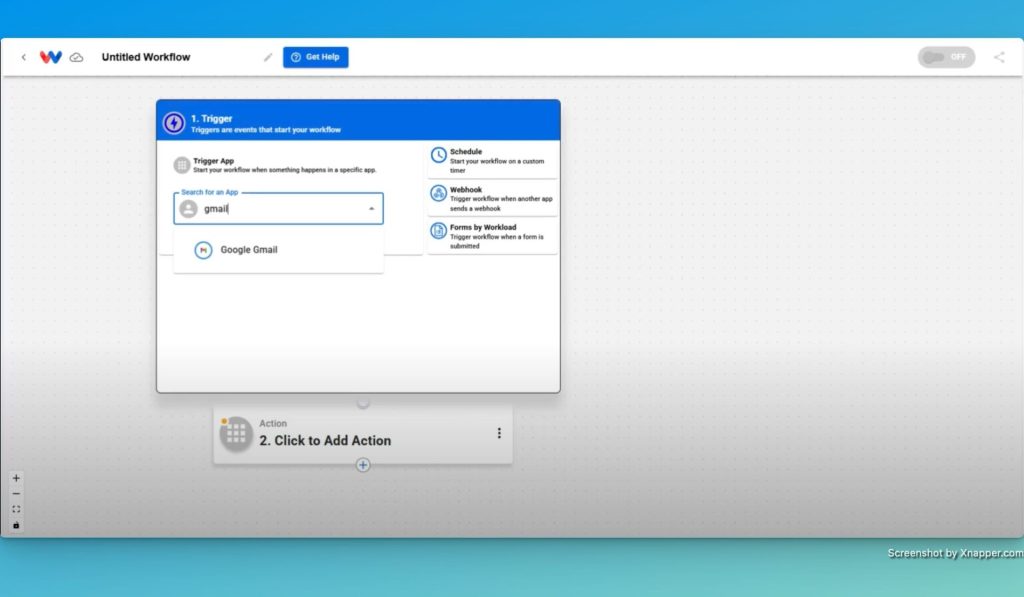
Step 1: Create a New Workflow for Gmail to Google Sheets Automation #
- Log In and Access the Editor:
Sign into your Workload dashboard and click the Create Workflow button in the upper left corner. This opens the workflow editor where you will build your Gmail to Google Sheets automation. - Add a Descriptive Title:
Name your workflow clearly—for example, “Gmail to Google Sheets Automation”. - Save Your Progress:
Save your new workflow as you set it up to ensure your changes are not lost.
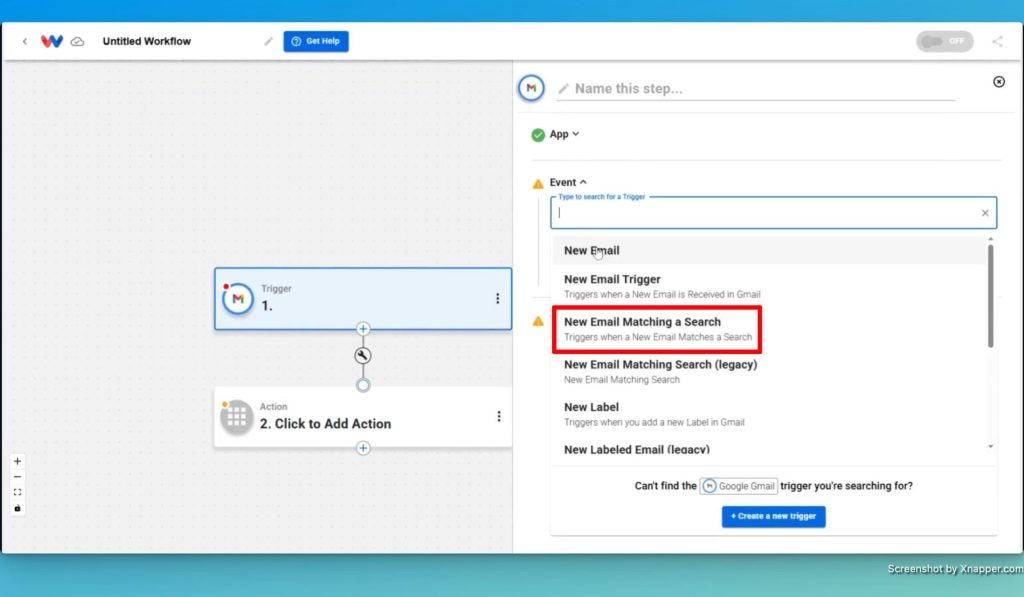
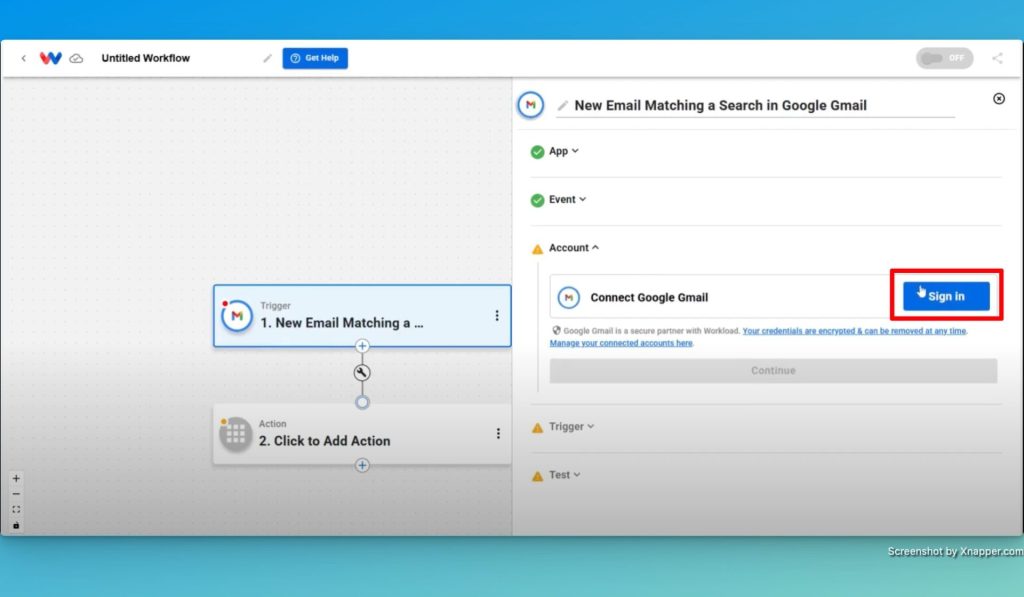
Step 2: Set Up the Gmail Trigger for Email Automation #
- Select Gmail as Your Trigger:
In the workflow editor, choose Gmail as the trigger app, then select the event New Email Matching a Search.
- Connect Your Gmail Account:
Authorize Workload to access your Gmail account securely.
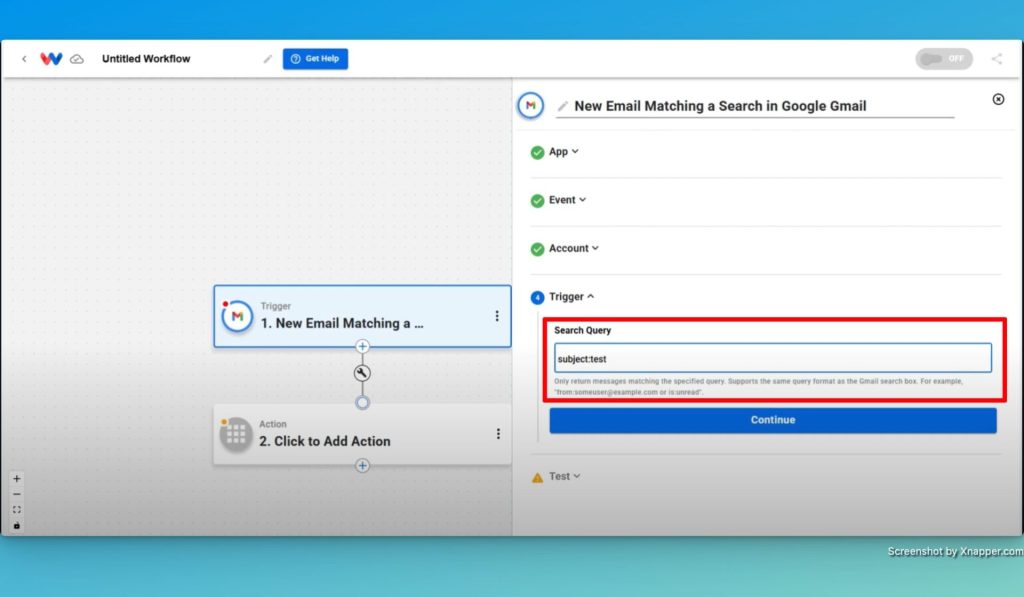
- Define Your Search Criteria:
Specify a search term to filter the emails. For example, use subject:test to capture only emails with “test” in the subject line. Tip: Adjust the search term to suit your needs and improve your Gmail to Sheets automation.
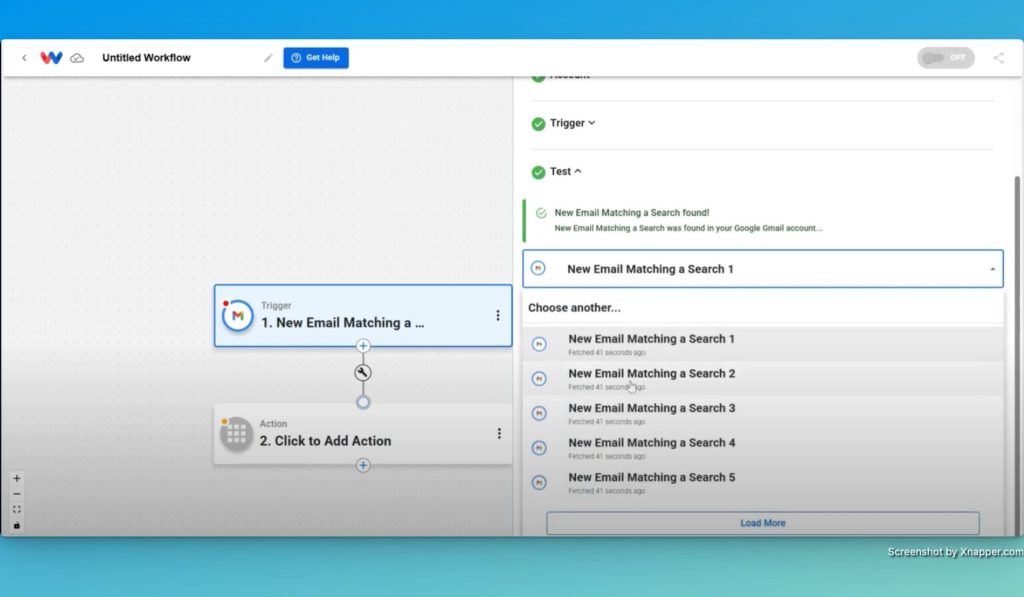
- Test the Gmail Trigger:
Click the “Test” button. If Workload finds emails matching your criteria, you will see the results, confirming that your Gmail trigger is working properly.
Click the “Continue” button. The red dot next to the Gmail icon in the trigger step will turn green, indicating that this trigger is complete.

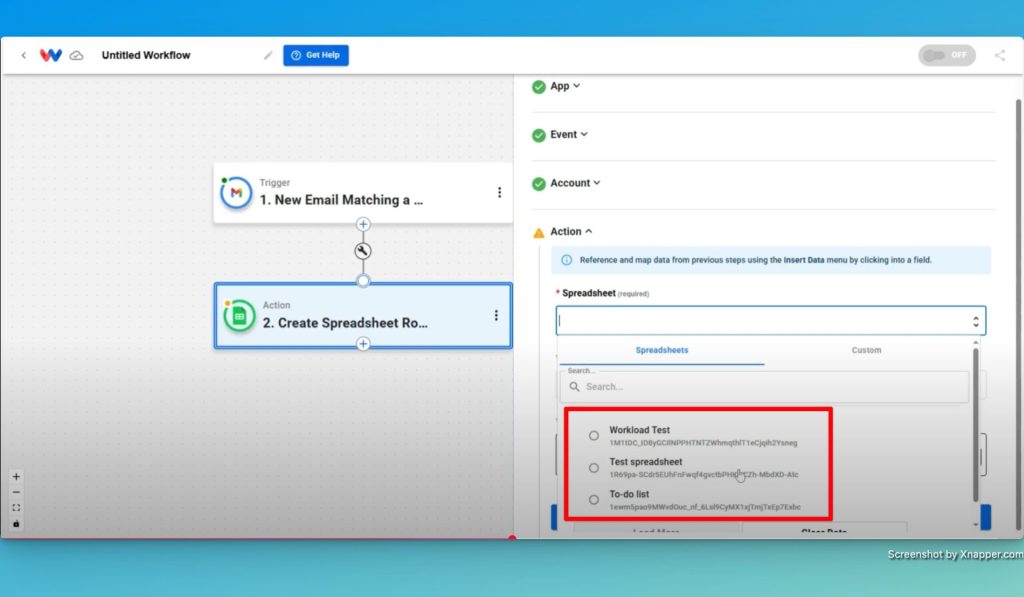
Step 3: Configure the Google Sheets Action for Automation #
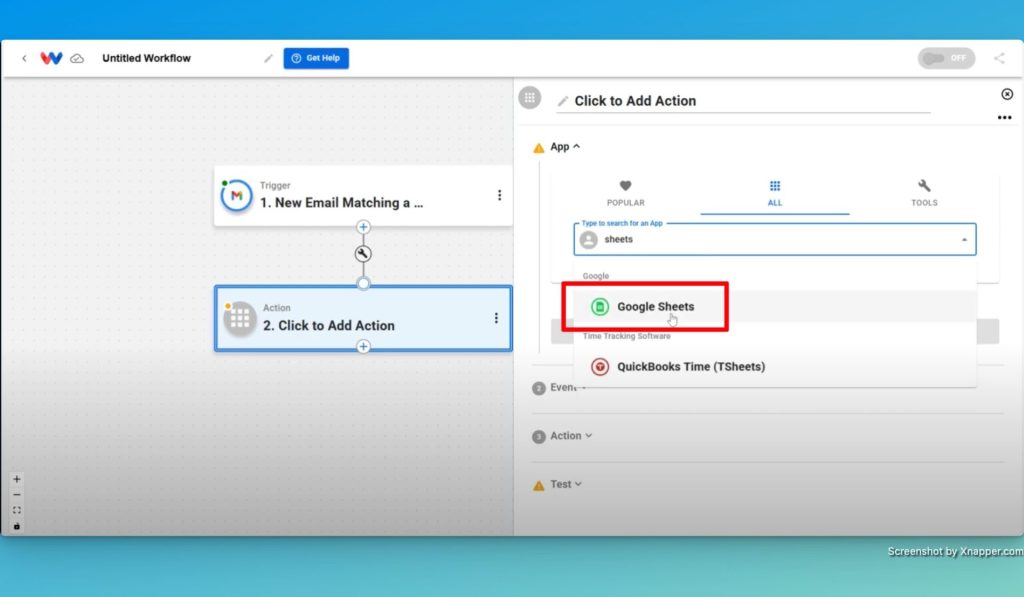
- Select Google Sheets as Your Action:
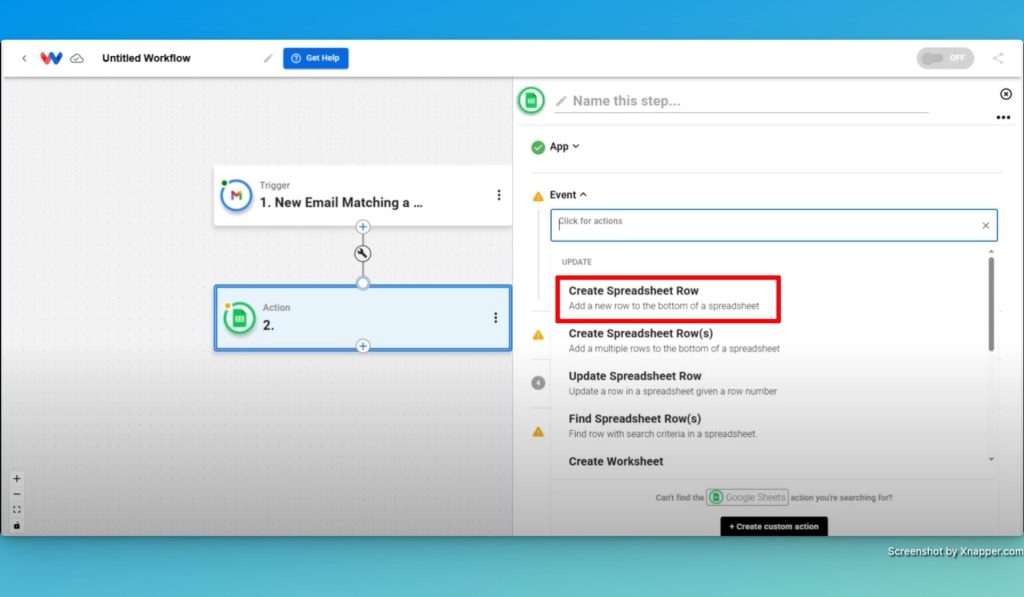
In the workflow editor, add an action and choose Google Sheets. Then, select the event Create Spreadsheet Row.
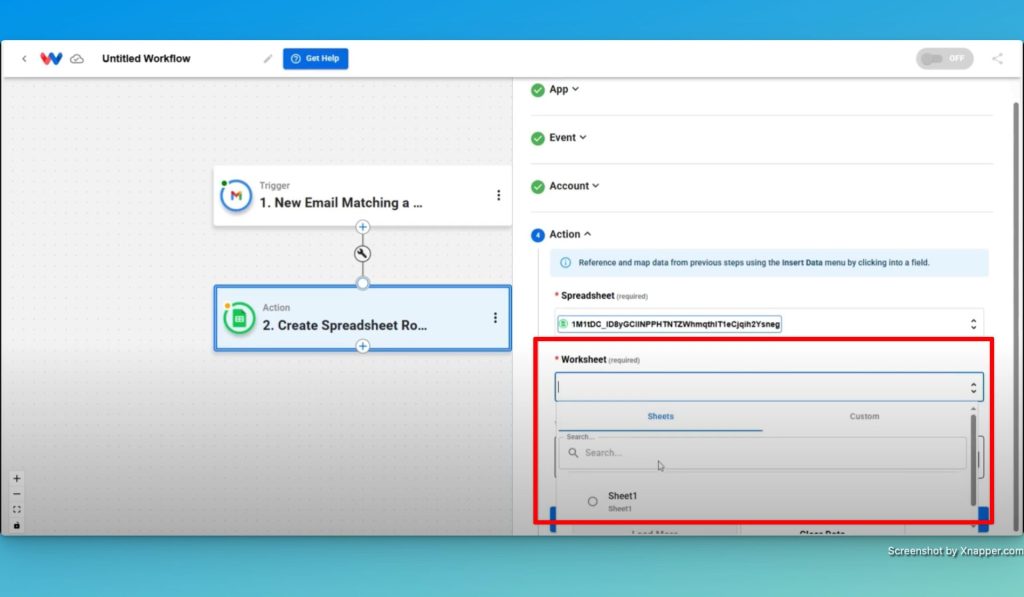
- Choose Your Spreadsheet:
Select your pre-created spreadsheet (e.g., “workload test”), then choose the worksheet that will receive the new data.
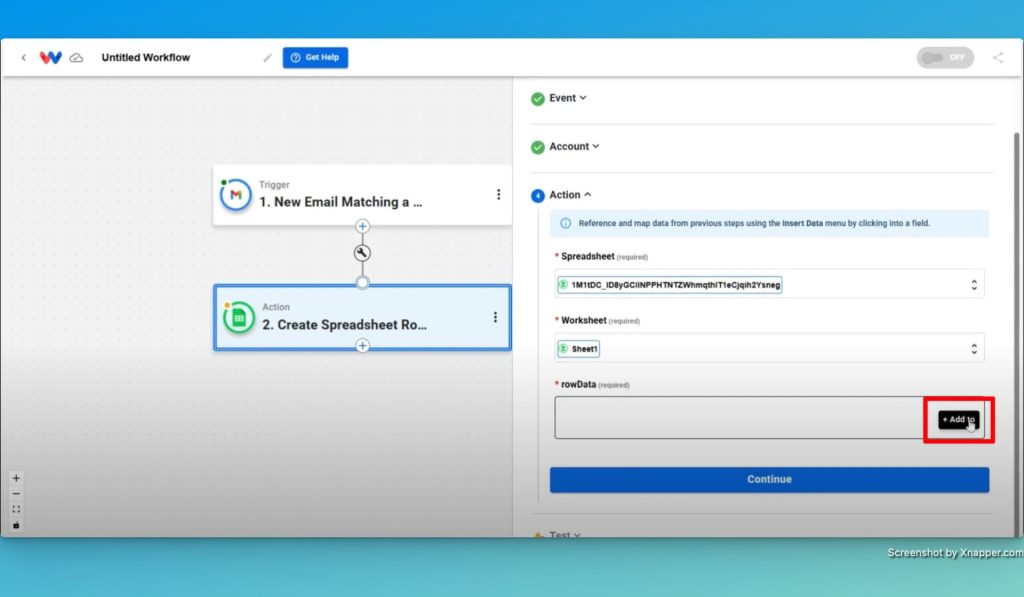
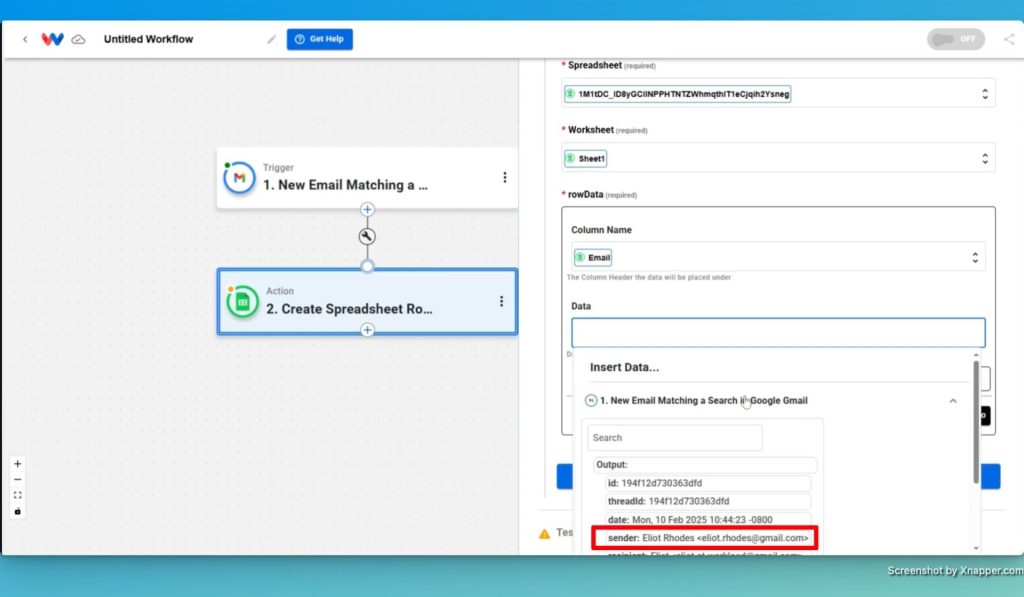
- Map the Email Data:
Click the Add To button to map the columns:- Email Address: Extract the sender’s email.
- Date: Capture the email’s received date.
- Subject: Retrieve the email subject.
- Message Content: Include the main content of the email.Workload makes it simple to map each column to the corresponding field from your Gmail trigger, ensuring your Gmail to Google Sheets automation works seamlessly.
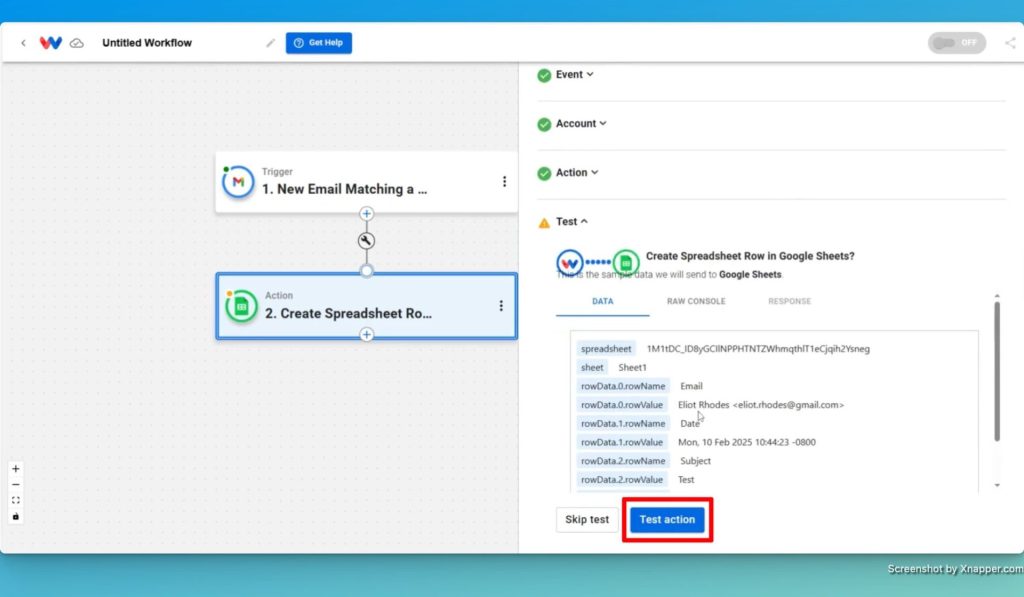
- Test the Google Sheets Action:
Click Test Action to send a sample row to your Google Sheets. When the data appears in your spreadsheet, the indicator will turn green, confirming that your action is set up correctly.
Step 4: Test and Activate Your Gmail to Google Sheets Automation Workflow #
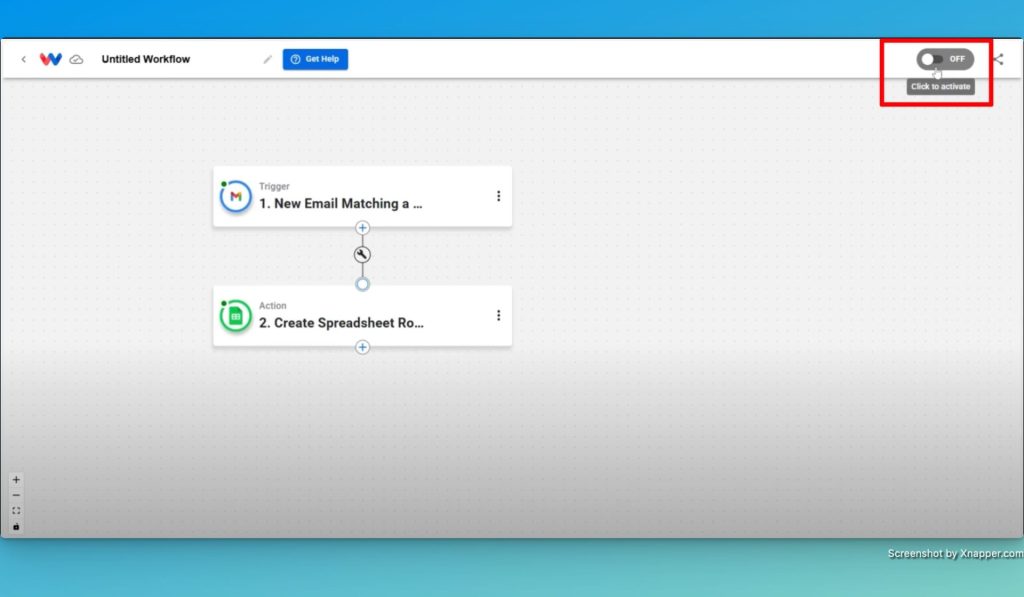
- Verify the Entire Workflow:
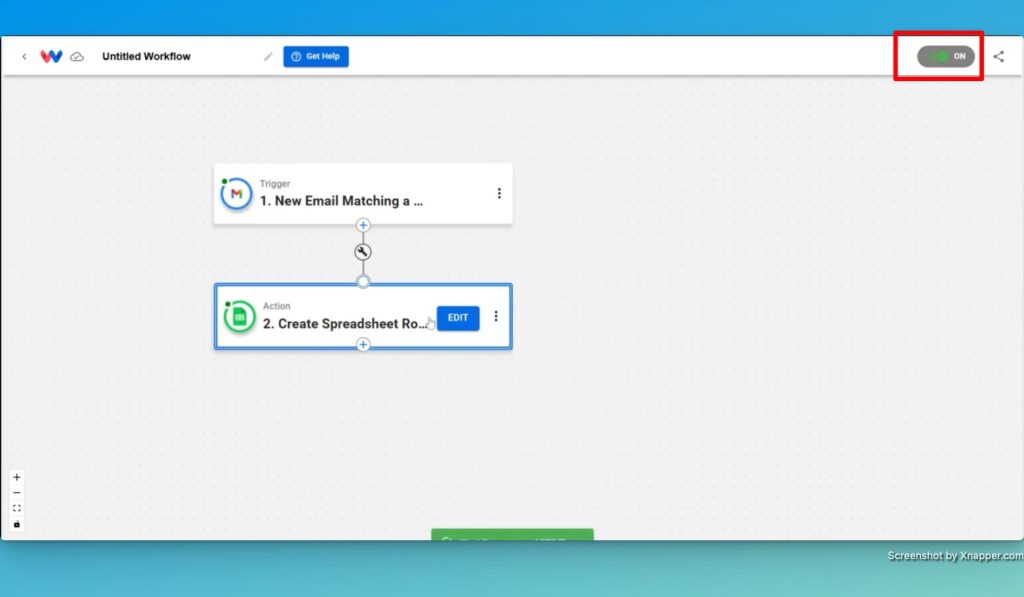
Ensure both the Gmail trigger and Google Sheets action tests are successful. When both indicator dots are green, your workflow is fully operational. - Activate the Workflow:
Turn on your workflow in the editor. Now, whenever you receive a new email that matches your search criteria (e.g., subject contains “test”), Workload will automatically extract the data and create a new row in your Google Sheets spreadsheet. - Monitor the Results:
Open your spreadsheet to verify that the data is updated with each new email, ensuring your Gmail to Google Sheets automation runs flawlessly.
Conclusion #
By following these steps, you have successfully implemented a Gmail to Google Sheets automation using Workload. This powerful workflow reduces manual effort by automatically extracting email data and updating your spreadsheet. With efficient Gmail to Sheets automation, you can focus more on growing your business.
For further insights into workflow automation and best practices, check out our Workload University and explore more tutorials on our Workload Help page.
Happy automating!


