- Overview: DrChrono Google Calendar Integration
- Step 1: Set Up Trigger for DrChrono Google Calendar Integration
- Step 2: Configure DrChrono API
- Step 3: Analyze the Appointment Data
- Step 4: Format Scheduled Time with AI
- Step 5: Add the Event to Google Calendar
- Conclusion: DrChrono Google Calendar Integration
Keeping DrChrono and Google Calendar in sync can be frustrating, especially when updates are missed, data doesn’t match, or appointments fail to sync. Thankfully, Workload’s DrChrono Google Calendar Integration takes care of this for you. It automatically adds new DrChrono appointments to Google Calendar, so you don’t have to update your schedule manually. This smooth automation improves accuracy, saves time, and reduces stress. In the end, you can stay organized effortlessly and focus on providing great patient care.
If you need extra help, you can watch our step-by-step video on the Workload YouTube channel. Additionally, you can visit Workload University or our Workload Help page for more automation tips.
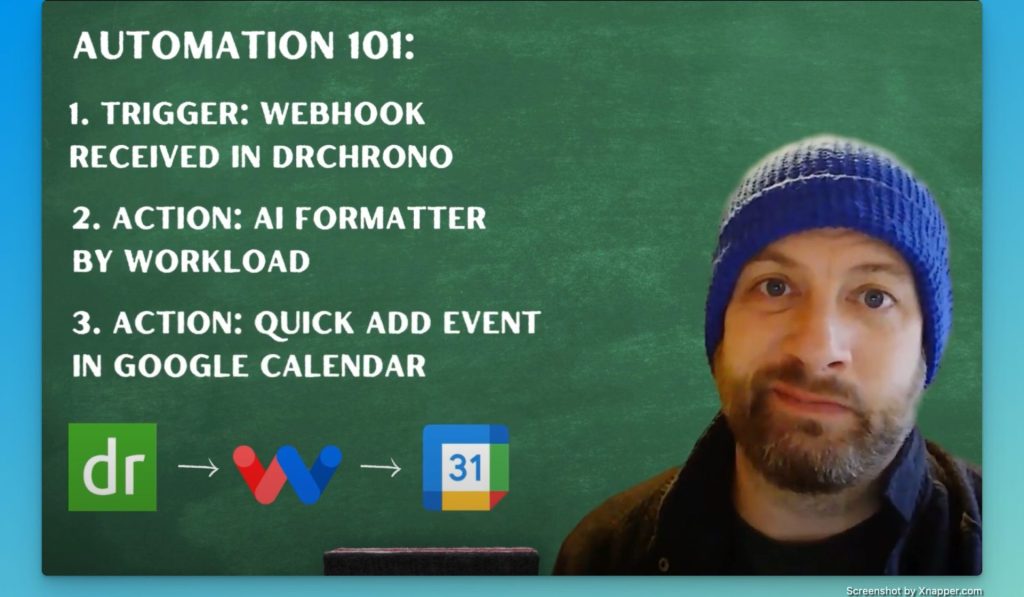
Overview: DrChrono Google Calendar Integration #
In this workflow, you will:
- Trigger on New Appointments: First, capture every new appointment automatically.
- Extract Appointment Details: Next, pull relevant information such as the patient’s name, appointment time, and duration.
- Create a Google Calendar Event: Finally, add an event to your selected Google Calendar with these details.
Before you begin, ensure you have:
- A connected DrChrono account.
- A Google Calendar account.
- A Workload account to create and manage your workflow.
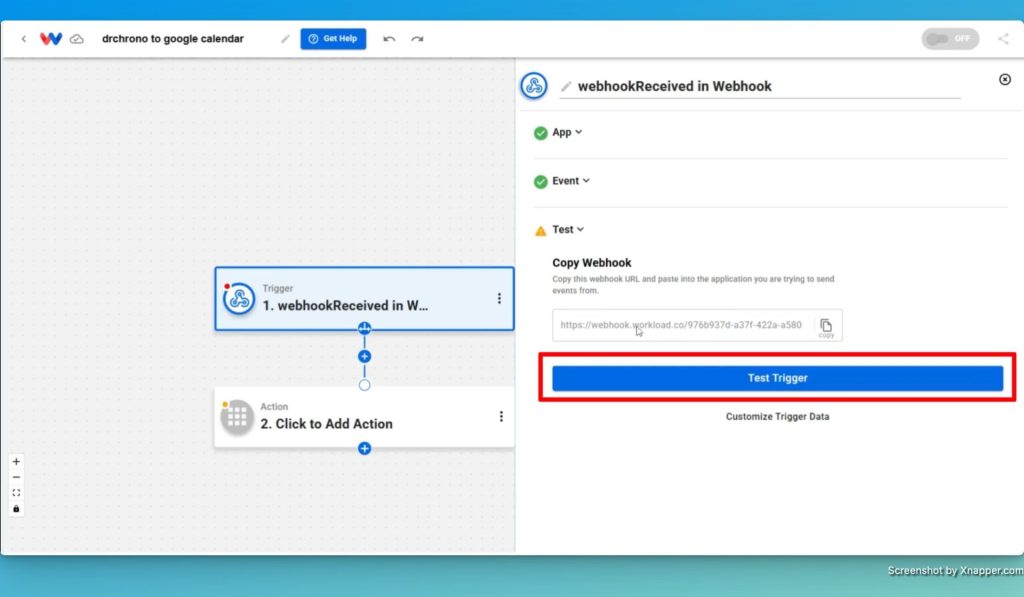
Step 1: Set Up Trigger for DrChrono Google Calendar Integration #
- Launch the Workload Editor: First, open the Workload editor and create a new worfklow.
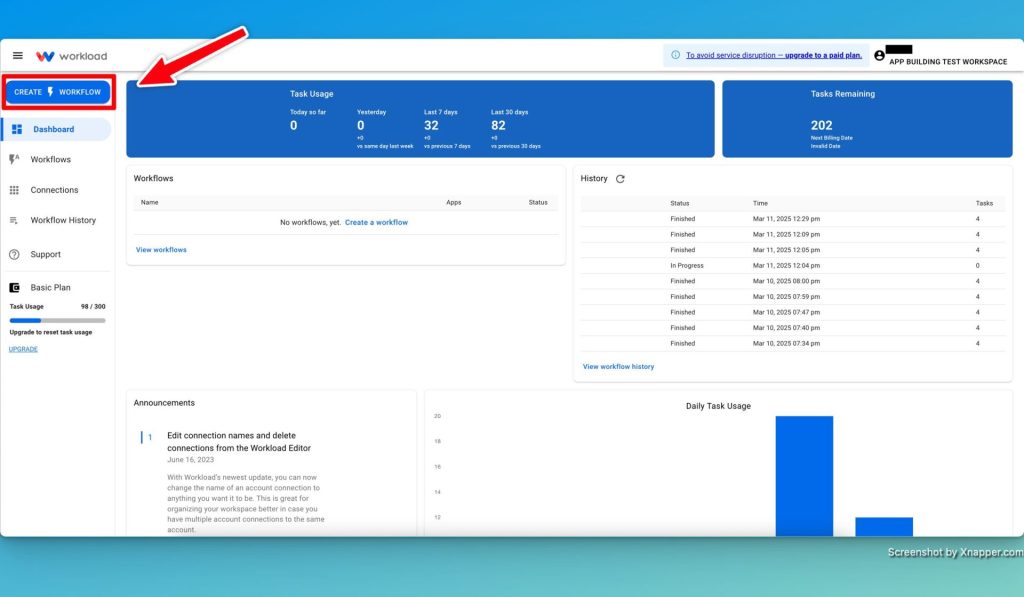
- Title Your Workflow: Name your workflow something descriptive like “Dr Chrono to Google Calendar” in order to easily identify it later.

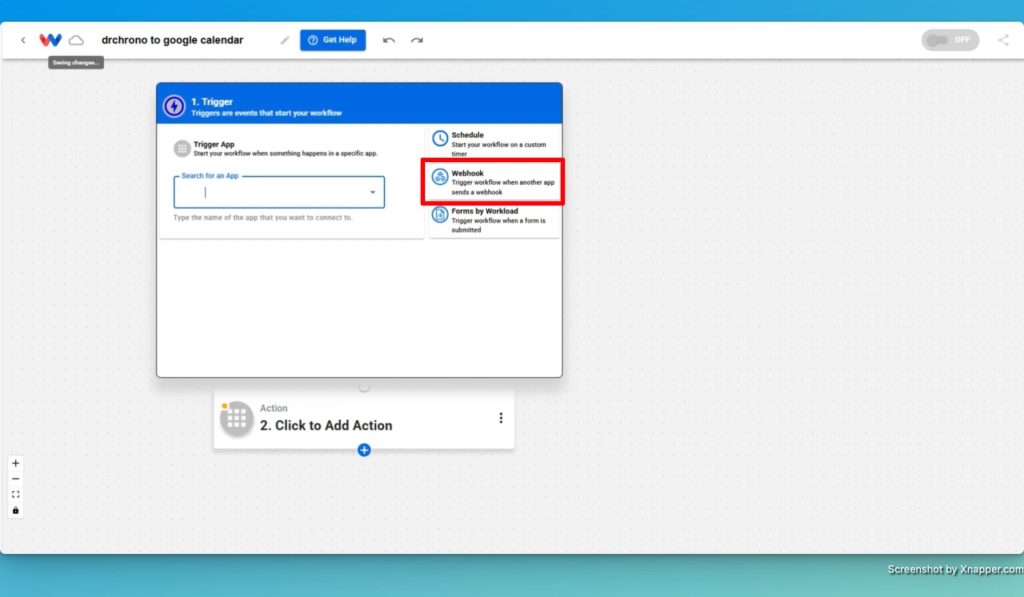
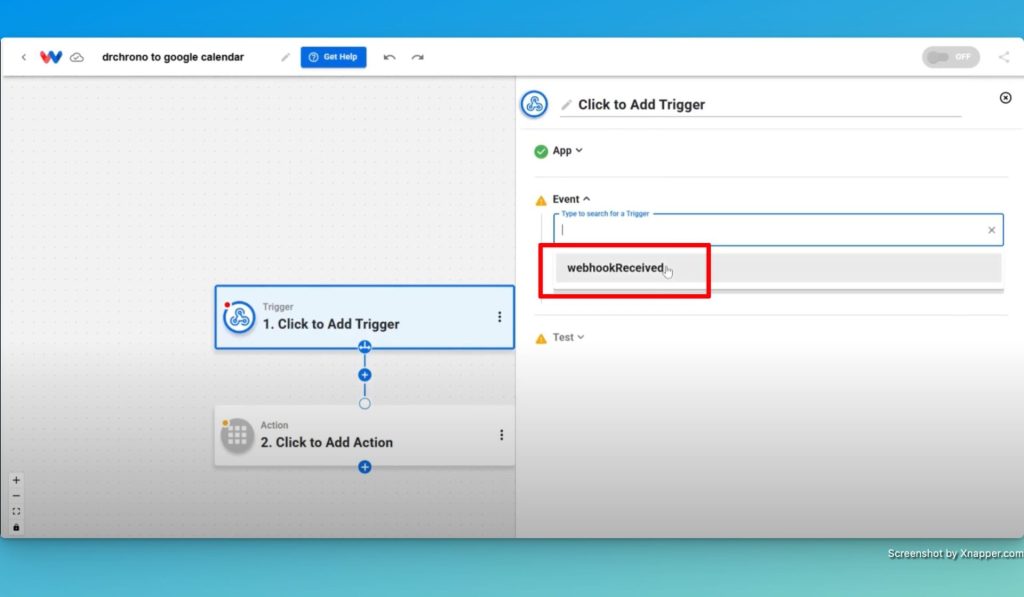
- Select the Webhook Trigger: Click the webhook button on the right side. Next, choose the trigger event “webhookReceived”.
- Test the Trigger: Press the “Test Trigger” button to ensure Workload is ready to receive data from DrChrono.
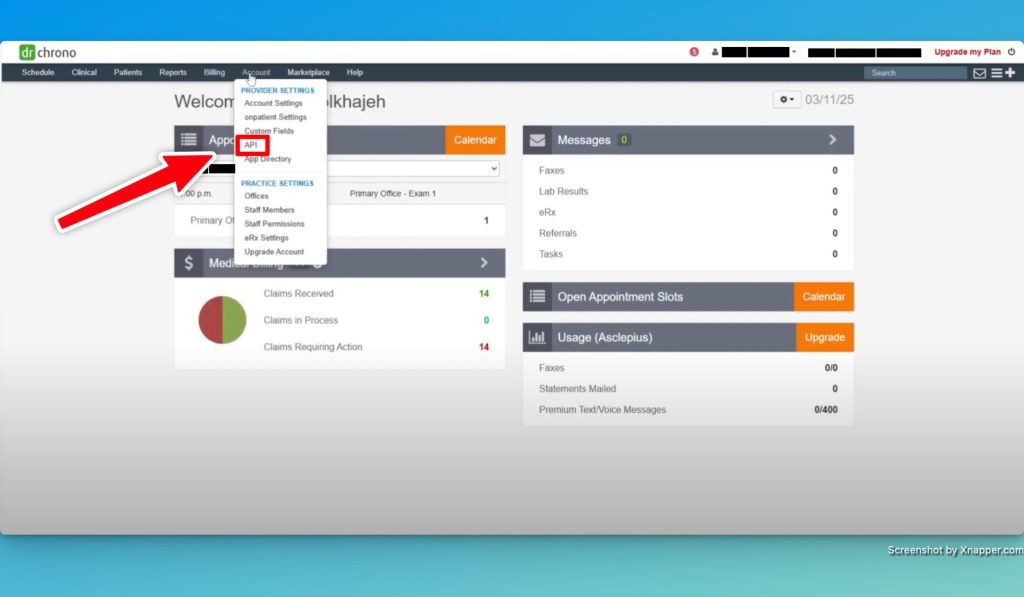
Step 2: Configure DrChrono API #
- Navigate to DrChrono: Switch to the DrChrono website.
- Select API: Hover over the accounts button and click on API.
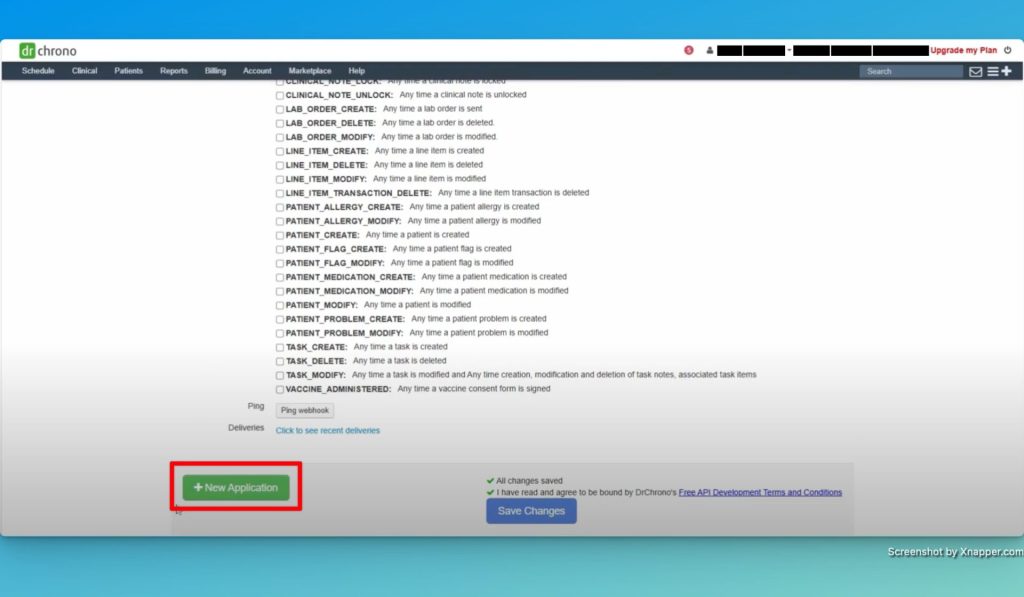
- Create New Application: Scroll down and click “+ New Application“.
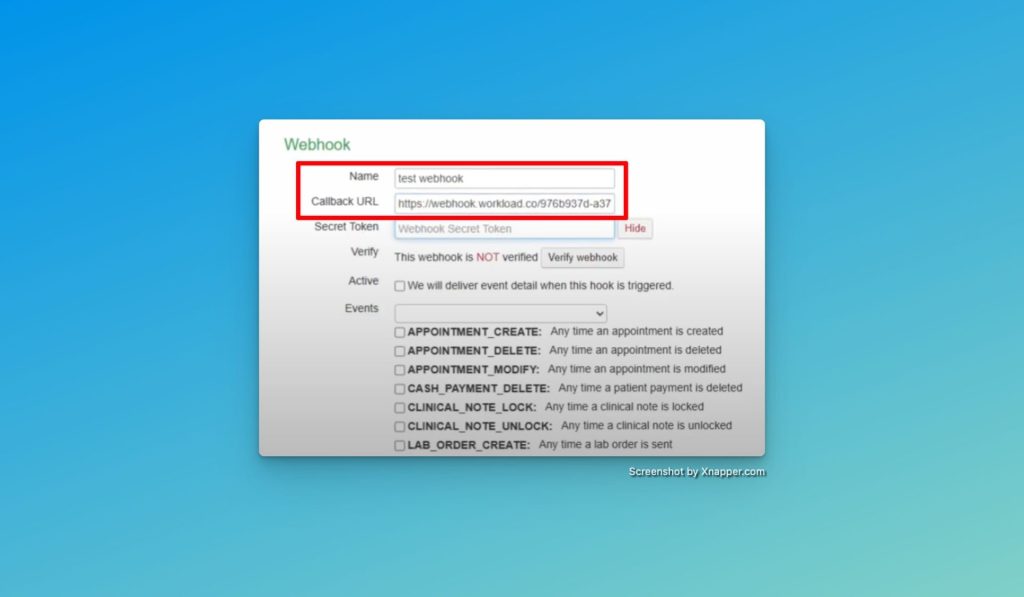
- Setup Webhook in DrChrono: Create a name for your webhook in DrChrono and save the changes.
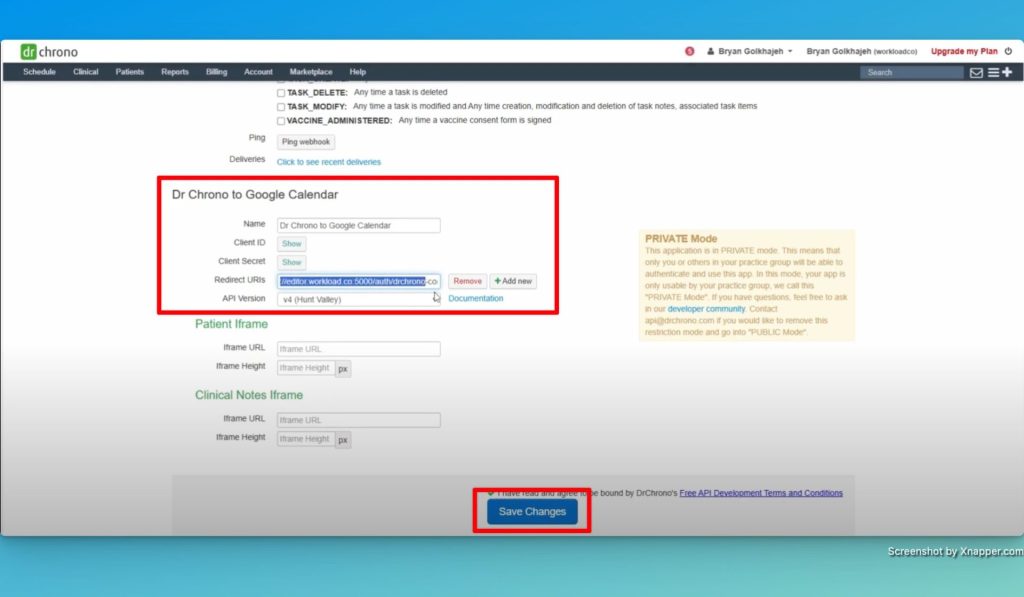
- Enter Webhook Callback URL: After saving changes, copy the Callback URL from the trigger step into the “Callback URL” field in DrChrono.
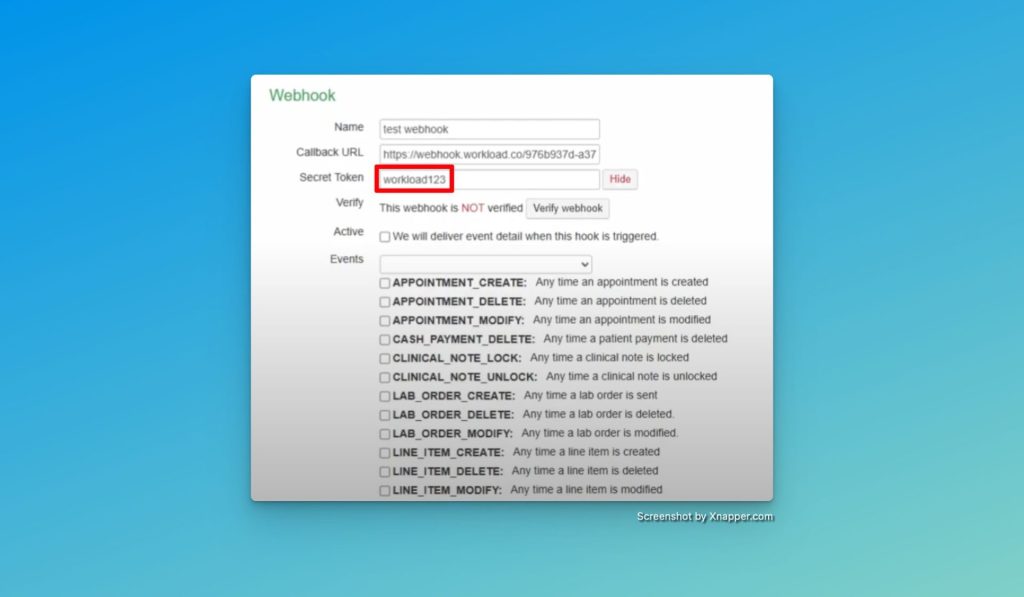
- Enter API Secret Token: Click the view button next to “Secret Token”. Now, enter the secret token “workload123”.
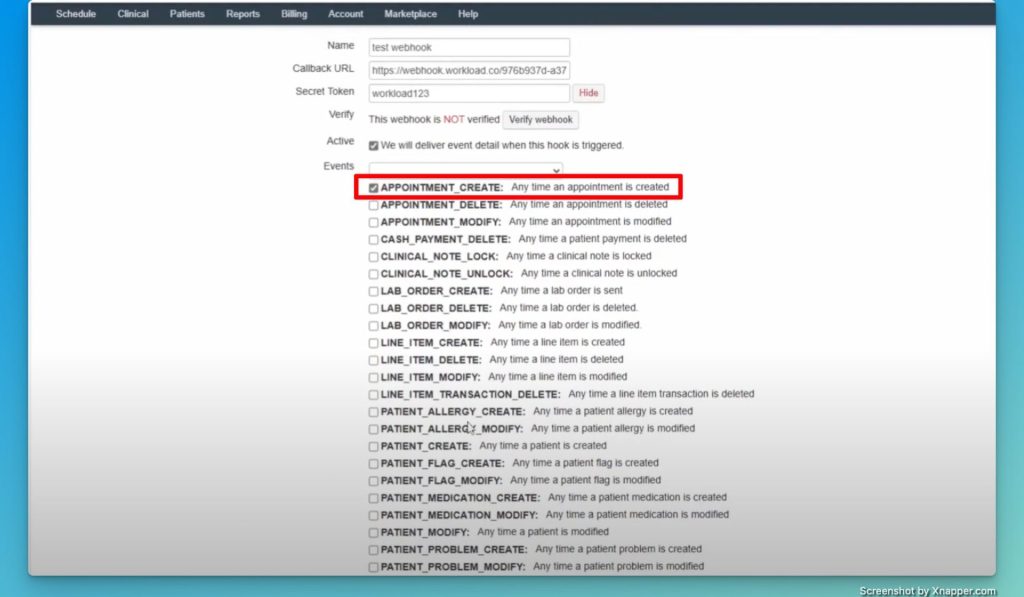
- Select Webhook Event: Choose “APPOINTMENT_CREATE” from the “Events” list in DrChrono.
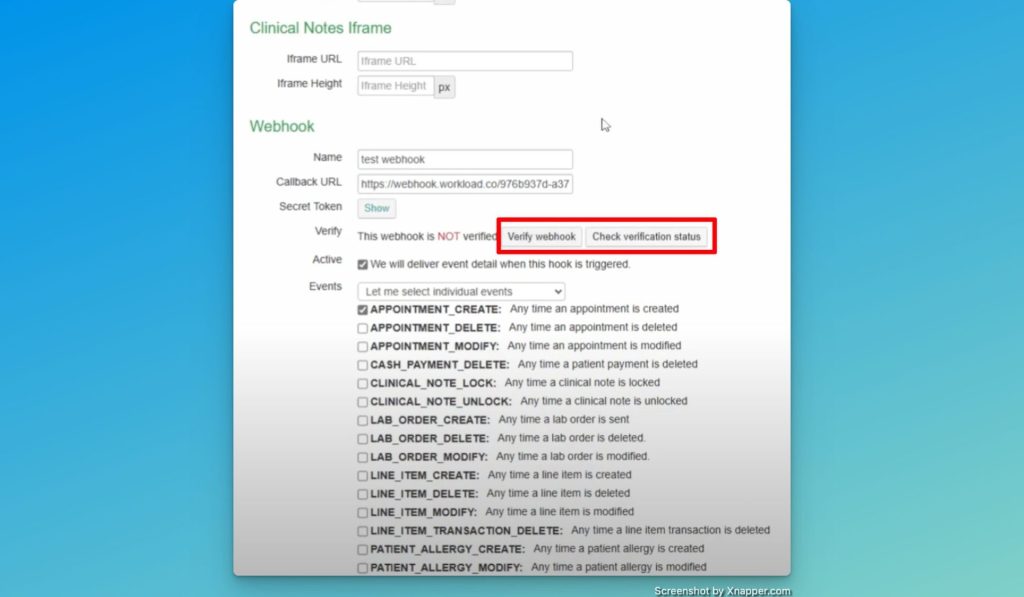
- Verify Webhook: Verify the webhook to confirm the trigger is working properly.
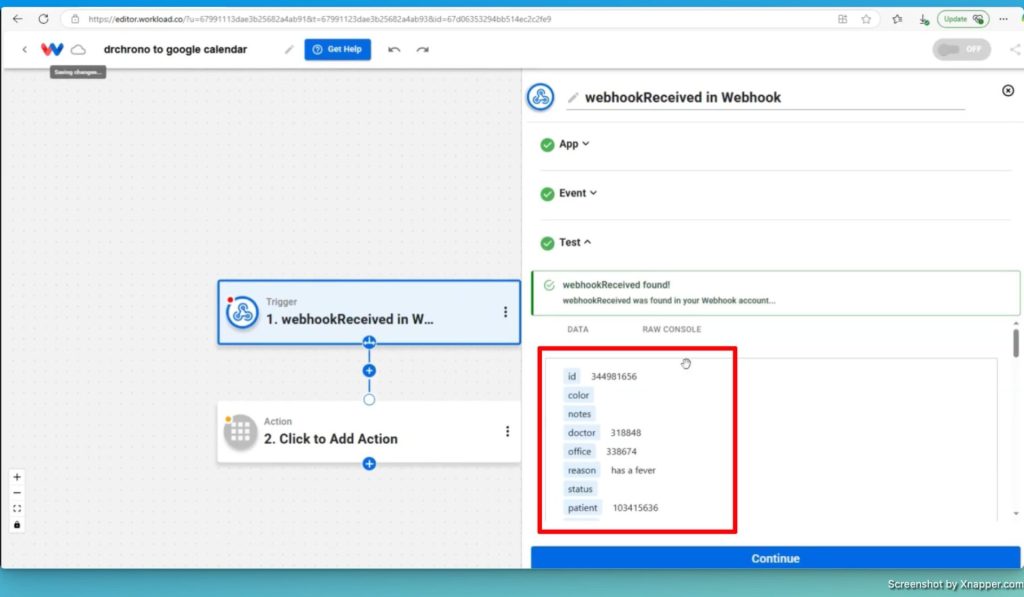
Step 3: Analyze the Appointment Data #
- Analyze Appointment Data: Review the Information and decide which details you want to include in your Google Calendar event.
- Verify Webhook: Verify in the Workload editor that the appointment details appear correctly, confirming that your webhook is active.
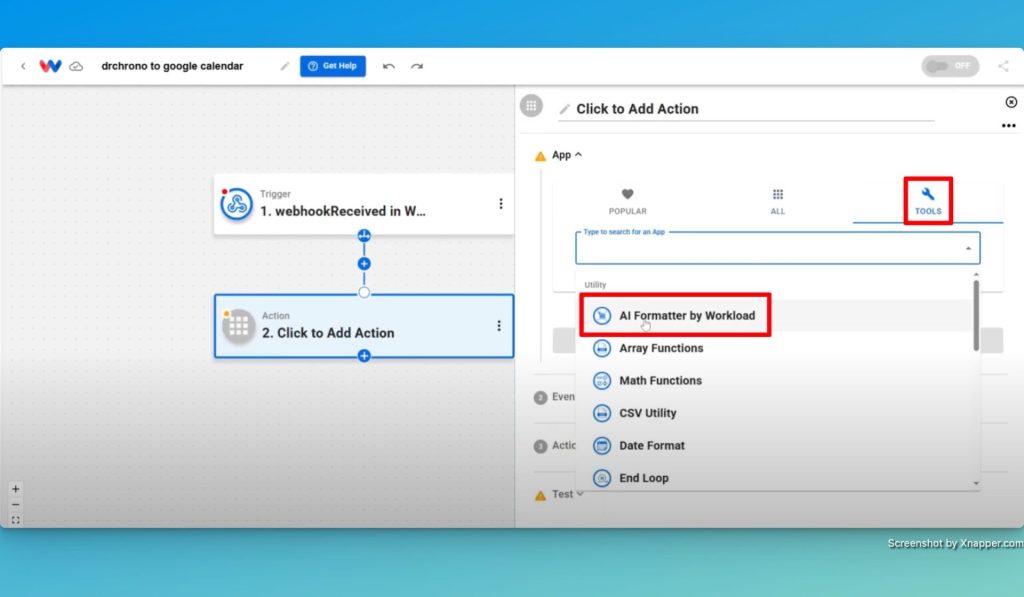
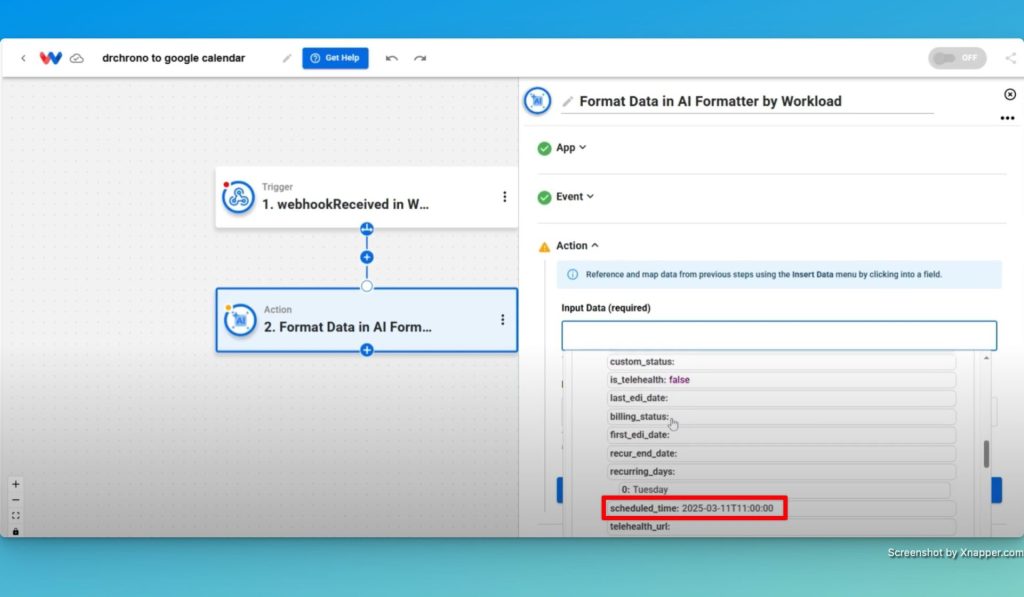
Step 4: Format Scheduled Time with AI #
- Add AI Formatter: Insert an action in Workload to use the AI formatter.
- Select Scheduled Time: Choose the scheduled time from the webhook data.
- Convert Time Format: Instruct the formatter to change the time into the “YYYY-MM-DD HH:MM” format (without seconds).
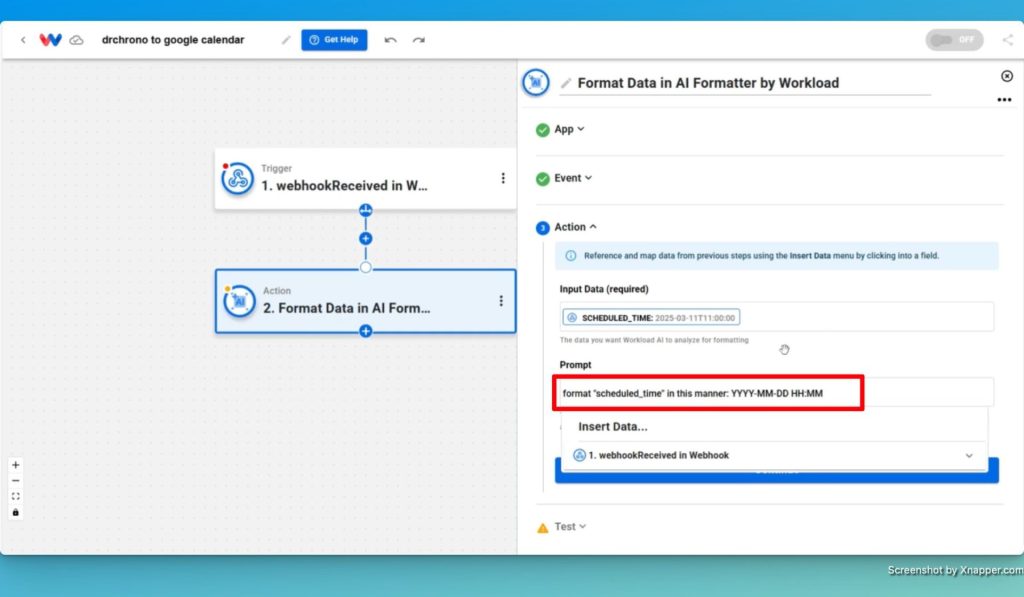
- Ensure Compatibility: This conversion is crucial because Google Calendar requires a specific time format for accurate scheduling.
Step 5: Add the Event to Google Calendar #
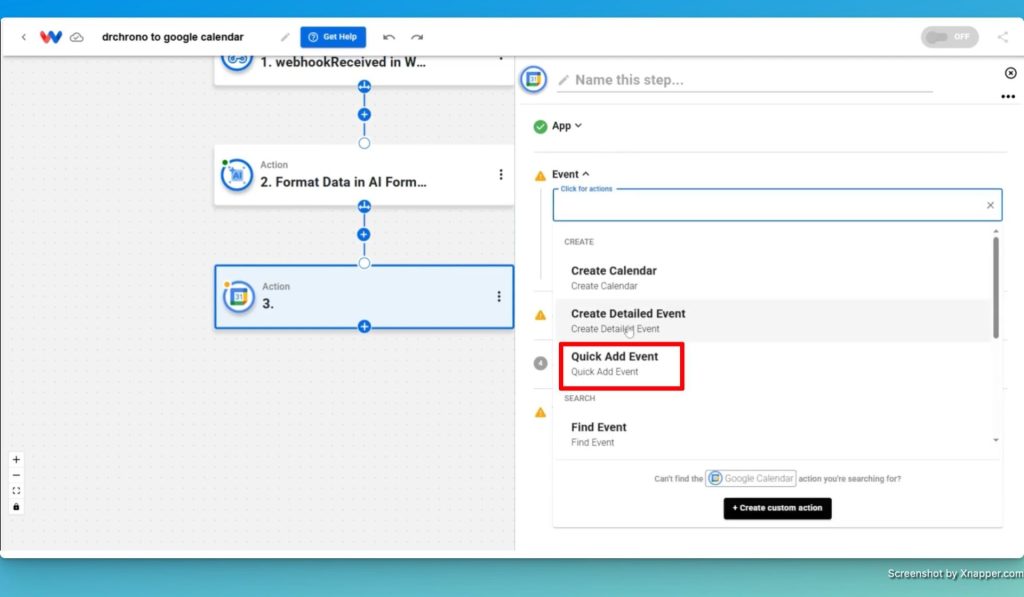
- Use Quick Add Event: Add an action in Workload and select the event action “Quick Add Event” from Google Calendar.
- Setup Google Calendar Action: Select the Calendar to add to and enter a prompt that describes the event you want to create using data from the Trigger and Step 1. Combine descriptive text with webhook data to create a clear and informative event.

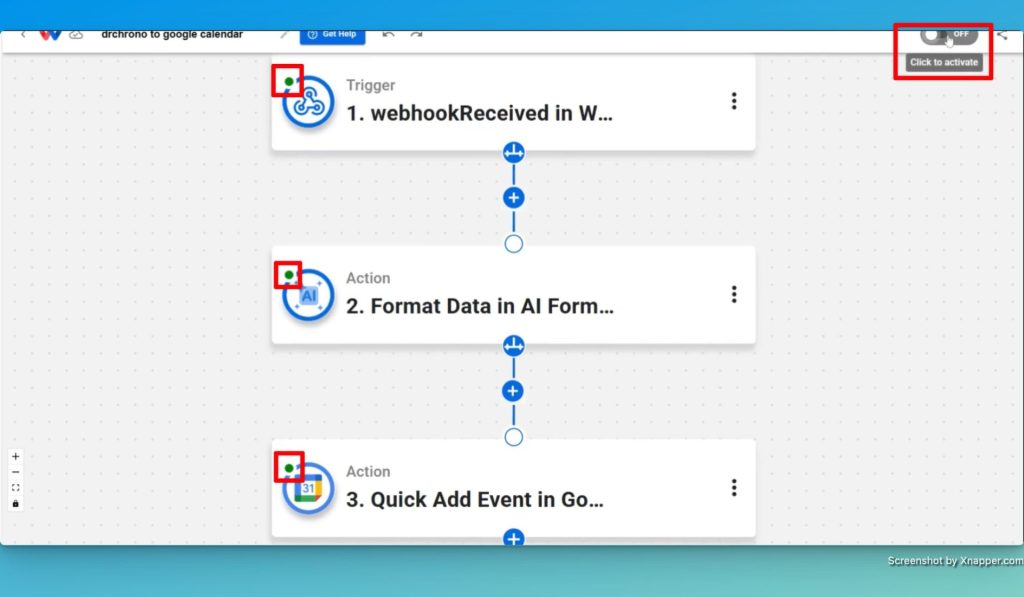
- Activate and Test the Integration: Ensure that the trigger and step nodes have green indicators and then activate the workflow. Run a test to confirm that the event appears correctly in your Google Calendar.
Conclusion: DrChrono Google Calendar Integration #
By following these simple steps and embracing automation, you now have a powerful DrChrono Google Calendar Integration that seamlessly syncs your appointments. In addition, this automation not only saves you time but also reduces the risk of manual errors. As a result, you can focus more on other important tasks without worrying about keeping your schedule up to date.
For more automation tips, visit Workload University or check our Workload Help page.
Happy automating!


