Introduction: Automate New Patient Creation with JotForm and DrChrono #
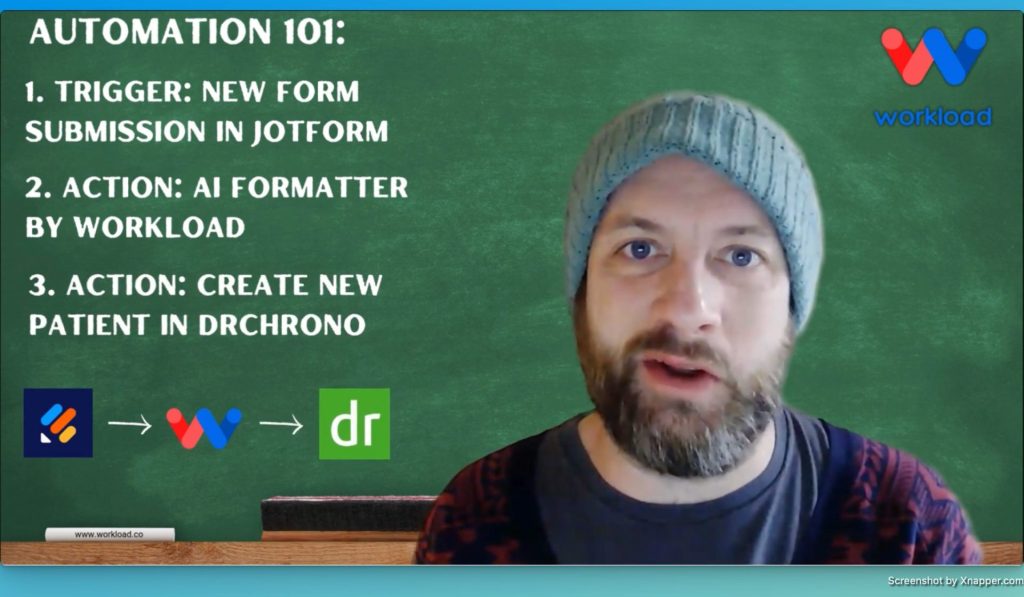
Automate new patient creation effortlessly with JotForm and DrChrono. In this post, we will show you how to set up a workflow that automates new patient creation. First, a patient fills out a registration form on JotForm. Then, Workload’s AI Formatter cleans the data. Finally, the data creates a new patient record in DrChrono. This system saves time and reduces errors.
For a video walkthrough, check out our Workload YouTube channel. Also, you can visit Workload University and our Workload Help page for extra tips and guidance.
Overview #
In this workflow, you will automate new patient creation with JotForm and DrChrono:
- Trigger on New Form Submission: Capture each patient registration automatically.
- Format Data with AI Formatter: Extract and clean key patient details.
- Create a New Patient in DrChrono: Map the formatted data to update your records.
Before you begin, make sure you have:
- A connected JotForm account with a registration form.
- A DrChrono account with patient data access.
- A Workload account to create and manage your workflow.
Step 1: Setting Up Your Workflow #
- Launch the Workload Editor: First, open Workload and create a new workflow.
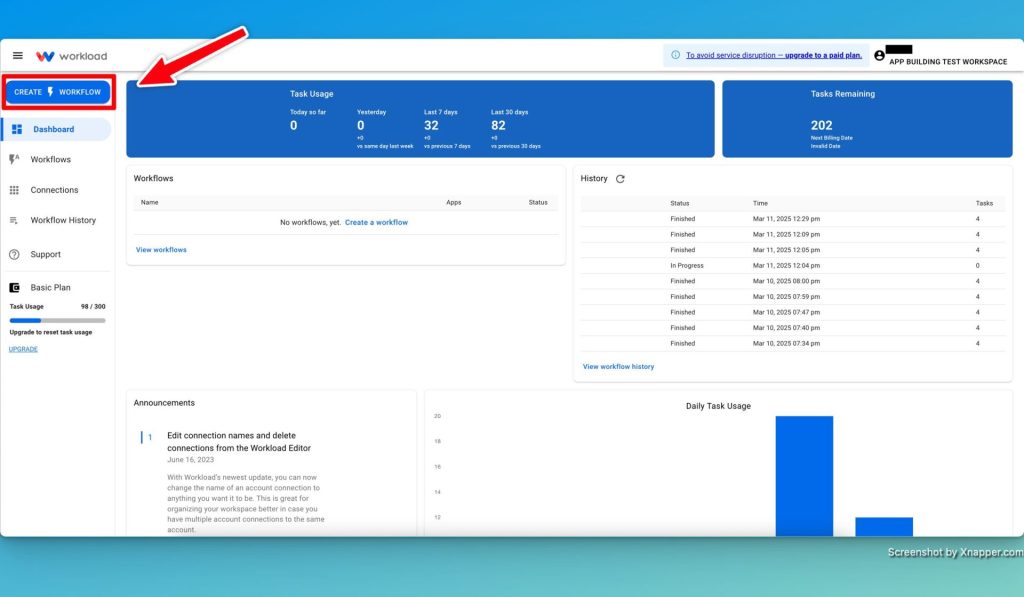
- Title Your Workflow: Next, name it something clear like “JotForm to DrChrono – Automate New Patient Creation.”

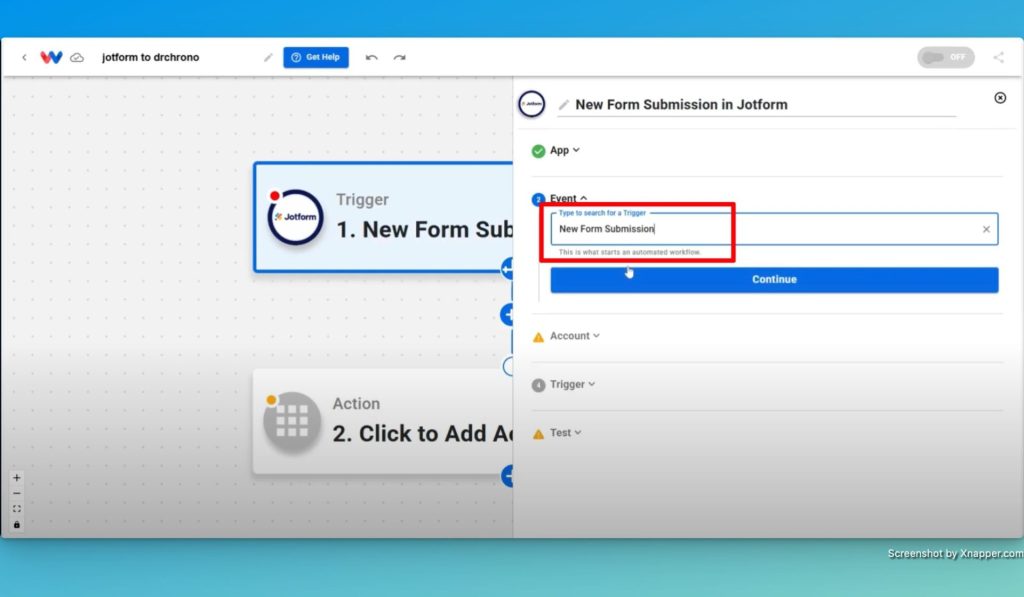
- Select the Trigger App: Then, choose JotForm as the trigger and set the event to “New Form Submission.”
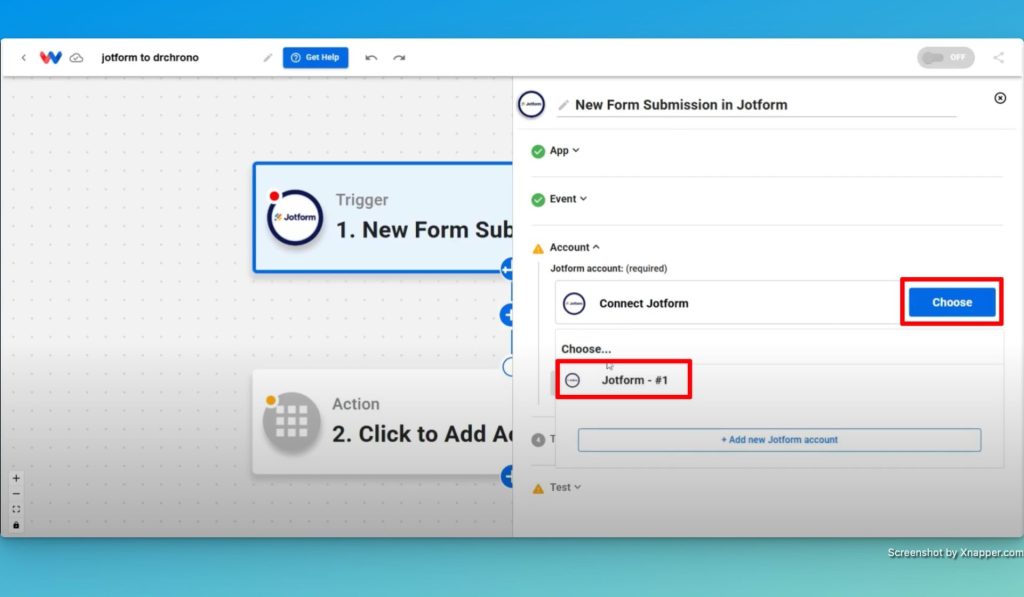
- Connect Your JotForm Account: After that, link your JotForm account to ensure every new submission activates your workflow.
- Select the Form to Monitor: Choose the form for the trigger to monitor in Jotform.

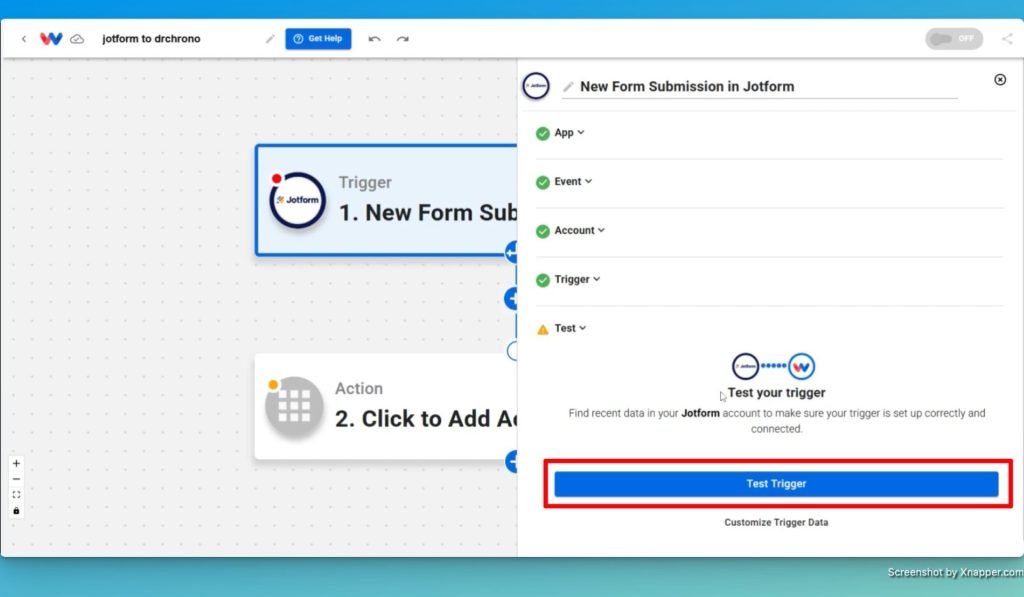
- Test Your Trigger: Finally, run a test to capture sample data and confirm that it is working correctly.
Step 2: Configuring the AI Formatter Action #
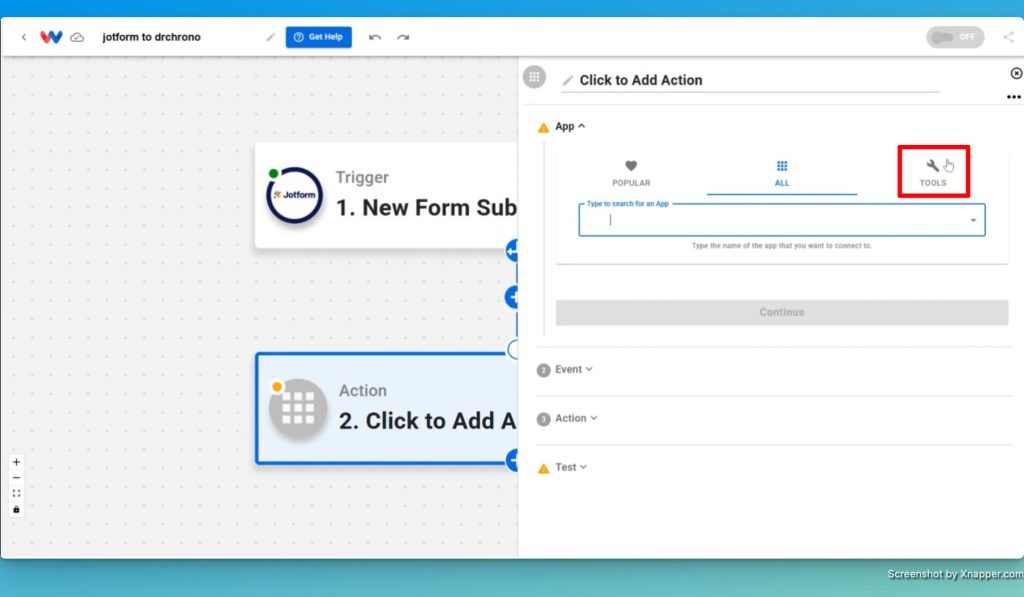
- Add the AI Formatter Tool: First, click on the tools icon in the workflow editor to get started.
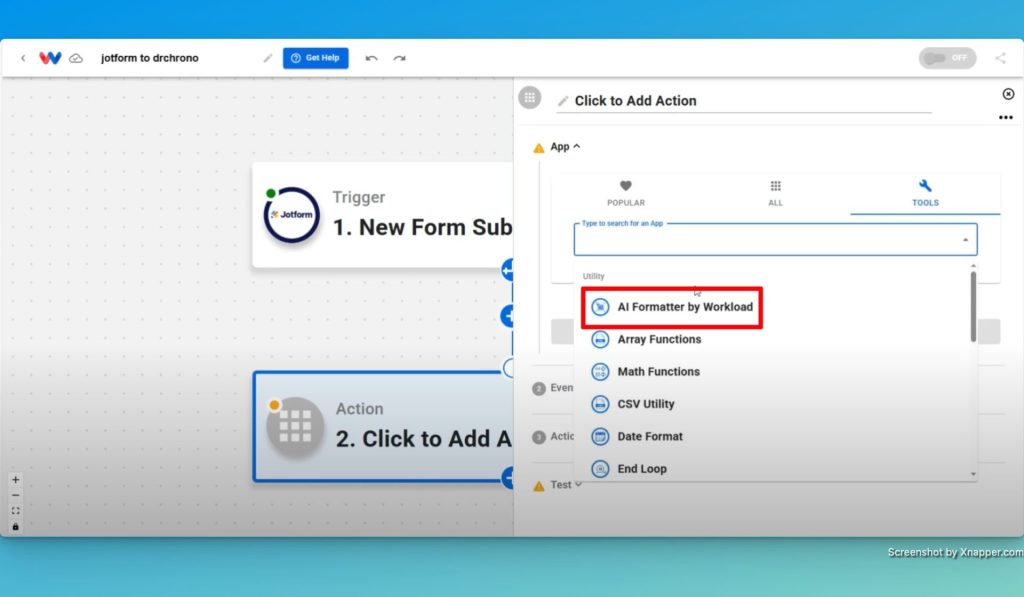
- Select the AI Formatter by Workload: Next, select “AI Formatter by Workload” from the available tools.
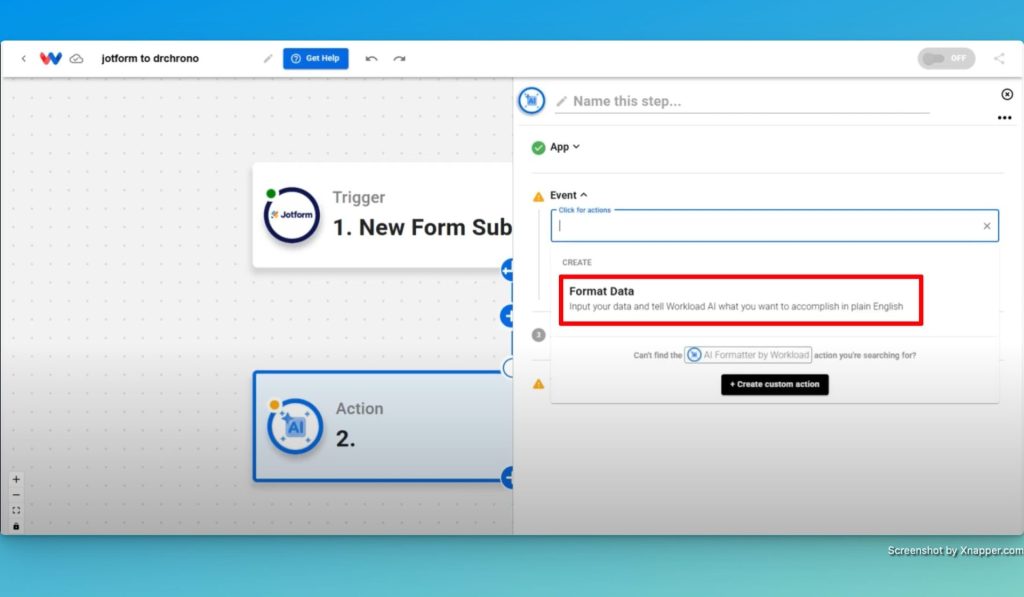
- Choose the “Format Data” Event: Then, choose the “Format Data” event to process the submission data.
- Set the Input Data: After that, set the input as the new form submission from JotForm.

- Paste Your Custom Prompt: Now, paste your custom prompt to extract only the required data fields.
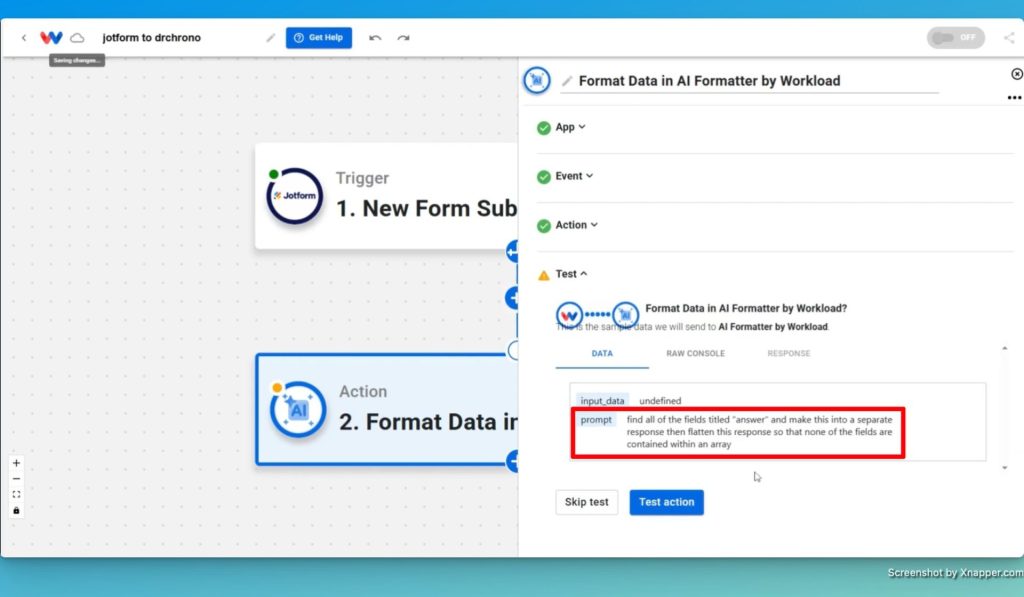
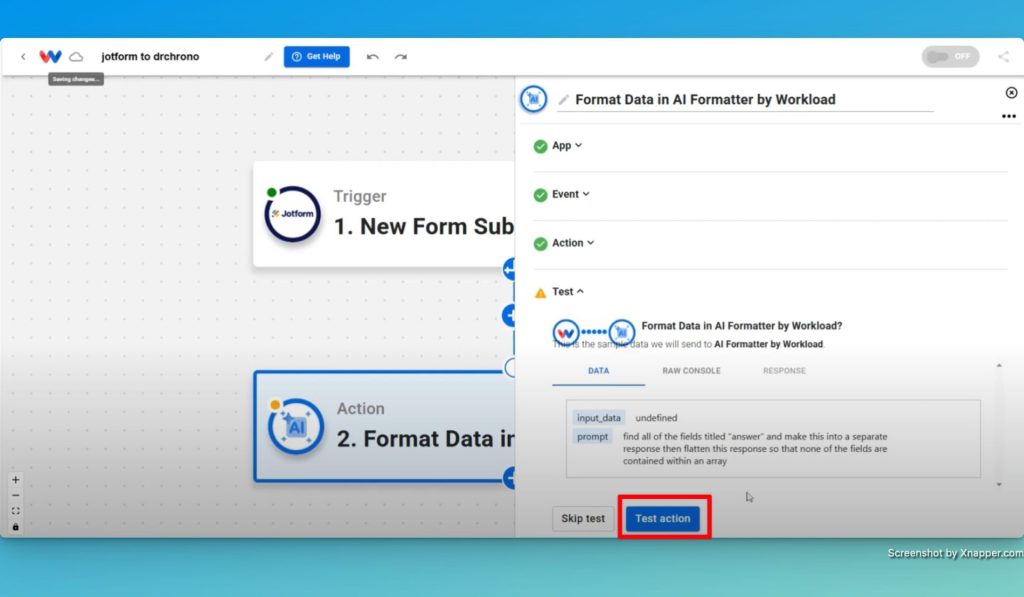
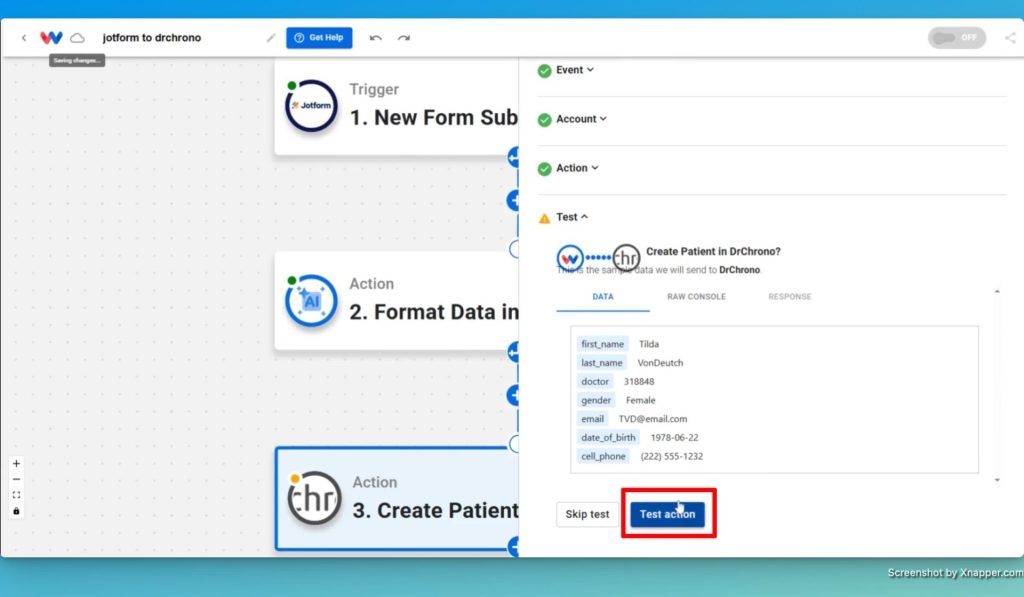
- Test the Formatter Action: Finally, test this action to ensure everything works as expected before moving to the next step.
Step 3: Creating a New Patient in DrChrono #
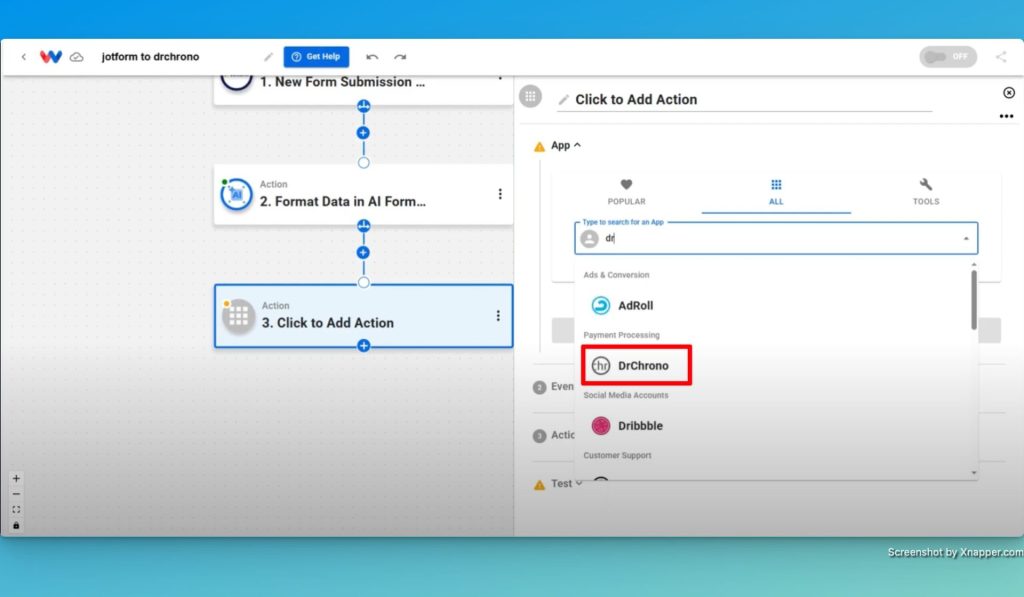
- Add a New Action: First, choose DrChrono as the action app to continue setting up the workflow.
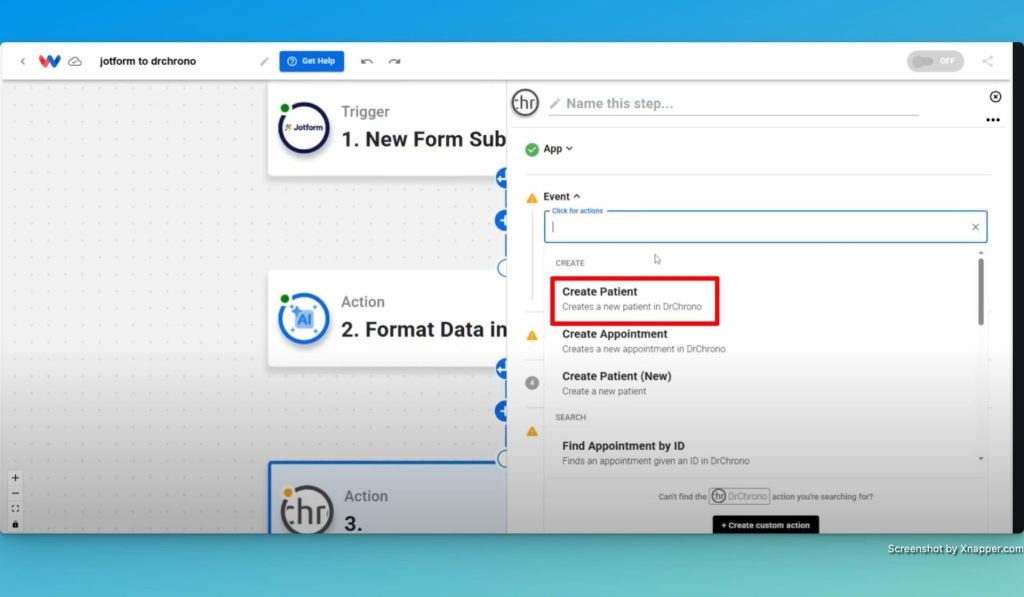
- Select the “Create Patient” Event: Next, select the “Create Patient” event and connect your DrChrono account.
- Map the Patient Data: Then, map each field from the formatted data to the corresponding patient details in DrChrono, such as first name, last name, email, and date of birth.

- Assign the Doctor ID: If needed, assign the correct doctor ID to ensure the patient is linked to the right provider.
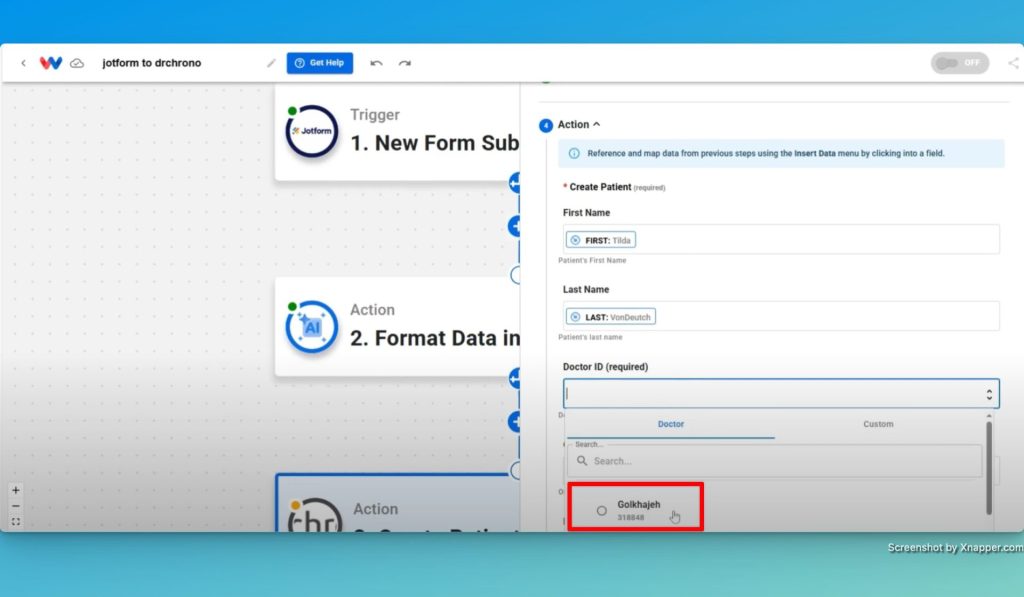
- Test the DrChrono Action: Next, run a test to confirm that a new patient is created and verify the new patient record in your DrChrono account.
Conclusion: Automate New Patient Creation with JotForm and DrChrono #
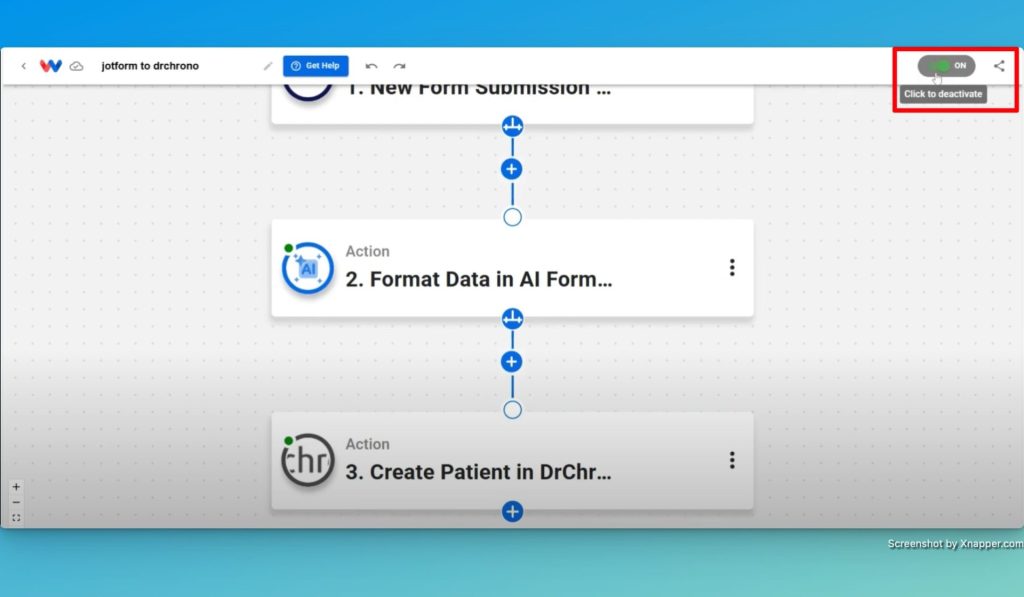
Now, once you complete these steps, every time a patient registers on JotForm, the process starts automatically. Consequently, you save time and reduce manual data entry. Additionally, this improves the accuracy of patient data. Ultimately, this workflow will let you focus more on patient care.
For more automation tips, visit Workload University or check out our Workload Help page.
Happy automating!


