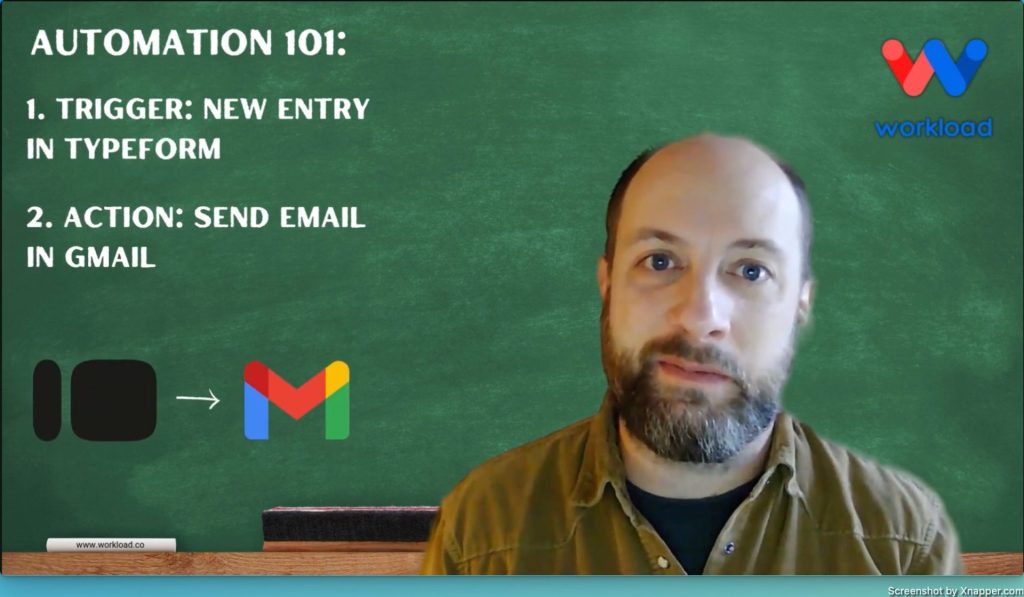
Introduction: Automate Emails with Typeform and Gmail #
Automating email responses saves time and makes communication easier. In this post, we’ll show you how to automate emails with Typeform and Gmail using the Workload editor. When someone submits a new Typeform entry, your team gets an automatic email with all the important details. This means no more sorting through data by hand!
For a video walkthrough of this process, check out our Workload YouTube channel. You can also visit Workload University and our Workload Help page for additional tips and guidance.
Overview: Automate Emails with Typeform and Gmail #
In this workflow, you will:
- Trigger on New Typeform Entries: Capture every new submission automatically.
- Extract Essential Data: Pull out key details such as submission time, answers, and contact information.
- Send Customized Gmail Emails: Deliver a personalized email containing the form details to your team in real time.
Before you begin, make sure you have:
- A connected Typeform account with an active form.
- A Gmail account ready for sending emails.
- A Workload account to create and manage your workflow.
Step 1: Setting Up Your Workflow in Workload #
- Launch the Workload Editor: Open the editor and create a new workflow.
- Title Your Workflow: Name it something descriptive like “Typeform to Gmail” so you can easily identify it later.
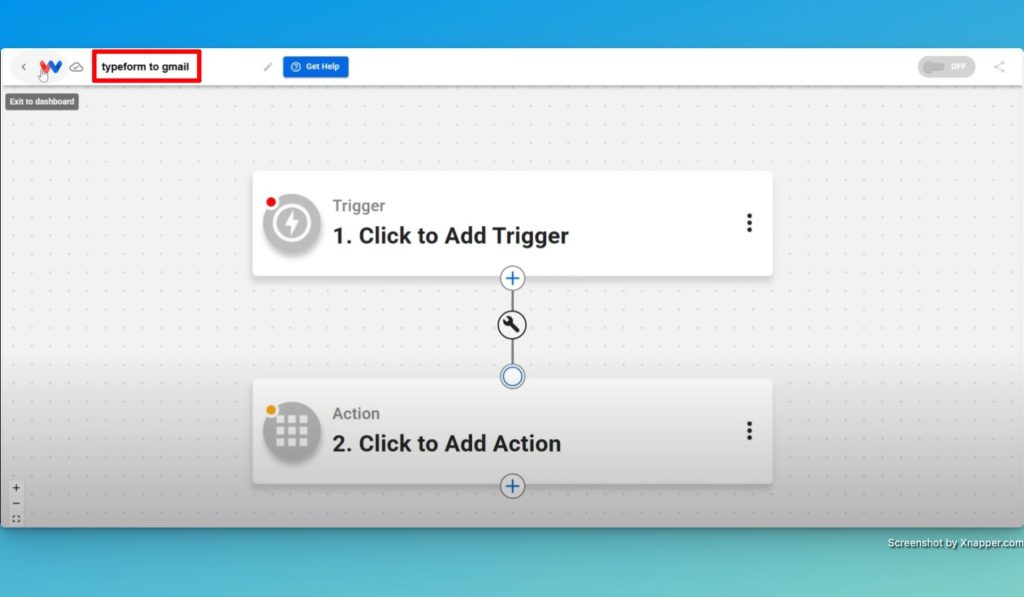
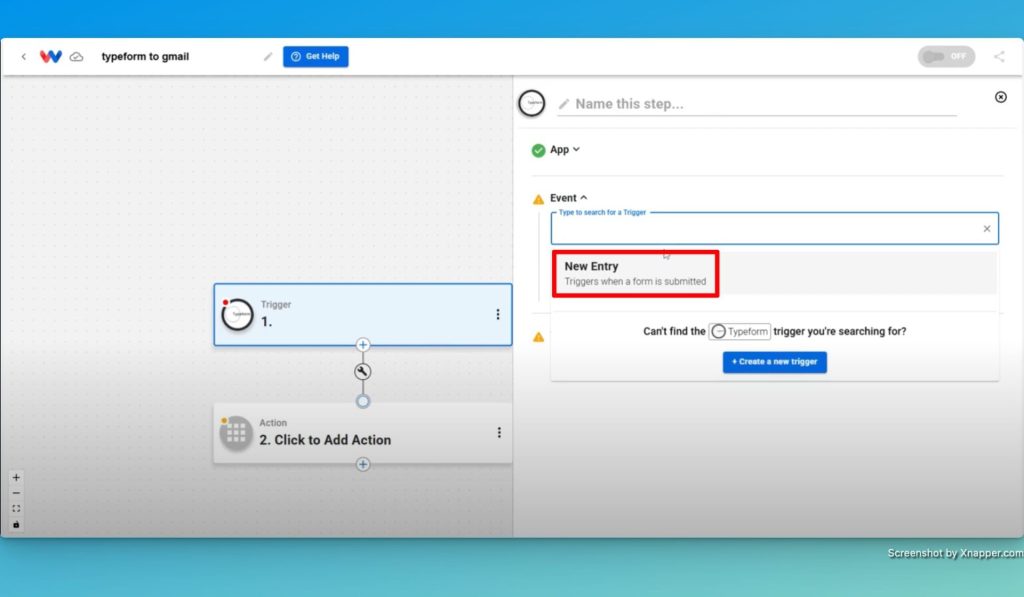
- Select the Trigger App: Choose Typeform as your trigger. Set the event to “New Entry” so that every form submission starts the workflow.
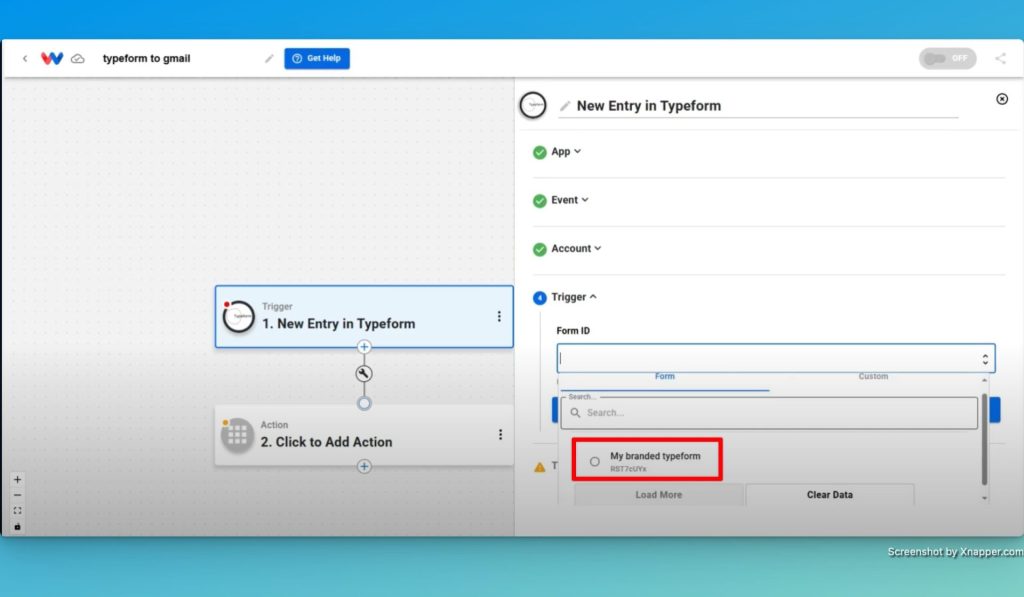
- Choose Your Form: Select the specific Typeform you want to monitor. This action ensures that every submission is captured.
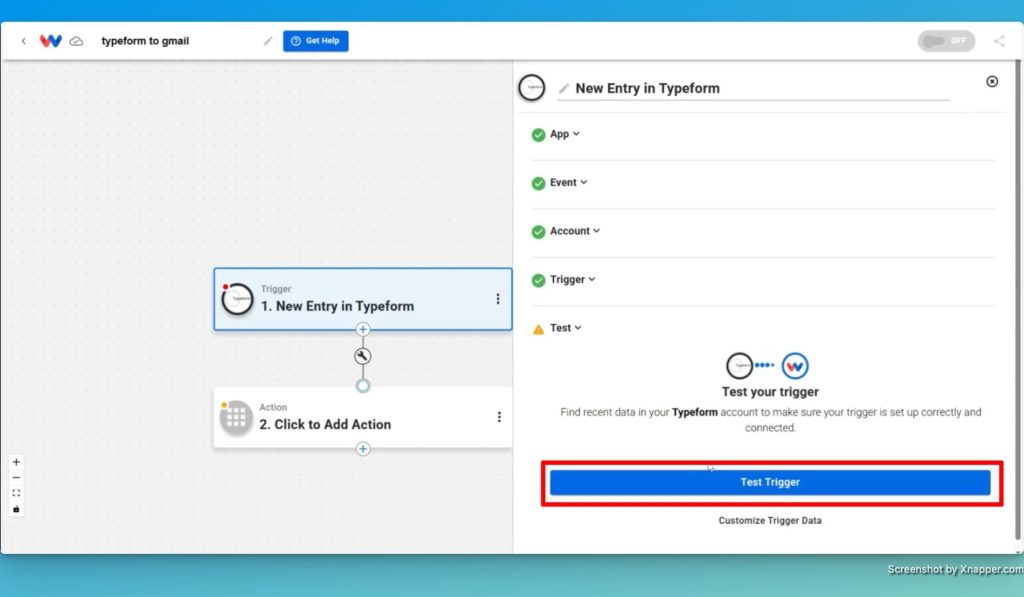
Step 2: Configuring the Typeform Trigger #
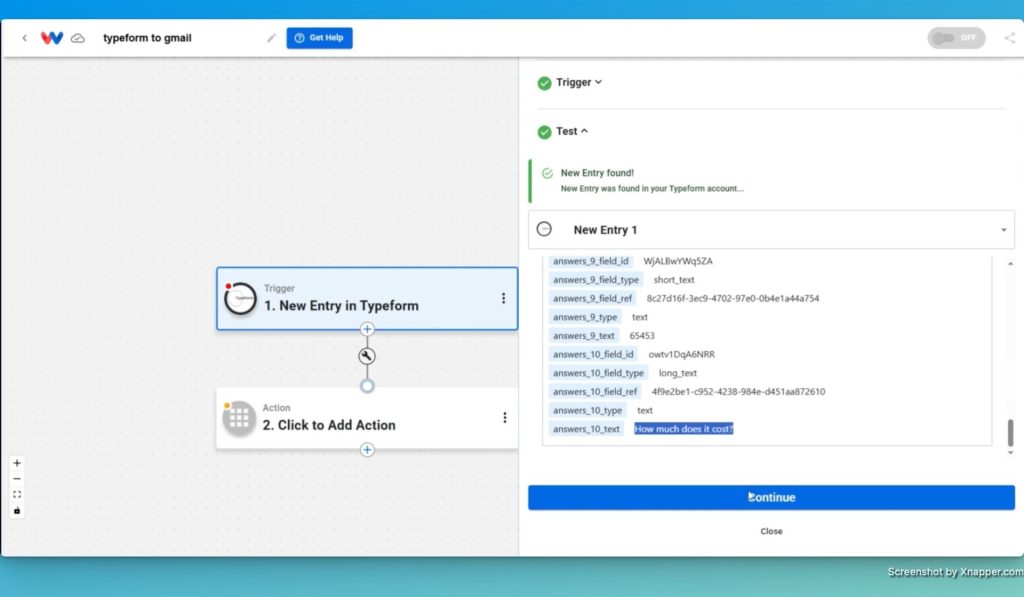
- Test the Trigger: Run a test to fetch sample data from your Typeform. The test will display information like submission time, answers to each question, and additional contact details.
- Review the Data: Notice the details captured by the trigger. Key elements include:
- Submission Time: To inform your team when a response was received.
- User Answers: Extract responses, email addresses, phone numbers, and segmented address details.
- Extract the Information: Decide which pieces of data you need to include in the email. This step prepares the data for the Gmail action.
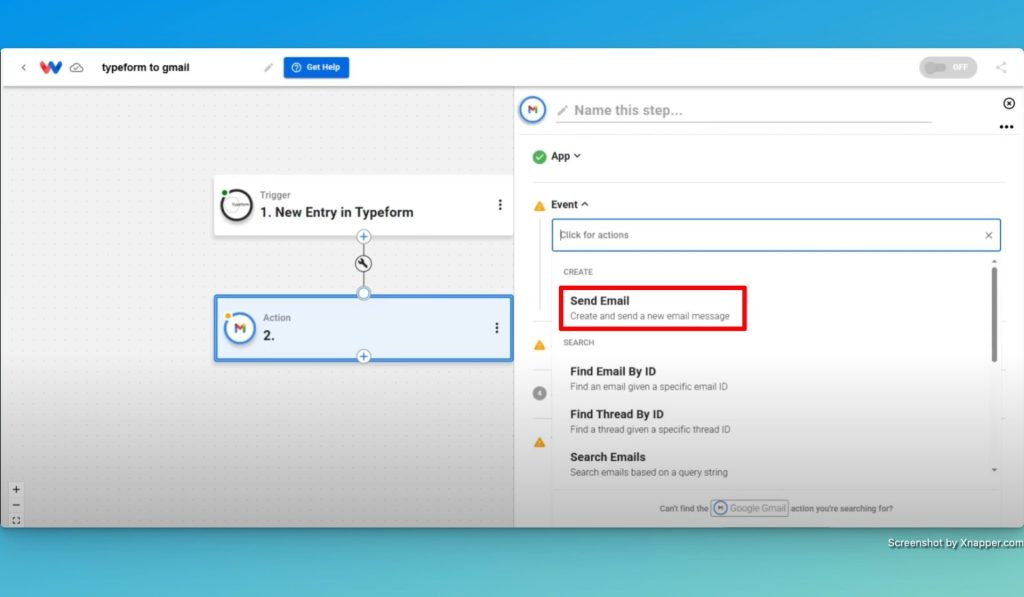
Step 3: Automating Email Delivery with Gmail #
- Add a Gmail Action: In your workflow, create a new step by selecting the “Send Email” action.
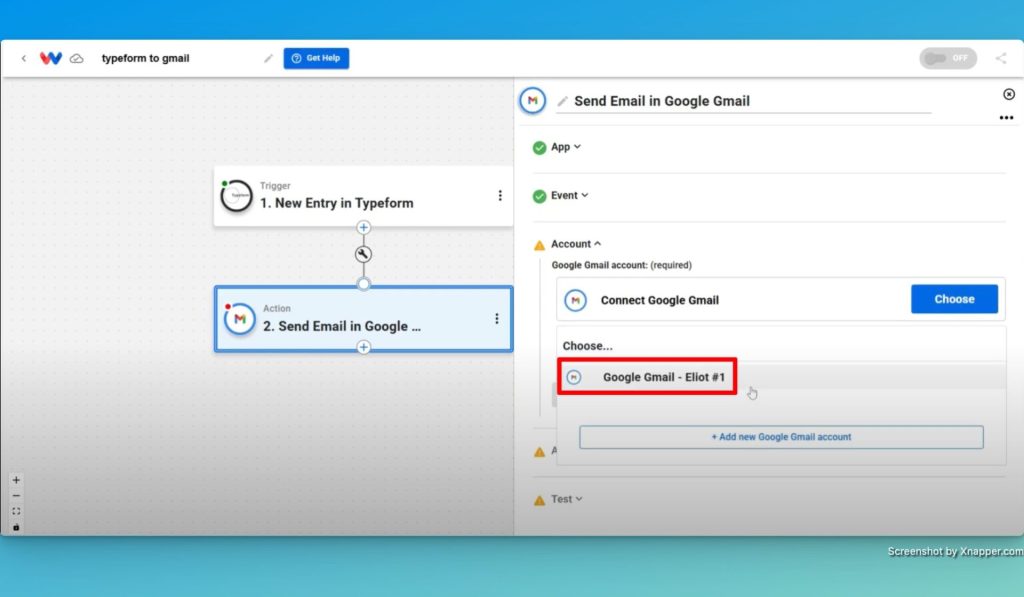
- Connect Your Gmail Account: Log in to your Gmail account if you haven’t already.
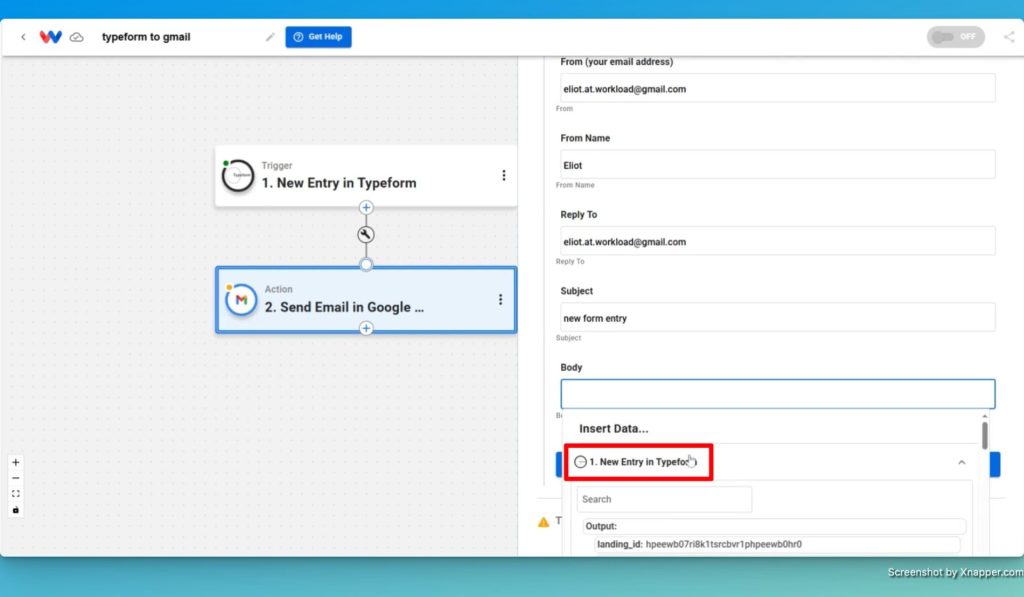
- Configure Email Settings:
- To Email: Specify the recipient (e.g., your team or yourself for testing).
- From Email and Reply-To: Use your email address.
- Subject Line: Use a clear subject such as “New Form Entry.”
- Email Body: Import the extracted data from the Typeform trigger. Insert details like the submission time and each answer, ensuring your team receives a comprehensive overview.
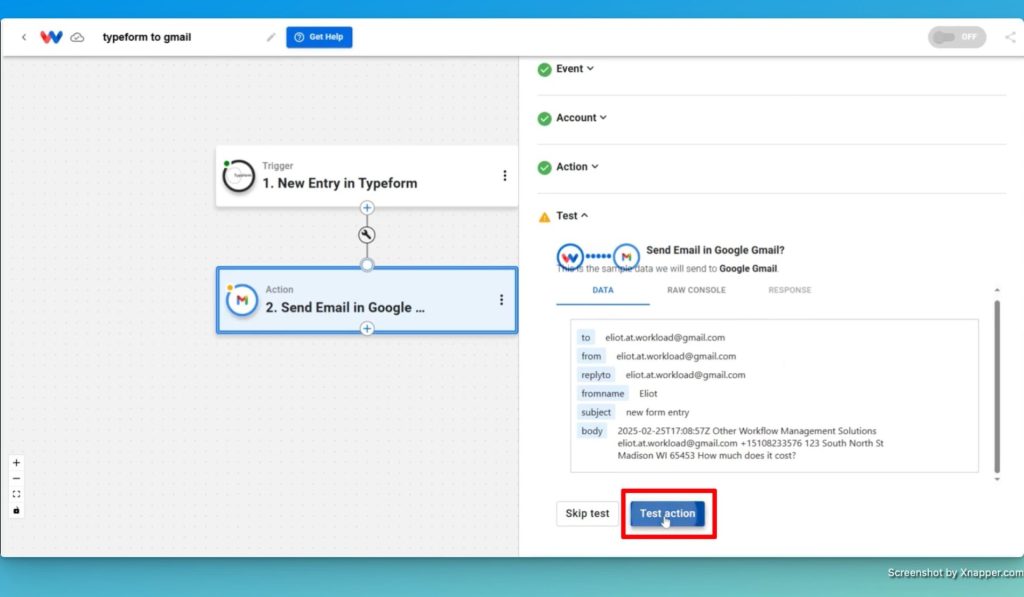
- Test the Action: Run a test to verify that the email sends correctly and displays all the intended information.
Conclusion #
Once you finish these steps, turn on your workflow to start automating emails. Every time a new Typeform entry comes in, Workload instantly triggers the process. Then, Gmail sends a detailed email with the form data. This setup makes your team more efficient and keeps communication clear by delivering quick and organized updates.
By using automation, you can save time and avoid manual work. Enjoy faster data processing and email delivery—let technology do the work for you!
Additionally, for more tips on automation and scheduling, visit Workload University or check our Workload Help page.
Happy automating!


