What if every new contact in Airtable was added to Mailchimp automatically—without any effort? With the Airtable to Mailchimp Integration, powered by Workload, you can sync contacts instantly. This keeps your marketing lists accurate and up-to-date. In this guide, we’ll show you how to automate this process and streamline your workflow.
If you need help, check out our step-by-step video on the Workload YouTube channel. You can also visit Workload University or our Workload Help page for more tips.
Overview: Airtable to Mailchimp Integration #
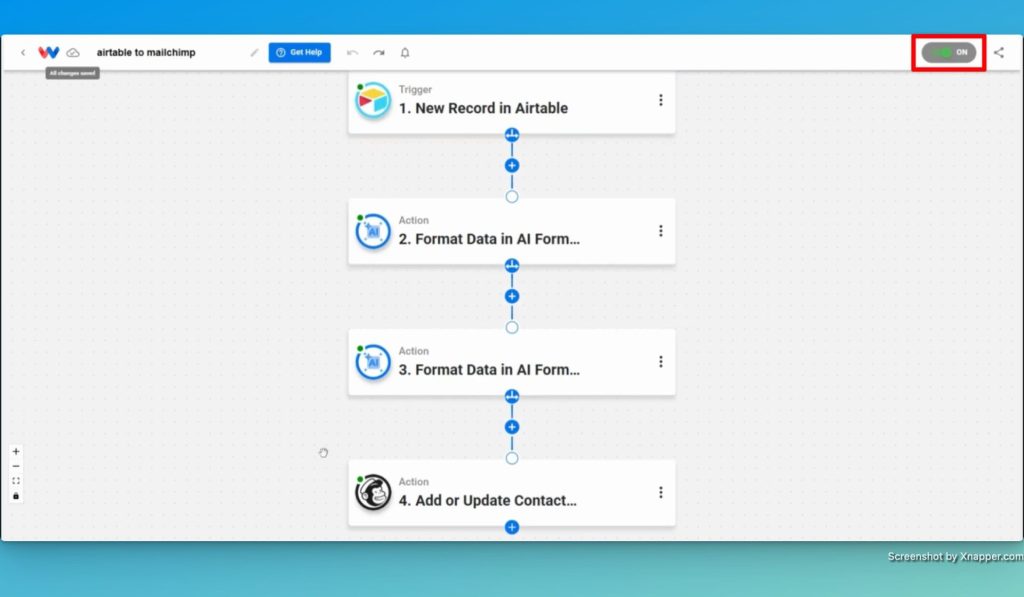
In this workflow, you will:
- Trigger on New Airtable Records: Capture new records automatically.
- Format Data with AI Formatter: Extract and structure subscriber details.
- Add or Update a Mailchimp Contact: Sync the formatted data directly to Mailchimp.
Before you start, make sure you have:
- An active Airtable account.
- A Mailchimp account with an active list.
- A Workload account to manage your workflow.

Step 1: Set Up the Trigger #
To get started, we are going to create a new workflow. Follow these steps: #
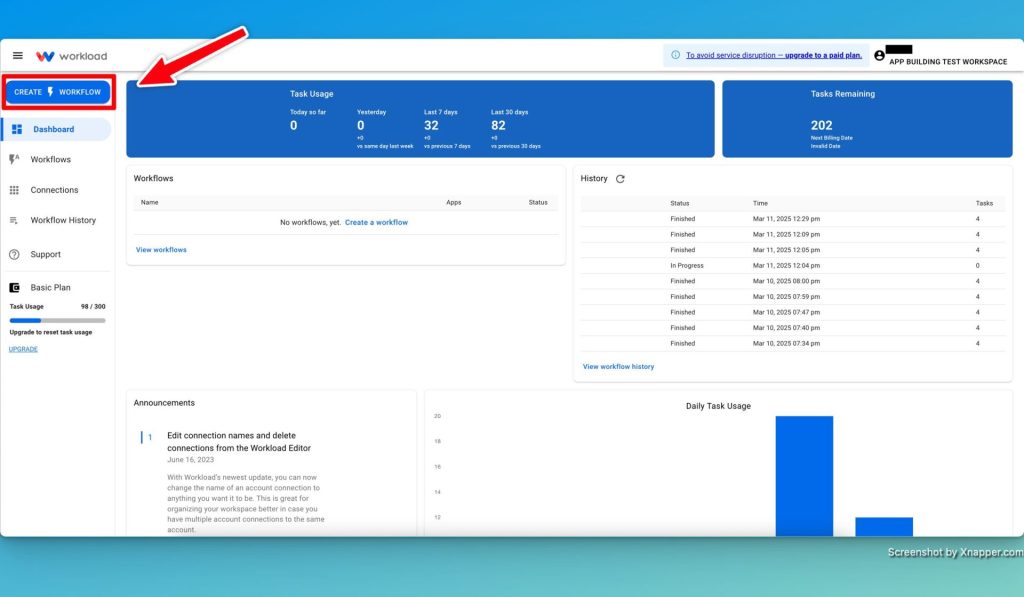
- Launch Workload: First, open Workload and create a new workflow.
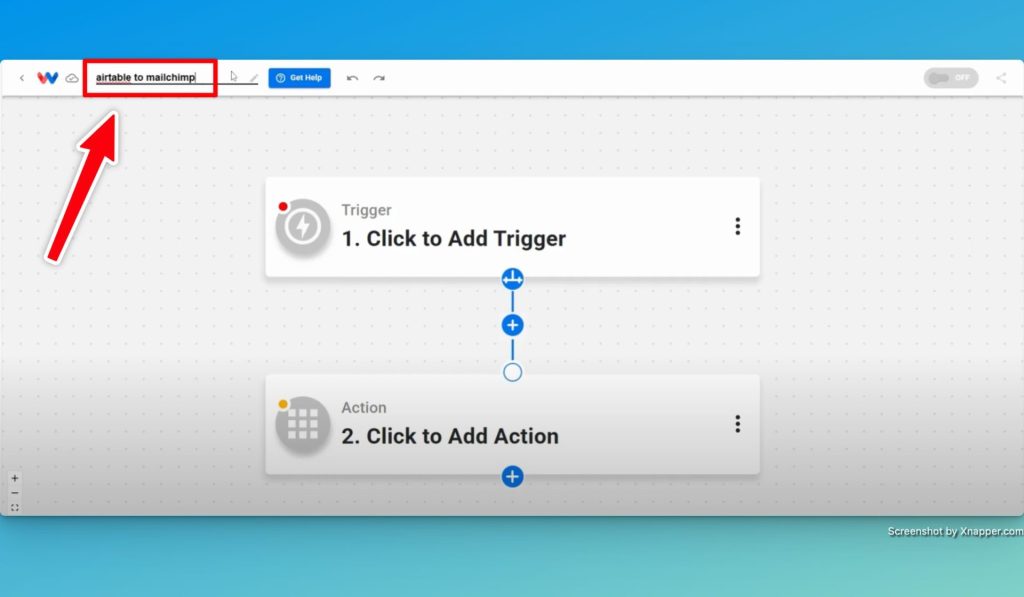
- Title the Workflow: Now, give your workflow a title.
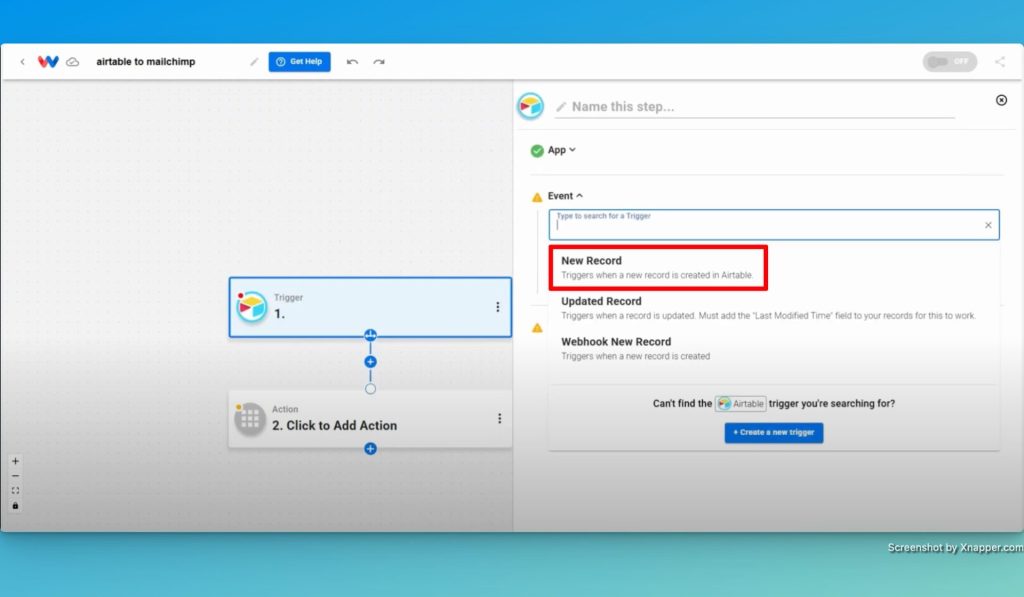
- Choose the Trigger App and Event: Choose the app Airtable, then select the “New Record” event.
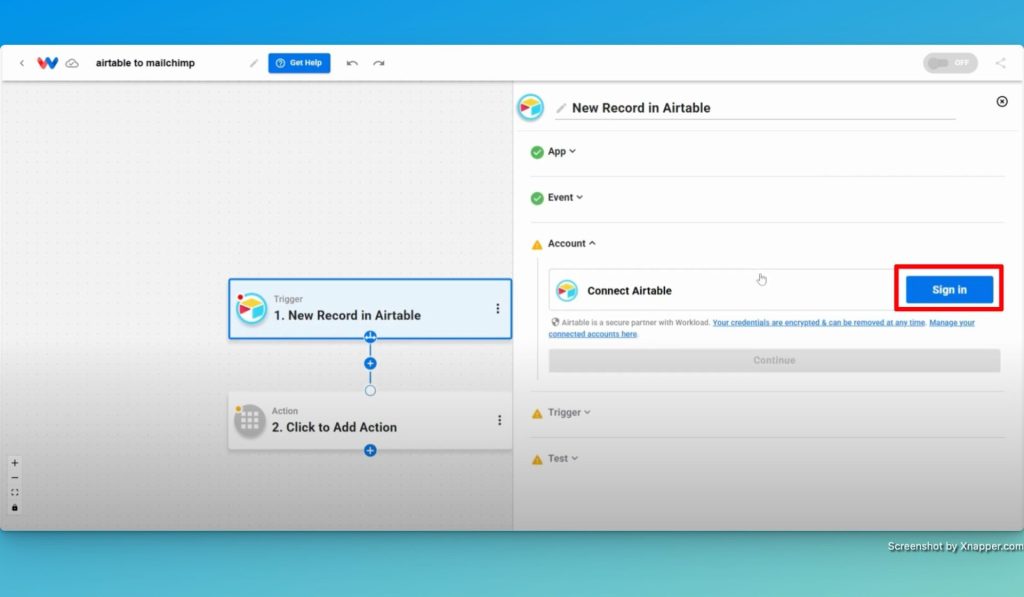
- Connect Airtable: Link your account by clicking “Sign In” or choosing an existing connection.
- Select the Base and Table: Choose the base and table (e.g., “Subscribers”) to watch for changes.
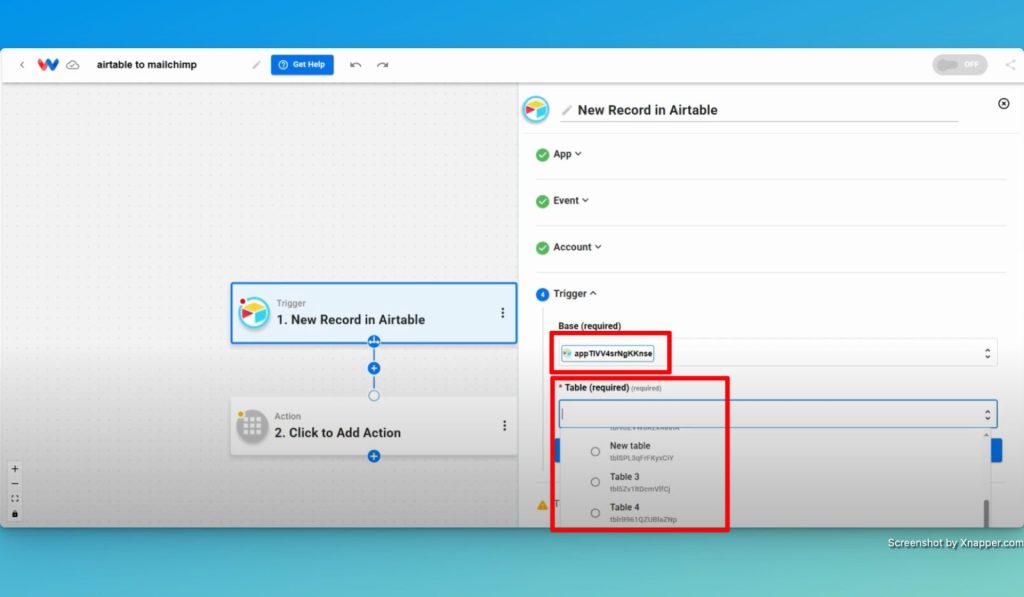
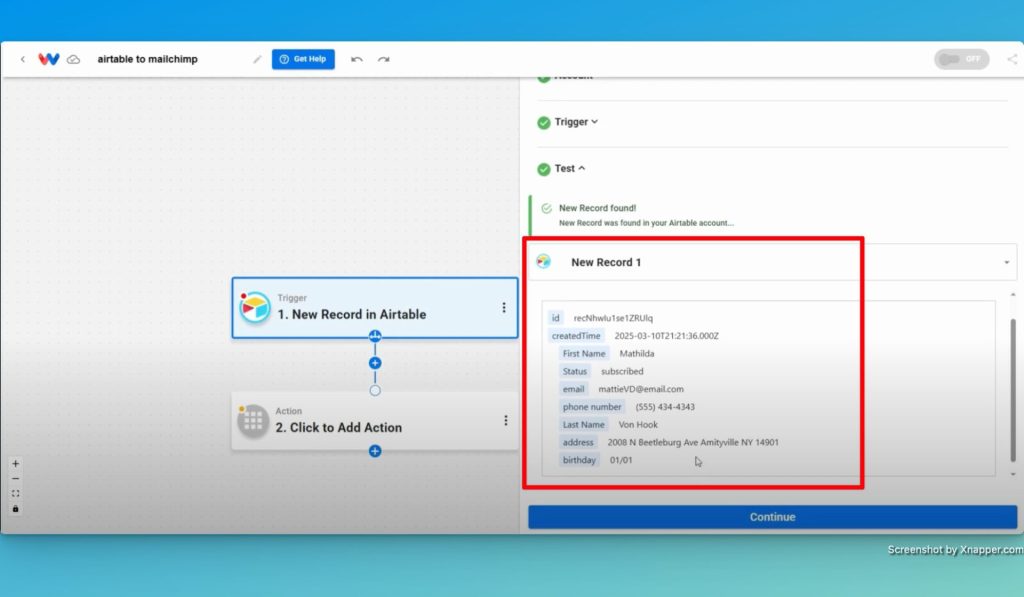
- Test the Trigger: Finally, test the trigger to make sure you see new records
Step 2: Format the Data with AI #
Now, let’s format the data from the trigger using the AI Formatter by Workload tool by following these steps: #
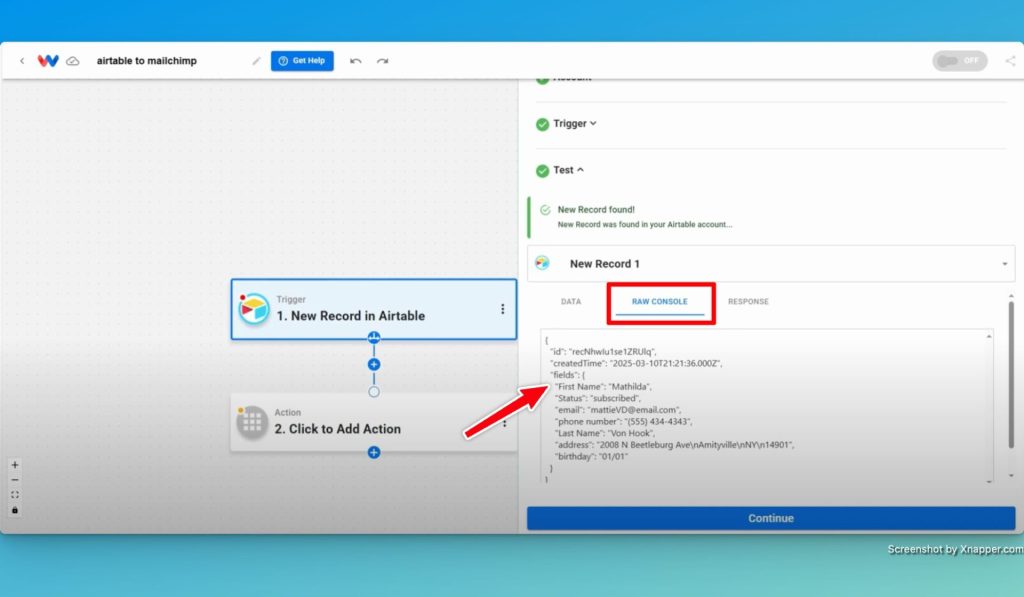
- Review the Data: First, let’s check to see if the data you need is nested within an array. To do this, look for the indent in the “Raw Console” trigger response. If so, we will need to format that data in order to use it.
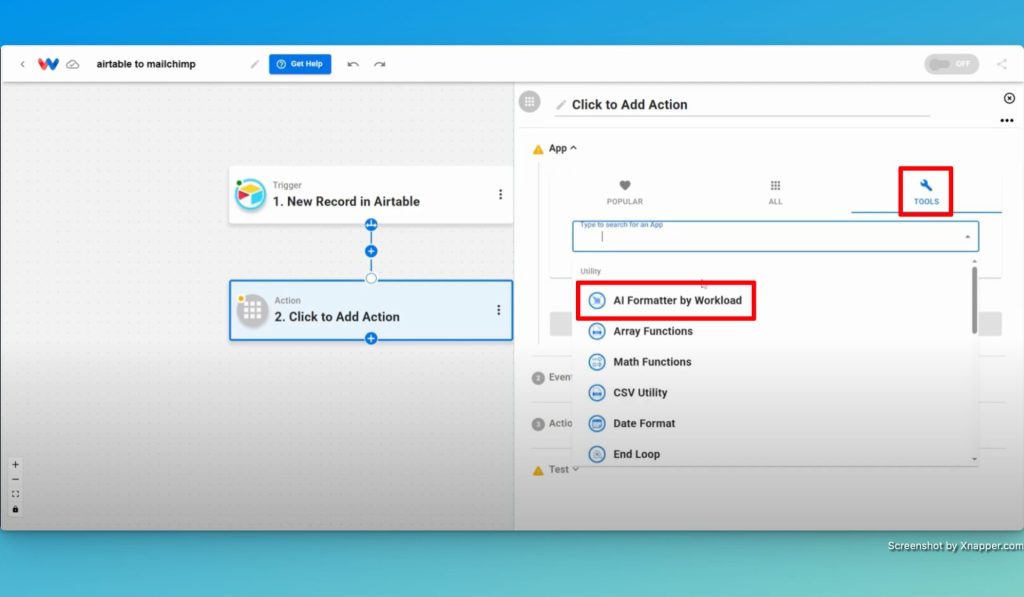
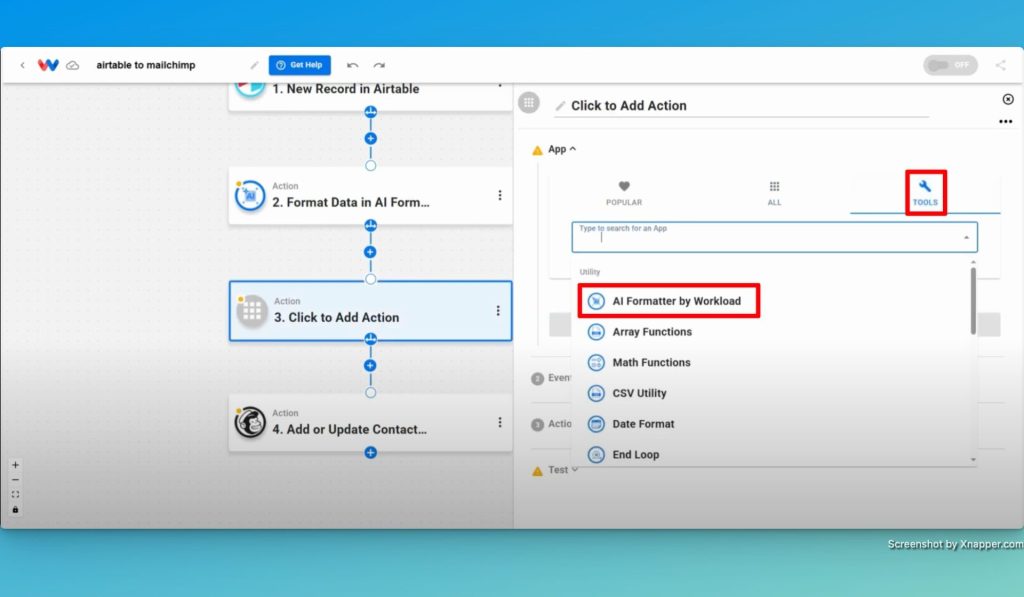
- Add an AI Formatter by Workload step: For the Step 2 action, click the Tools menu and then choose the “AI Formatter by Workload” utility. Next, choose the “Format Data” event.
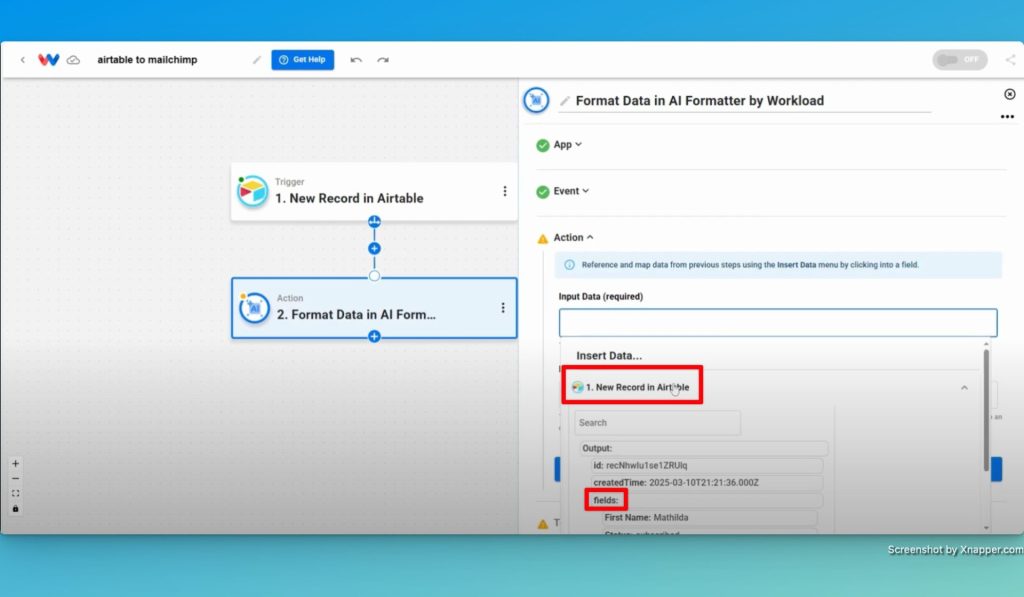
- Select the Input Data: Click in the “Input Data” field and then on the response from the trigger. Now, choose the field that says “fields”.
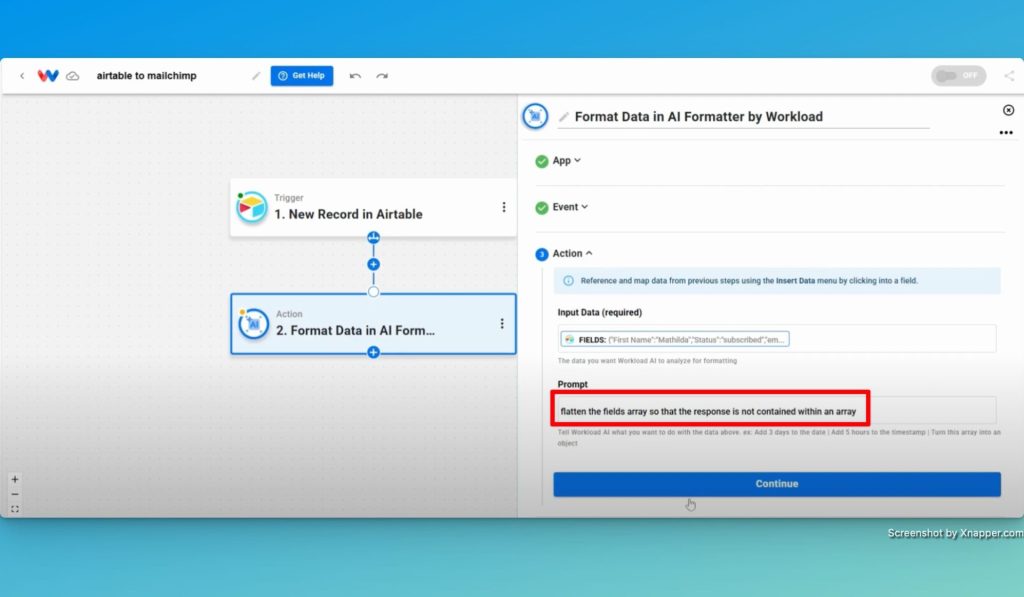
- Define the Formatting: Prompt the tool to “flatten the fields array so that the response is not contained within an array”. fields. This will convert nested arrays into a flat, easy-to-read list. Consequently, your data becomes ready for the next step.
- Test and Verify Formatting: Finally, test your action and make sure that the response data is all separated correctly.

Step 3: Create a Mailchimp Action Step #
Now, let’s add a step that will add or update a contact into Mailchimp. #
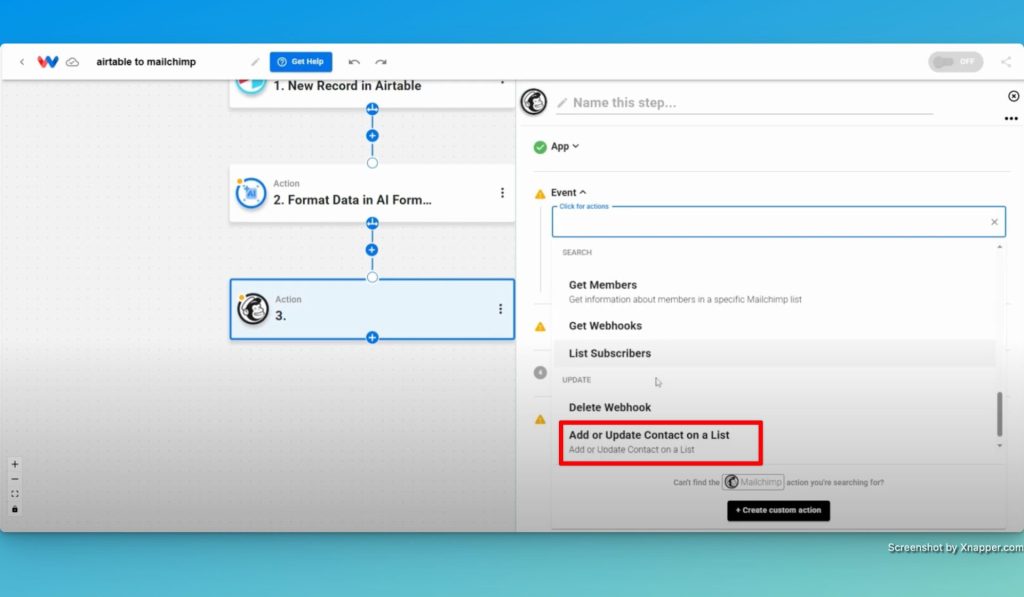
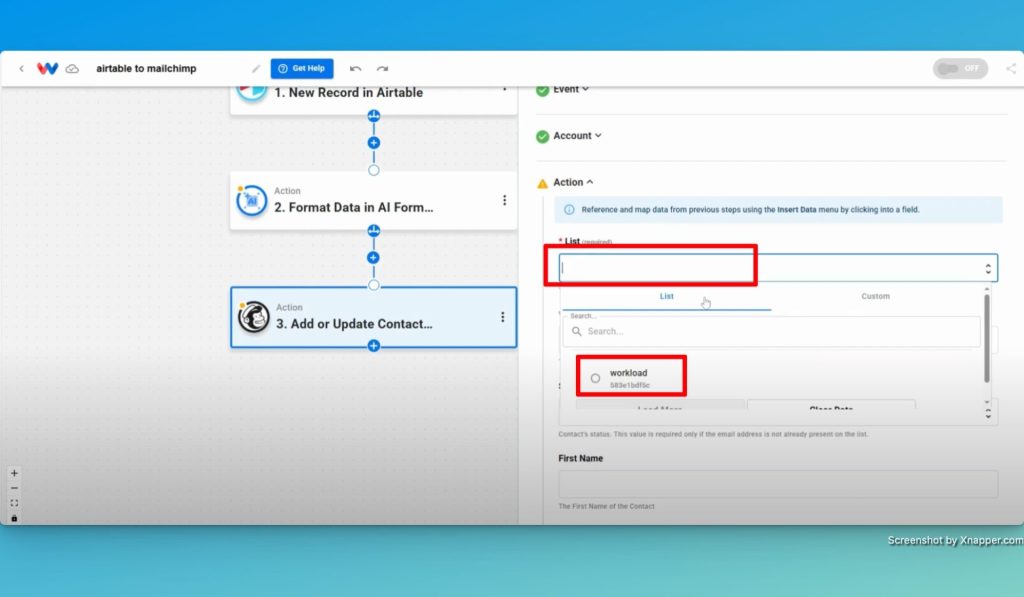
- Setup Mailchimp action: Add a new step and choose Mailchimp as the app. Then, select “Add or Update a Contact on a List” as the action event.
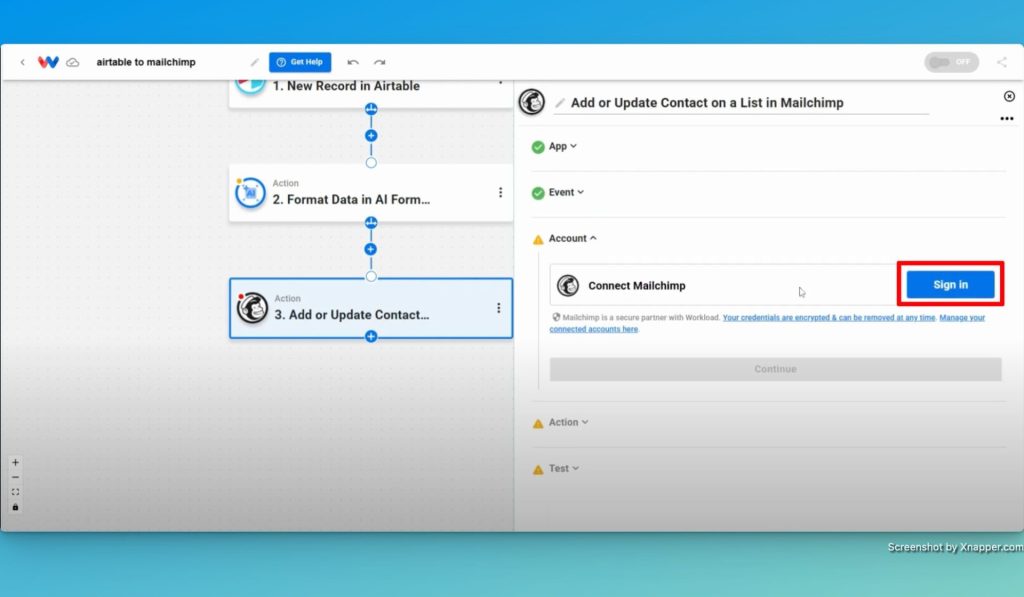
- Connect your Mailchimp Account: Click the Sign In button or choose an existing Mailchimp connection.
- Choose Mailing List: Now, choose your mailing list (e.g., “Workload List”).
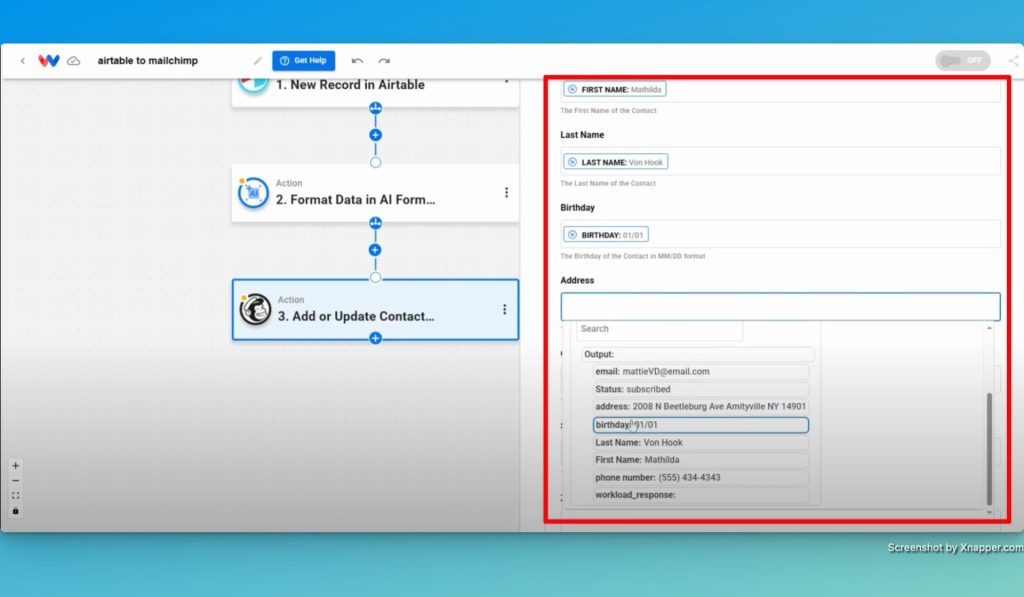
- Map Contact Details: Map fields between Airtable and Mailchimp. (Note: You may need to add another step to format the fields into the proper format that is required by Mailchimp). These are examples of commonly used fields:
- Email Address: Choose the email from the formatted data.
- First and Last Name: Pull the email from the formatted data.
- Subscription Status: Set the status to “Subscribed”.
- Phone Number & Address: Map the phone number and address fields from the Airtable step.
- Email Address: Grab the email address from the formatted data response.
Step 4: Format Fields (if needed) #
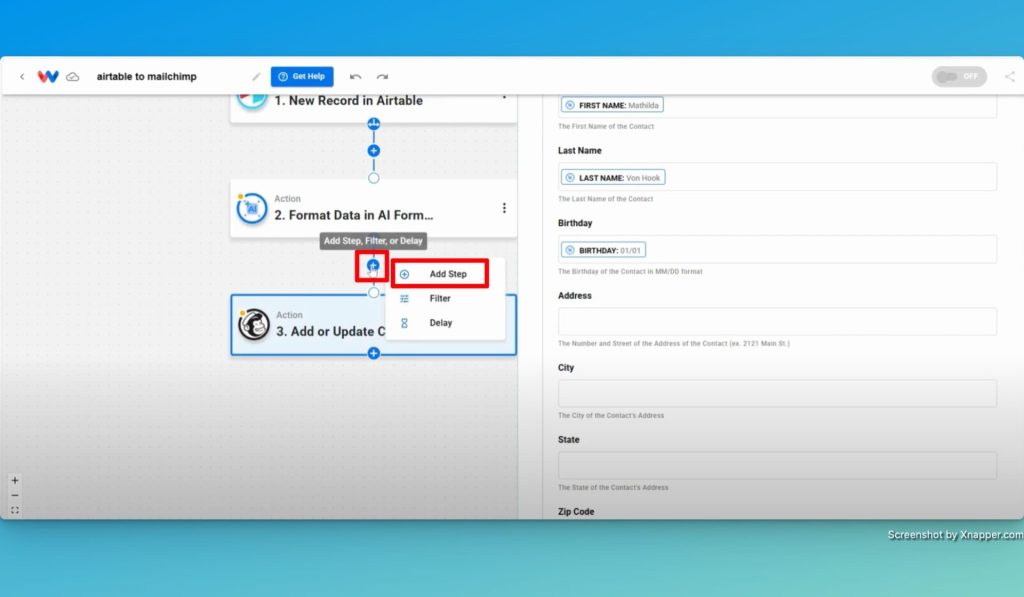
- Review Address Format: Next, check if the address is stored as one field in Airtable.
- Add a Format Data Step: Add a step in between Steps 2 and 3 by clicking the “+” icon and then the “Add Step” button.
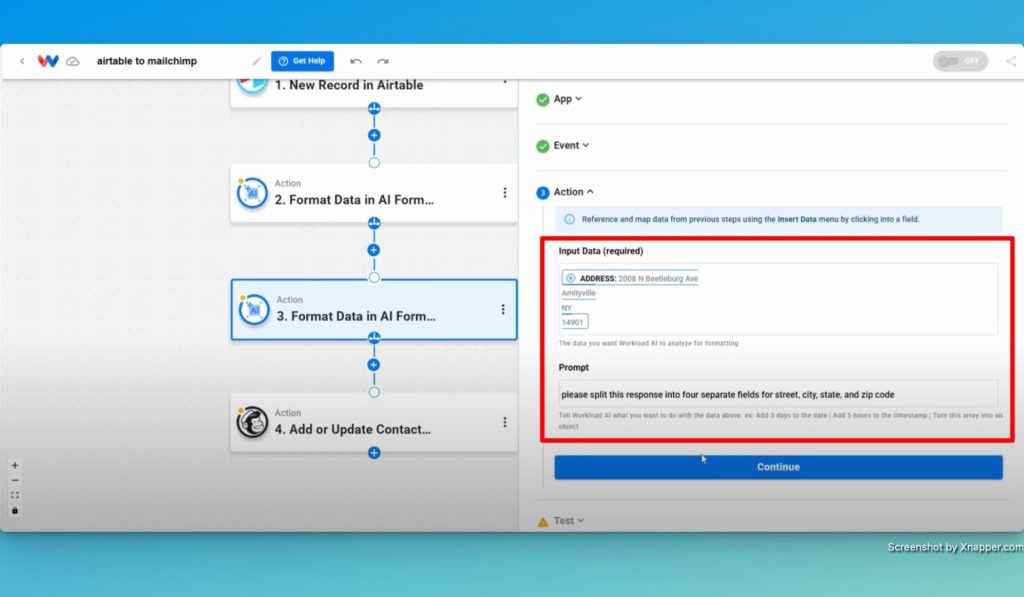
- Setup the action: Click the “Tools” menu and then select the “AI Formatter by Workload” utility. Now, choose the “Format Data” event.
- Prompt the AI Formatter: Prompt the formatter tools to split the address into street, city, state, and zip code.
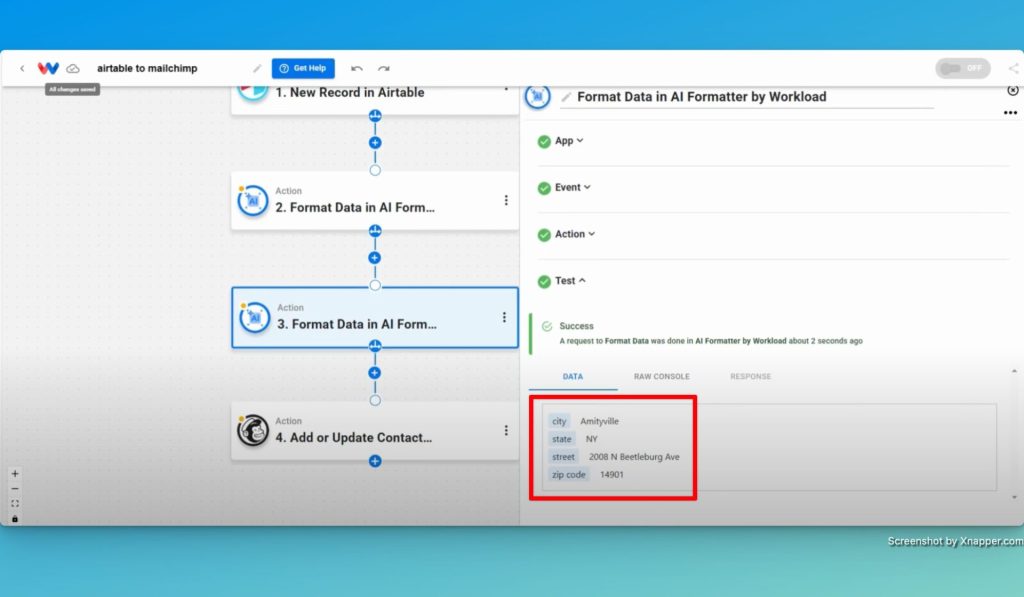
- Test and verify the response: Lastly, check the fields on the Formatter step to make sure they have been separated correctly.
Step 5: Test and Activate your Airtable to Mailchimp Integration #
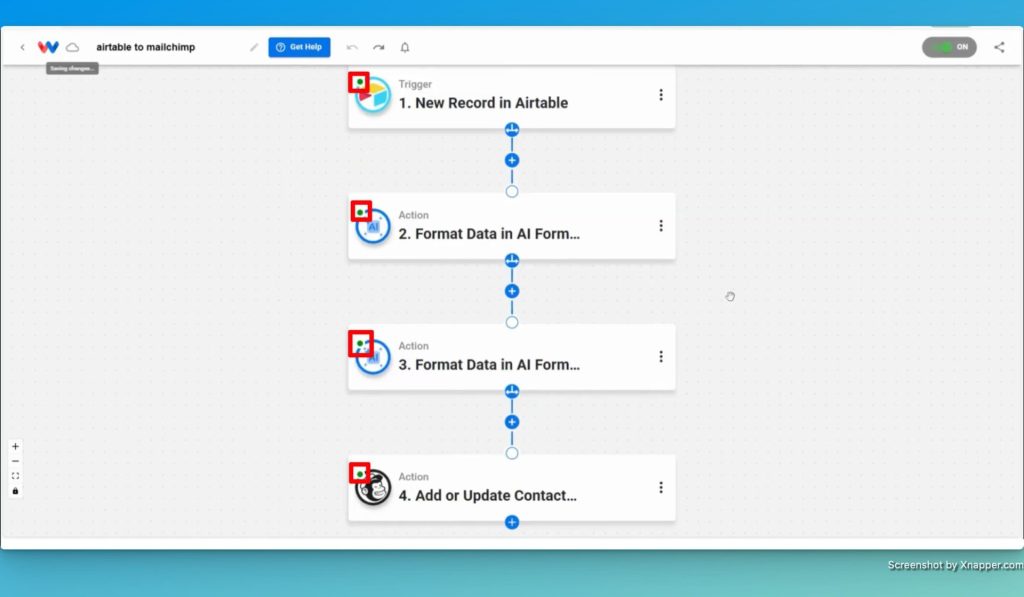
- Verify the Workflow: Test the workflow to make sure everything works as expected and that all the steps have green indicators.
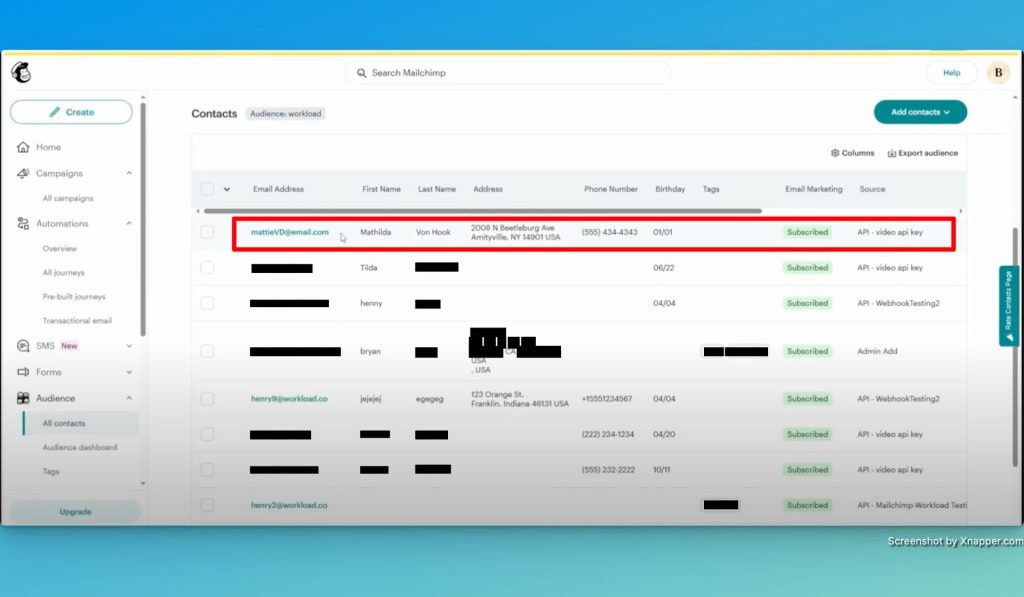
- Check Mailchimp: Confirm that the contact was added or updated correctly.
- Activate the Workflow: Finally, turn on the workflow to begin syncing new Airtable records with Mailchimp automatically.
Conclusion: Finishing the Airtable to Mailchimp Integration #
Now, with Workload, you can effortlessly automate your Airtable to Mailchimp integration and as a result, your email lists will always be accurate and up to date—without any manual effort. Consequently, you’ll save time and maintain consistency in your marketing efforts.
For more tips, be sure to visit Workload University or check out our Workload Help page.
Focus on success- let Workload handle the rest!


