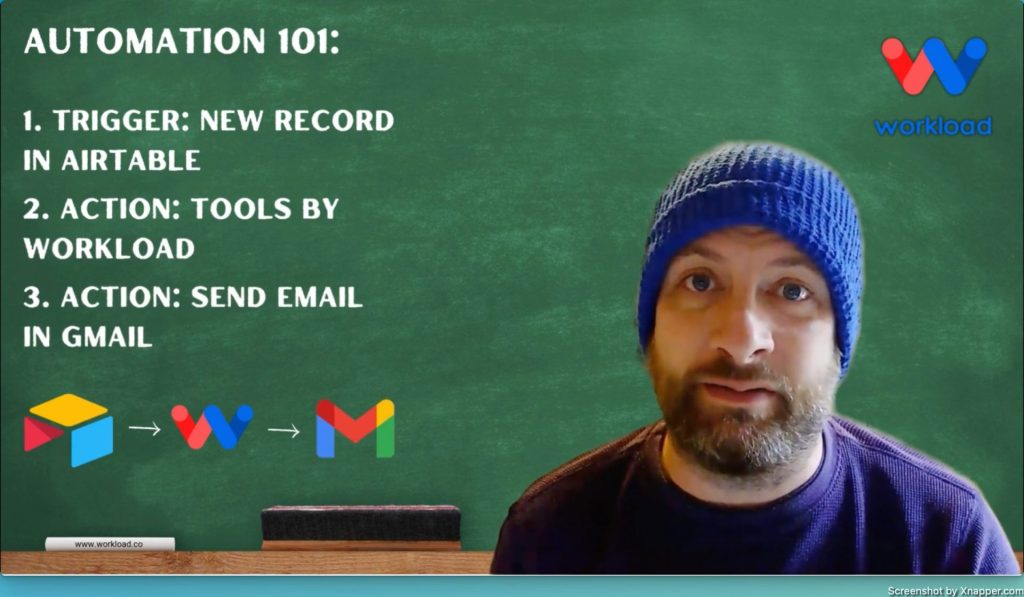
Repeating the same tedious tasks every day can feel like a never-ending loop. Imagine if, instead, a smart system handled those mundane details for you! With Workload’s Airtable Gmail Integration, your workday transforms instantly. The workflow springs into action the moment a new record appears in your Airtable subscribers table. Then, it elegantly uses an AI Formatter to organize your data and then send out a custom welcome email via Gmail. In this post, we reveal how this creative automation empowers business owners to break free from repetitive chores and focus on what truly matters—growing their business.
If you need help, check out our step-by-step video on the Workload YouTube channel. You can also visit Workload University or our Workload Help page for more tips.
Overview: Airtable to Gmail Integration #
In this integration, you will:
- Trigger on a New Airtable Record: Easily detect new entries in your Airtable subscribers table.
- Format the Data: Use our AI Formatter tool to quickly flatten the fields array.
- Send an Email via Gmail: Automatically send a friendly welcome email as soon as a new record appears.
Before you begin, please check that you have:
- An active Airtable account with a base and table set up.
- A Gmail account ready for sending emails.
- A Workload account to build and automate your workflow.
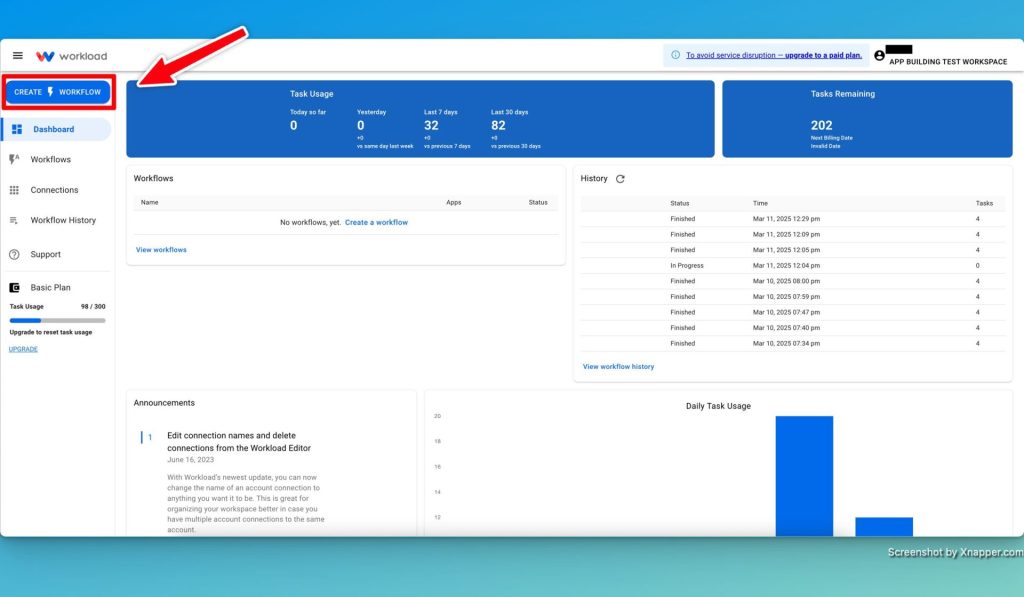
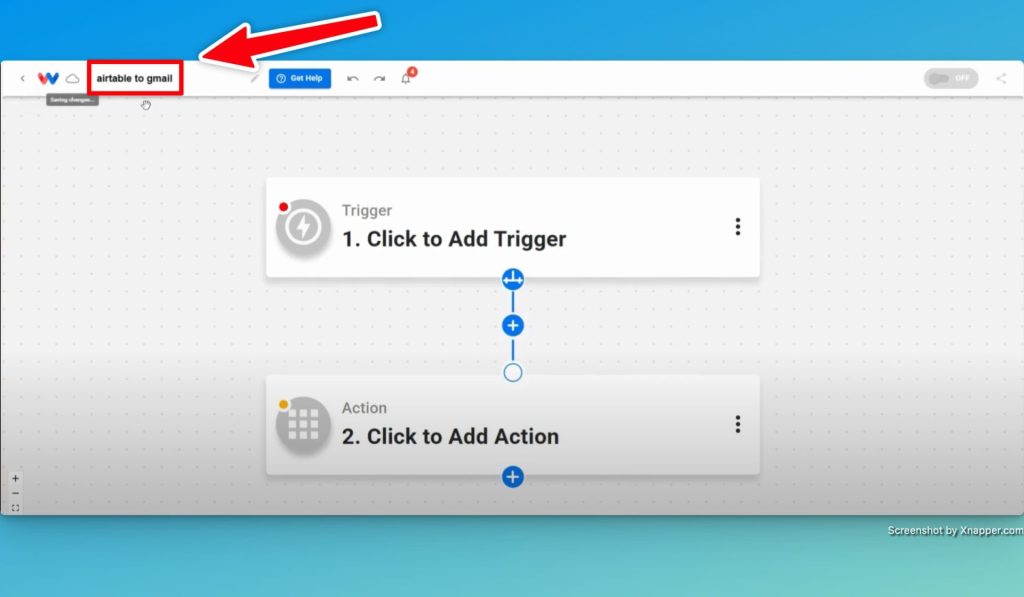
Step 1: Create a New Workflow #
- Launch Workload: Start by opening Workload and clicking on “Create Workflow“.
- Name Your Workflow: Give your workflow a clear title (e.g., Airtable to Gmail Integration).
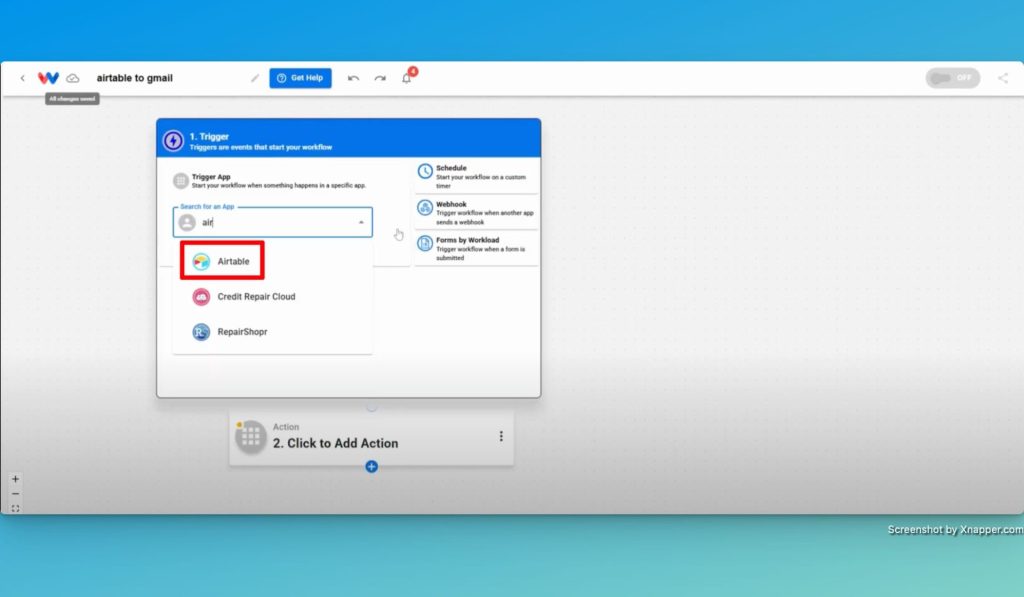
Step 2: Setup Your Airtable Trigger #
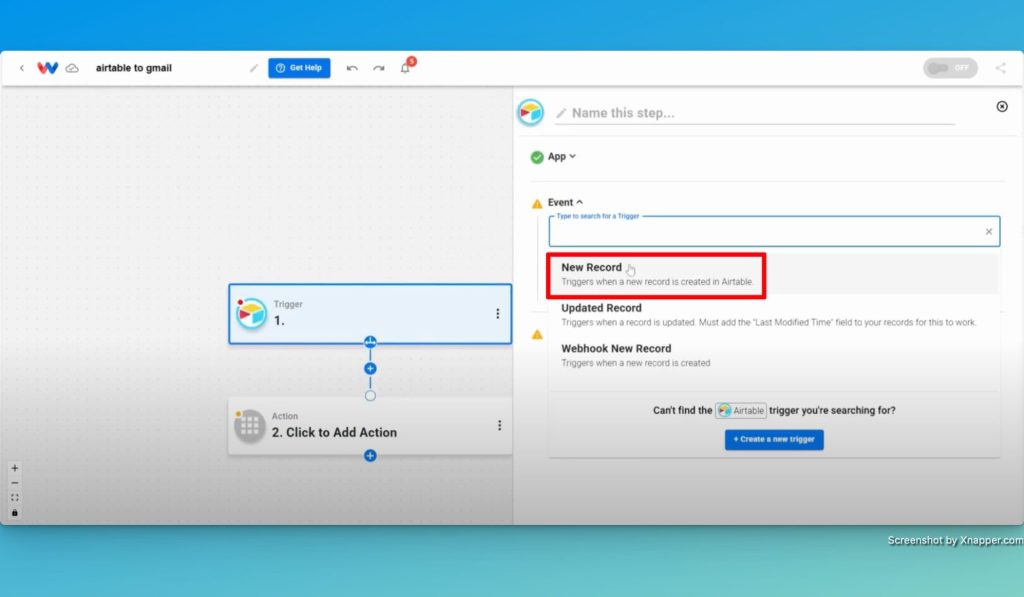
- Select Trigger App: Now, choose Airtable as the trigger app.
- Set the Trigger Event: Now, choose “New Record” as the event.
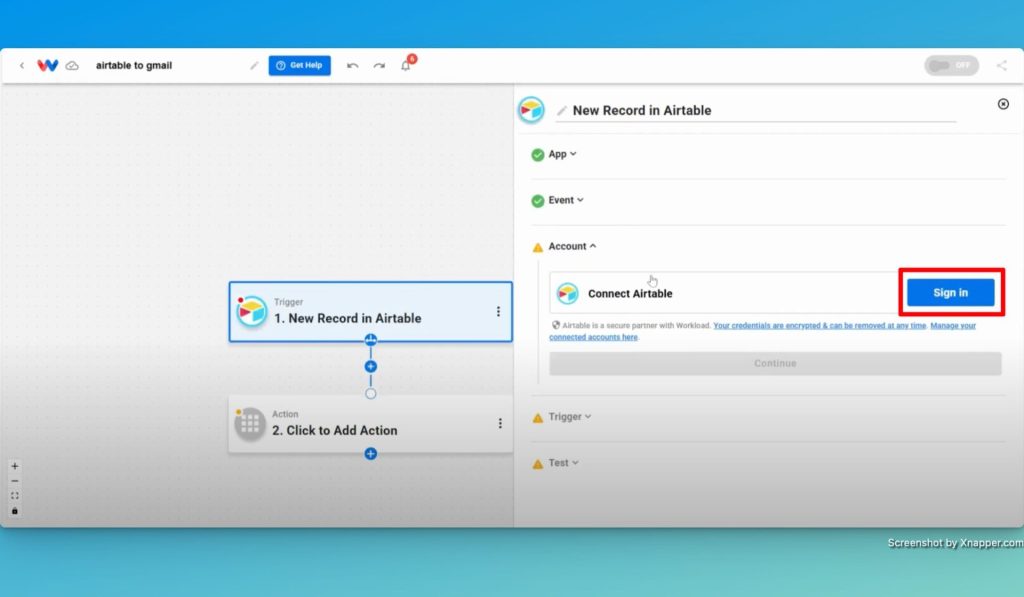
- Connect Your Account: Securely link your Airtable account to Workload by clicking “Sign In” or by choosing an existing connection.
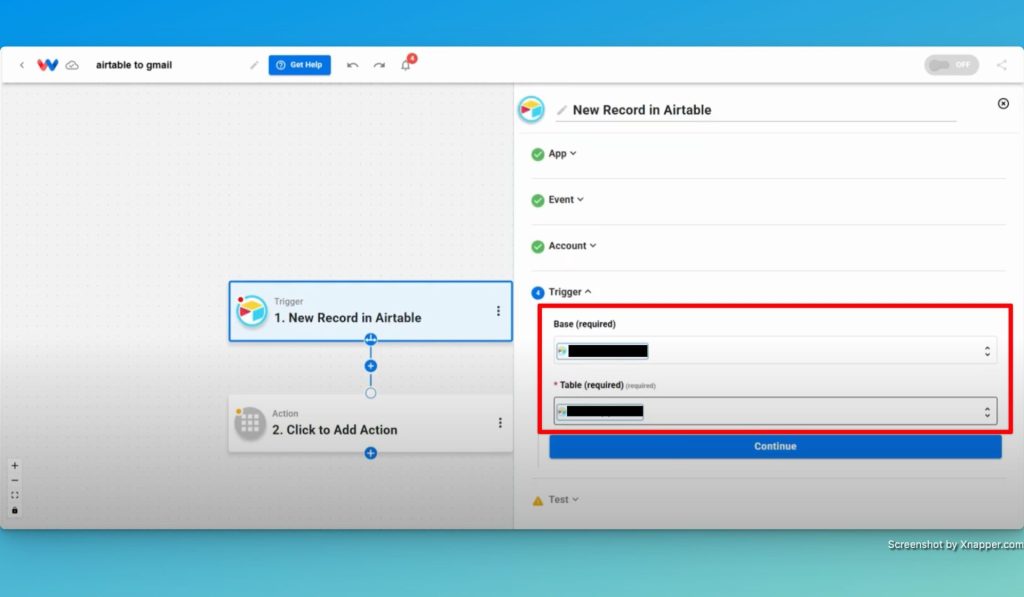
- Pick Your Base and Table: Now, choose your base (e.g., Workload Testing) and then the specific table (e.g., Subscribers Table) from the dropdown menus.
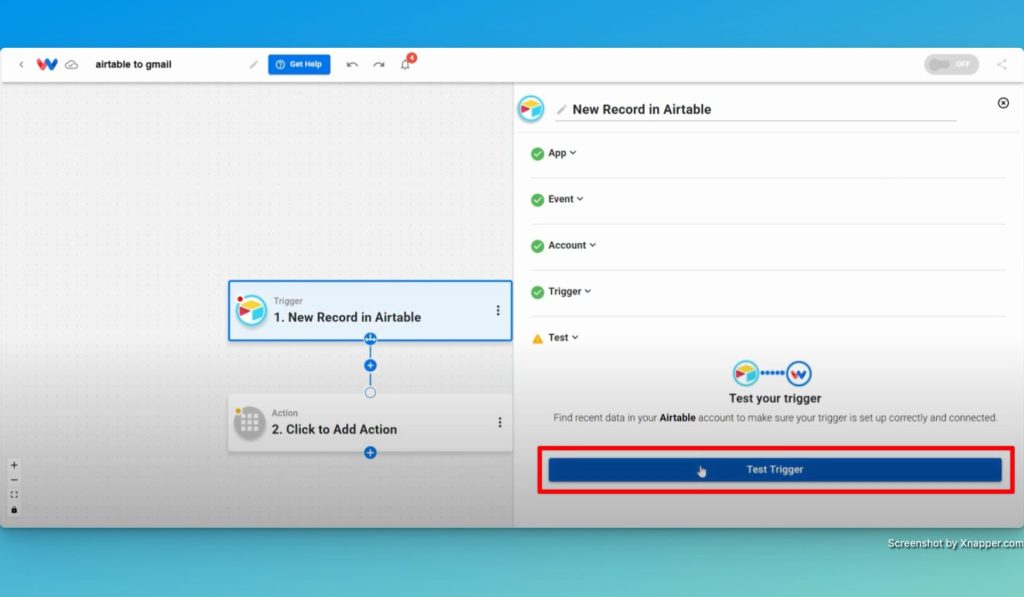
- Test the Trigger: Finally, run a test to confirm that a new record initiates the workflow.
Step 3: Format the Data Using AI Formatter #
- Create AI Formatter Step: First, click in the box that says “Click to Add Action” and then choose the AI Formatter by Workload utility from the Tools menu.

- Choose the Input Data: Click in the “Input Data” box and then on “New Record in Airtable”. Next, choose “fields:” from the list of options.
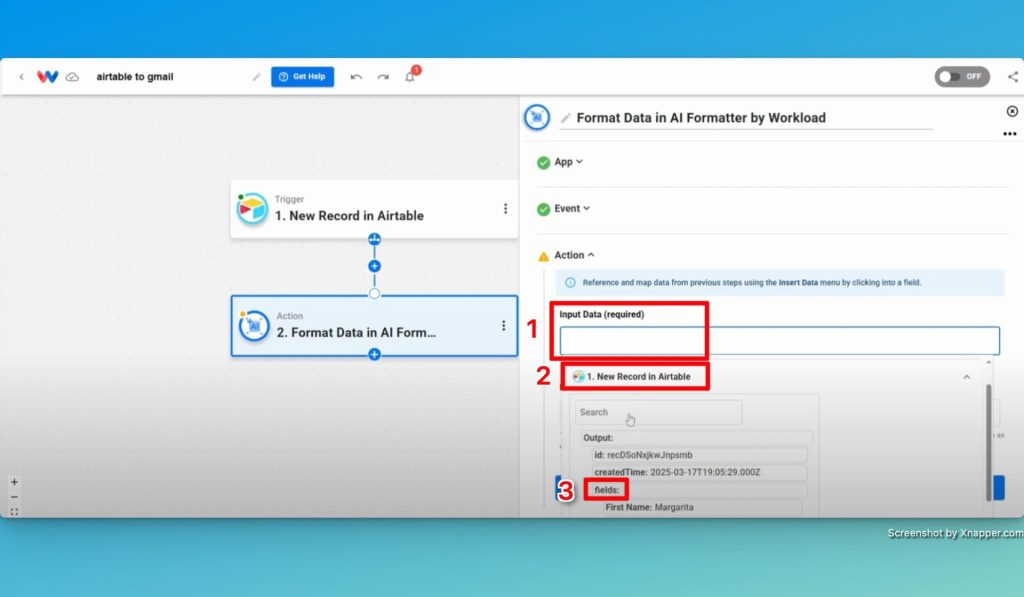
- Prompt the AI Formatter: Enter a prompt to the AI Formatter to flatten the fields array (e.g., “Flatten the fields array so that all data is not contained within an array”).
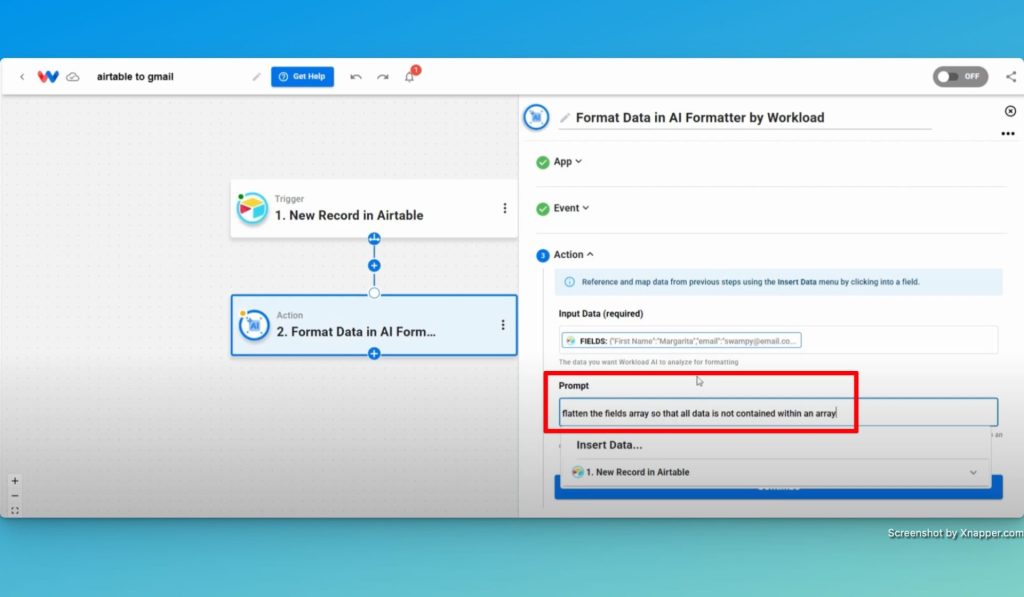
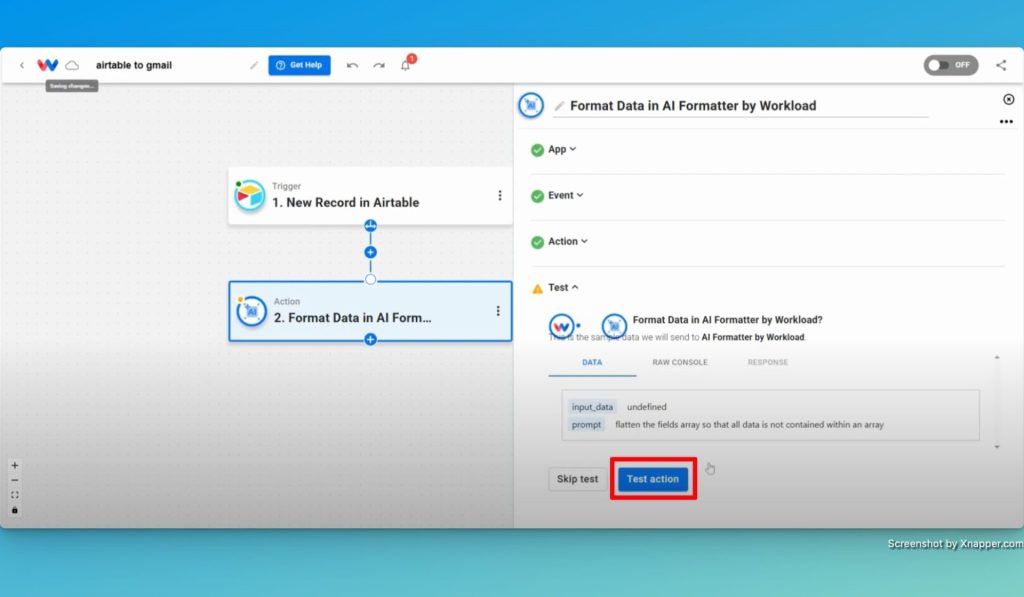
- Test the Action: Finally, test the action to make sure all data appears flattened. This will allow the data to be formatted correctly for the next step.
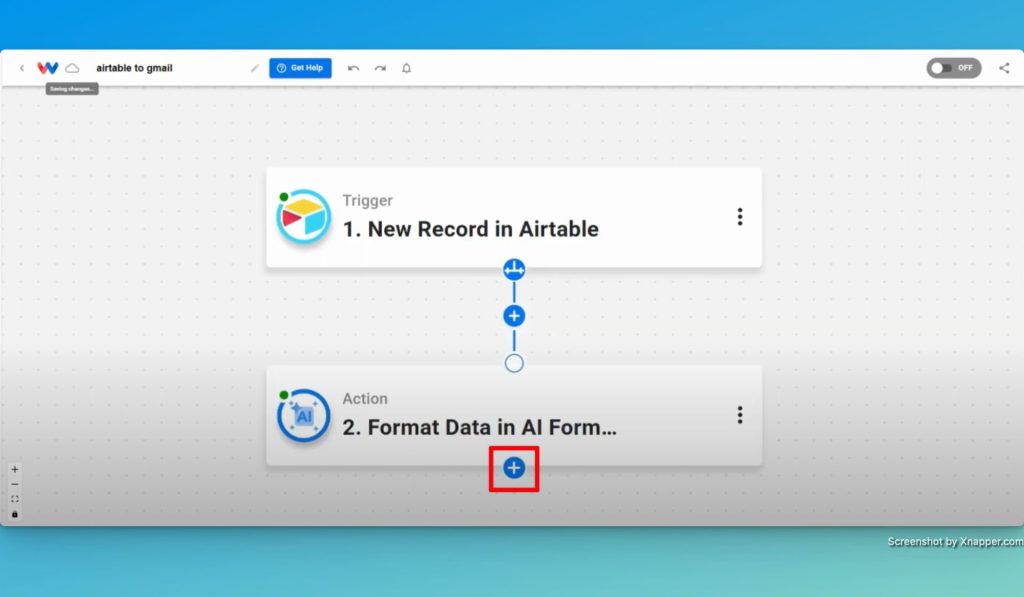
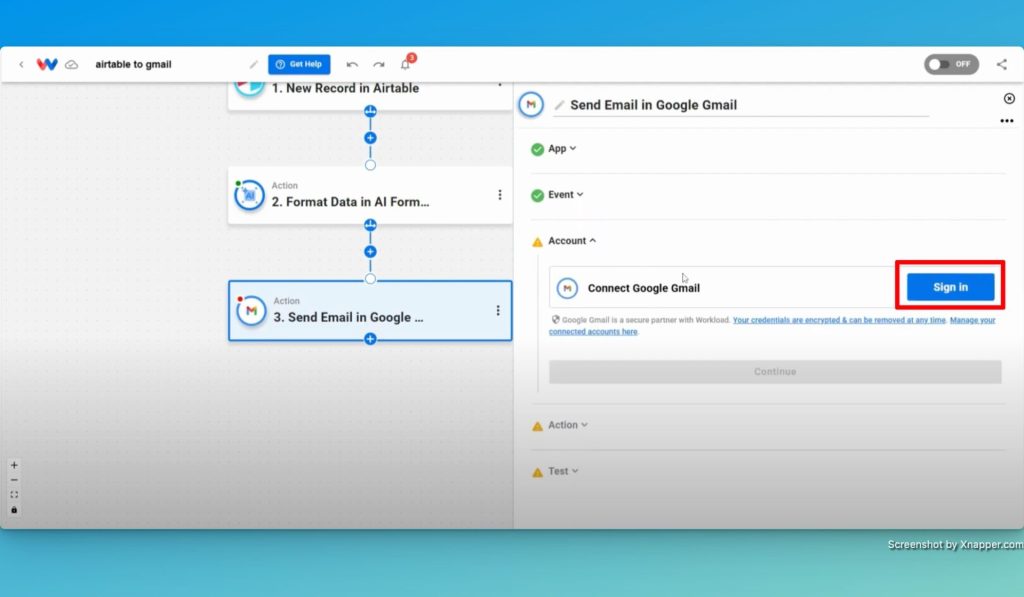
Step 4: Create a Gmail Action #
- Add a New Step: Click the blue “+” button at the bottom of Step 2 to add a new step.
- Select Action App & Event: Select Google Gmail as the app and then choose “Send Email” as the action event.

- Link Your Gmail Account: Securely connect your Gmail account to Workload by clicking “Sign In” or by choosing an existing connection.
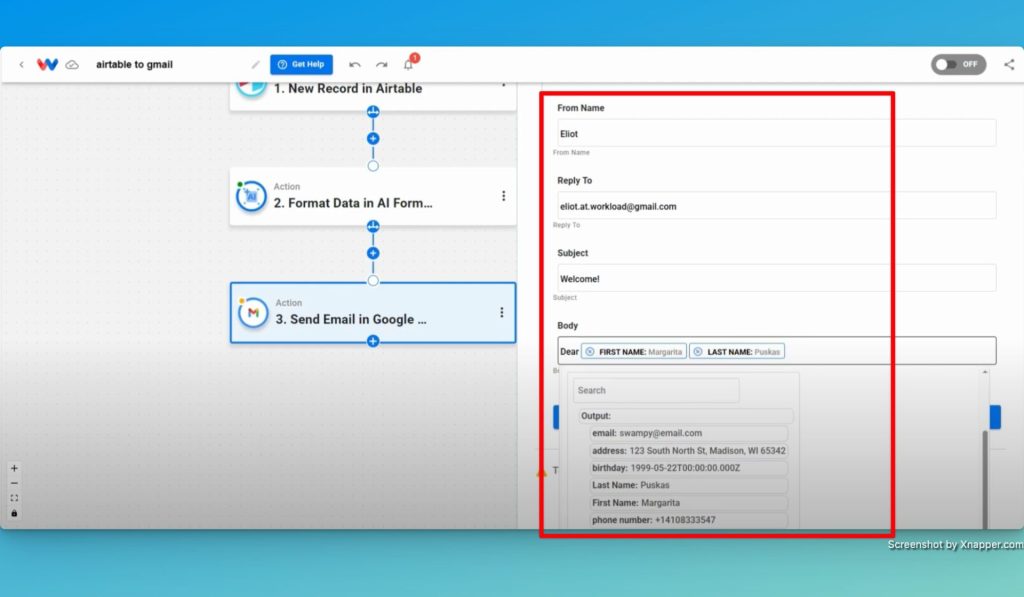
- Import Email Details: Now you need to map the data from the prior steps into your email. To start, focus on these fields:
- To
- From
- From Name
- Reply-to
- Subject and Body
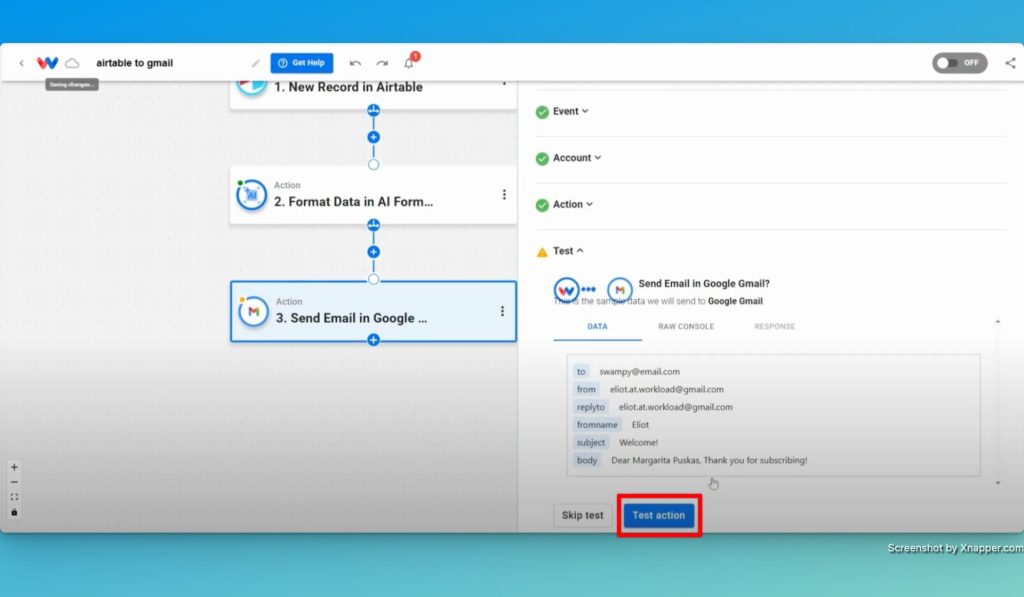
- Test the Action: Finally, make sure that the email was sent successfully.
Step 5: Review and Activate Your Airtable Gmail Integration #
- Review All Steps: Check that every step shows a green indicator.
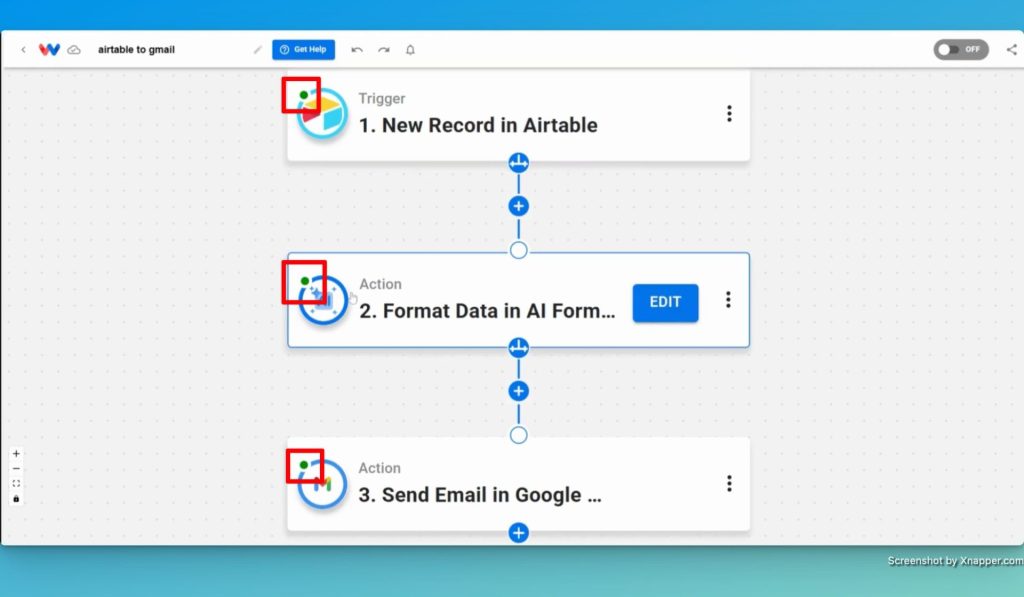
- Activate the Workflow: Toggle the switch to “on” to begin automation.

- Monitor Your Integration: Finally, verify that new Airtable records trigger Gmail emails automatically.
Finishing Up: Airtable Gmail Integration #
Well done! You have just built a an Airtable Gmail Integration workflow to save time and streamline your business communication. By automatically formatting new records from Airtable and sending personalized Gmail messages, you can finally eliminate repetitive tasks. As a result, you can focus on what truly matters—growing your business.
Now, you can relax and enjoy a more efficient workday. For more tips, be sure to visit Workload University or check out our Workload Help page.
Goodbye tedious tasks- hello efficiency!


