Streamline Scheduling with Calendly Invite Logging #
Business owners often waste time entering meeting invites into spreadsheets. Manual tracking slows you down and increases the chance of errors. With Workflow’s Calendly Invite Logging workflow, you can automatically record each new invite from Calendly into Google Sheets. This efficient process saves you time and boosts your organization’s accuracy. By customizing your own Calendly Invite Logging workflow, you can capture every detail that is critical to you as soon as an invite is created.
Need help? Let our workflow expert Eliot guide you through each step in our tutorial video. You can also explore Workload University or our Help Center.
Overview: Calendly Invite Logging Integration #
This integration has three simple jobs:
- Detect New Invites: It watches Calendly for every new meeting invite.
- Log Invite Details: It adds a new row in Google Sheets with the invitee’s name and email.
- Reduce Errors: It stops mistakes by removing the need to type data by hand.
Before you start, make sure you have:
- A Calendly account
- A Google account with access to Google Sheets
- A Workload account to create and run your workflow
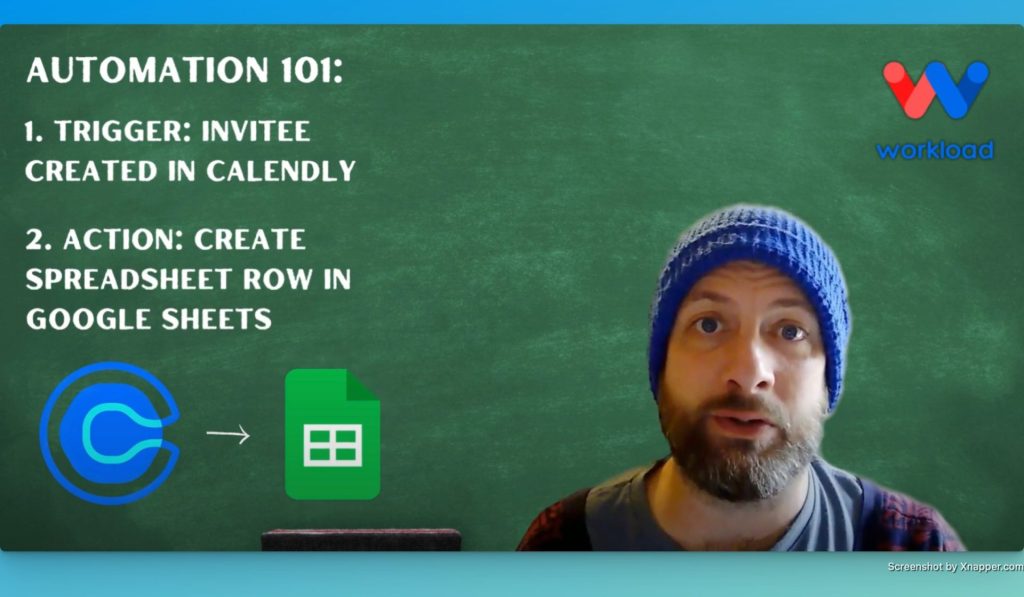
Step-by-Step: Build the Calendly Invite Logging Workflow #
Step 1: Set Up the Trigger (Calendly) #
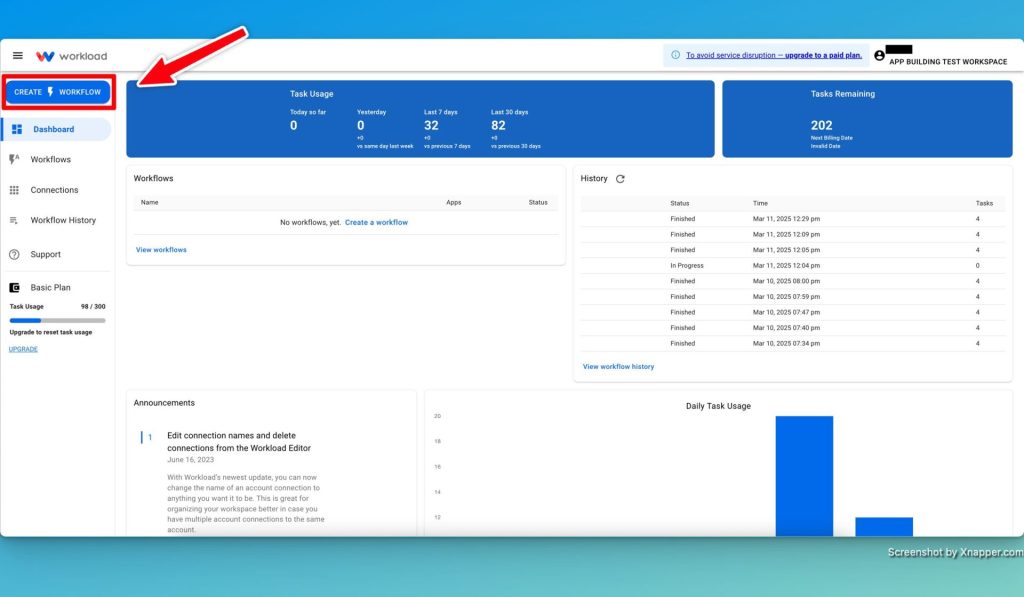
- Open Workload: Log in to your Workload Dashboard and click “Create Workflow“.
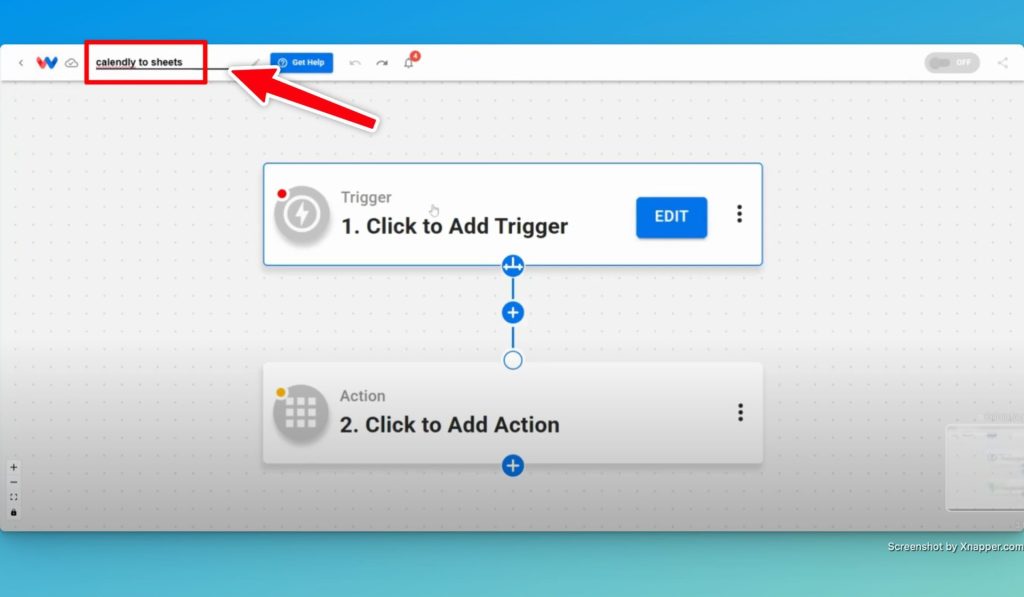
- Name Your Workflow: Give it a simple name like Calendly Invite Logging.
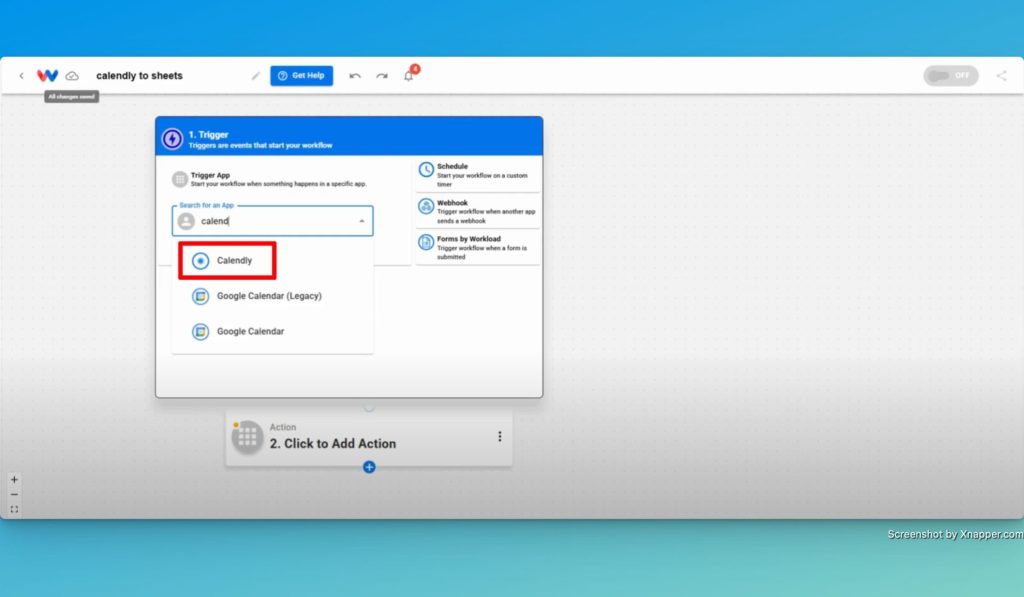
- Select the Trigger App: Click the Trigger box and choose Calendly.
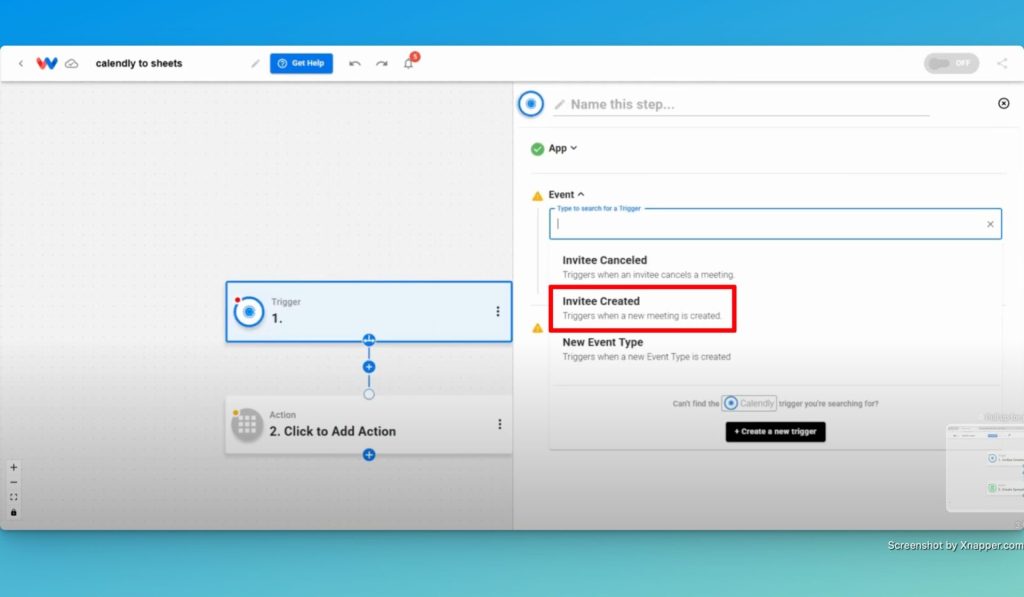
- Choose the Event: Select Invitee Created as the trigger event.
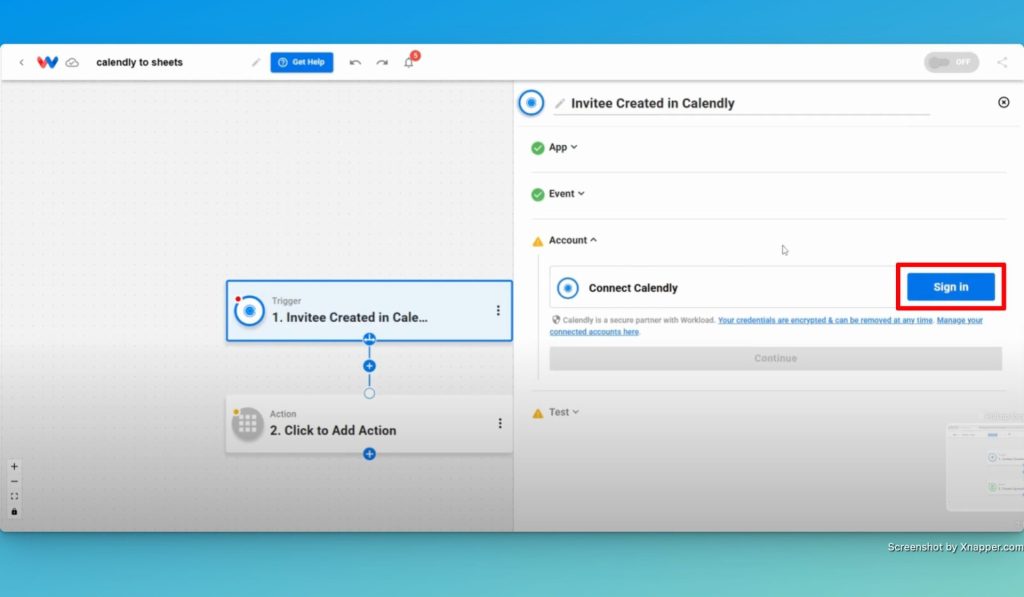
- Connect Your Account: Sign in and securely connect your Calendly account.
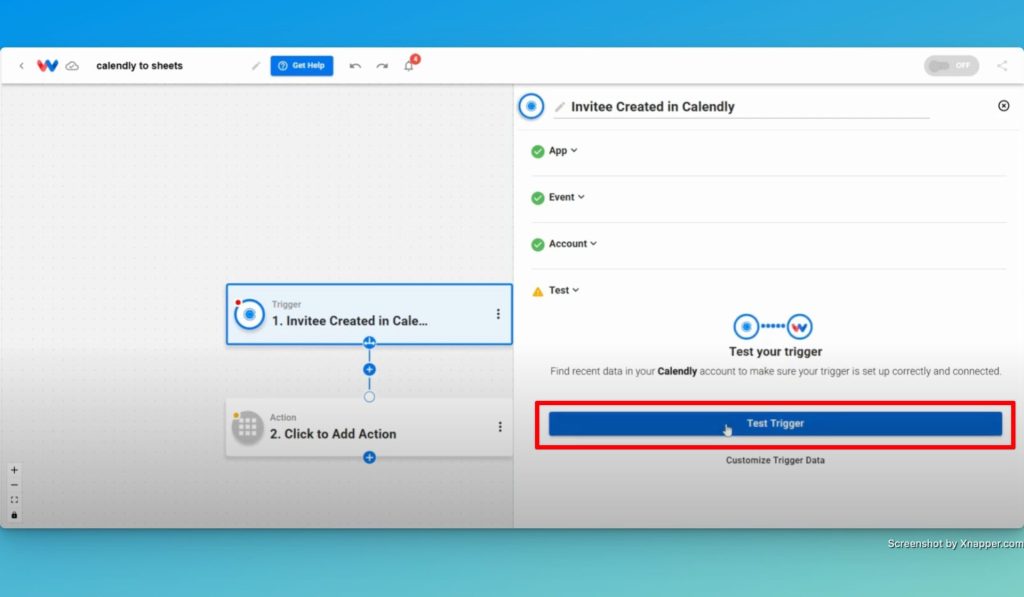
- Test the Trigger: Click “Test” to check that a recent invite is found.
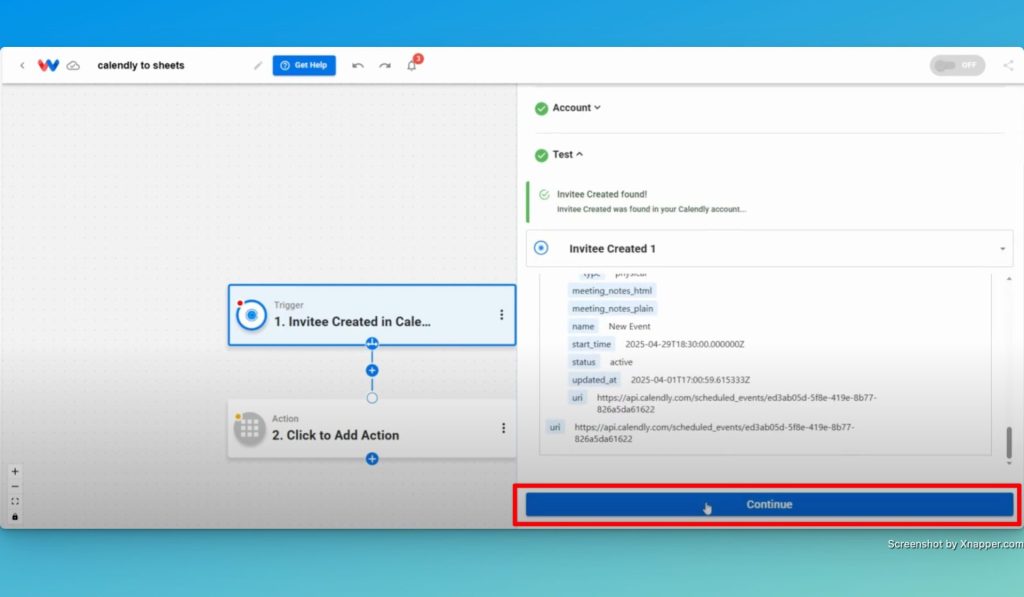
- Continue: Click “Continue” to continue to the next step of the workflow.
Step 2: Create the Action (Google Sheets) #
- Select the Action App: Click the Action box and choose Google Sheets.
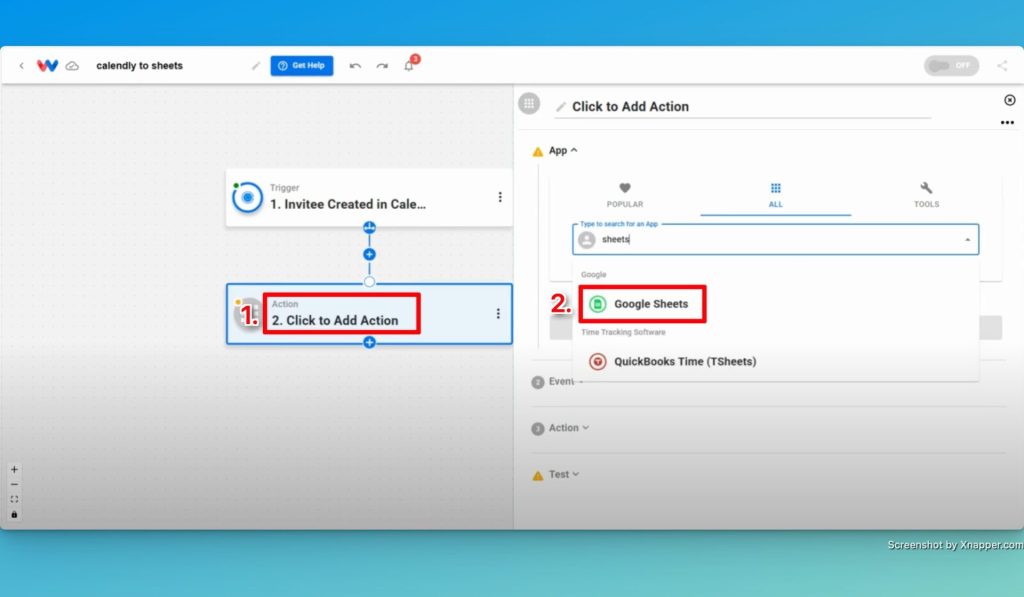
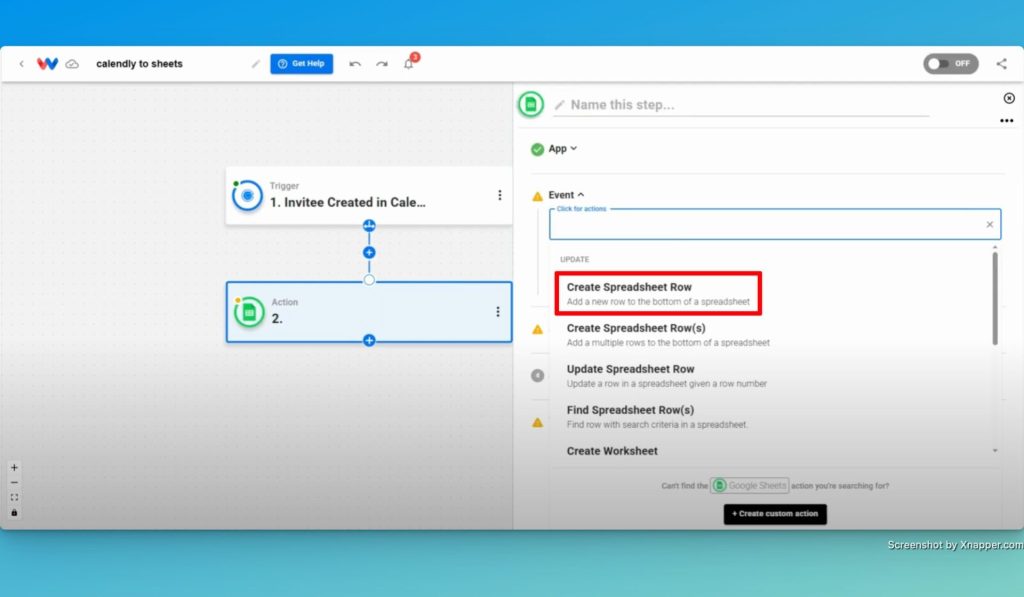
- Choose the Event: Pick Create Spreadsheet Row from the list.
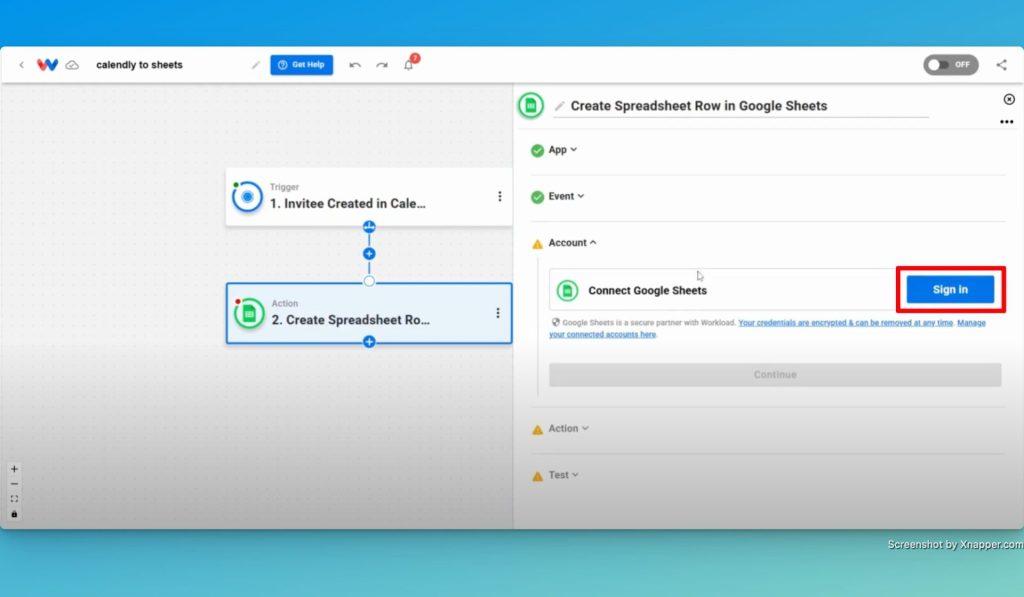
- Connect Your Account: Securely sign in to your Google account or select an existing connection.
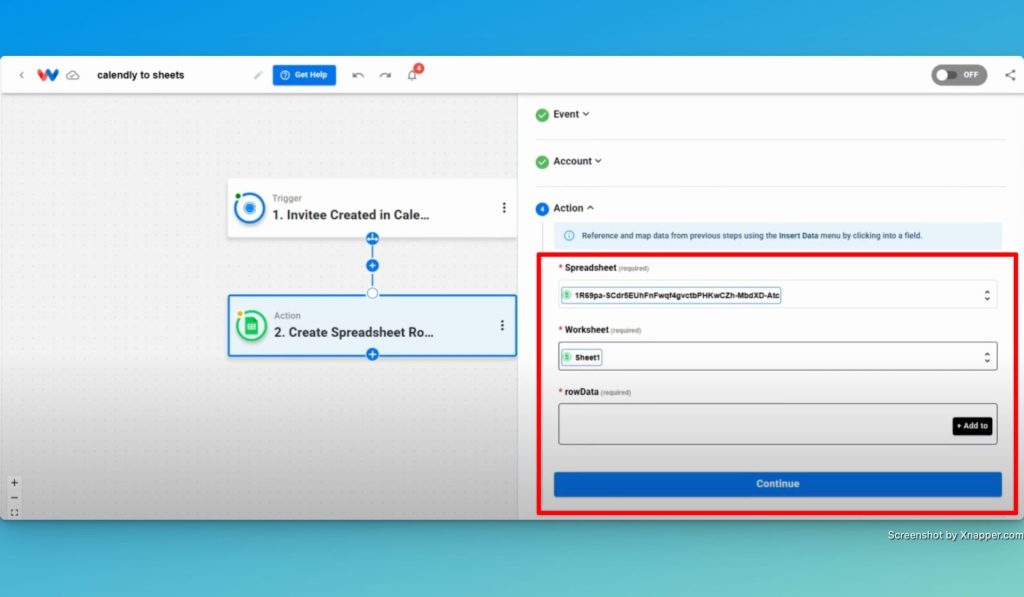
- Map Your Data:
- Select the Spreadsheet and Worksheet that you want to use.
- Click “Add To”.
- Customize the data from the Calendly trigger that you want to add to the spreadsheet.
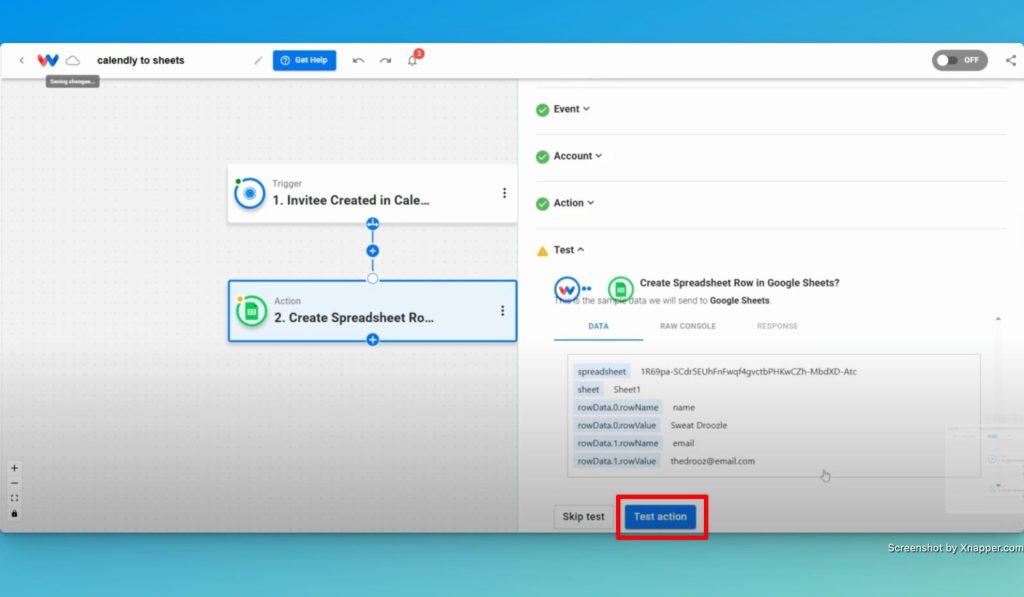
- Test the Action: Click “Test action” to see if a new row is added to your spreadsheet.
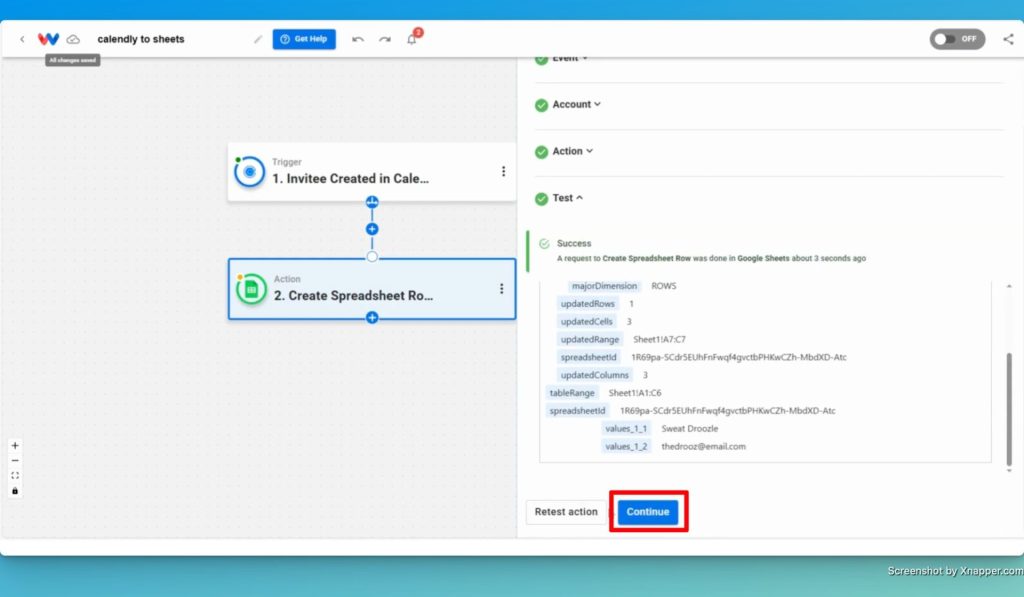
- Continue: Proceed when the test shows success.
Step 3: Test and Activate the Workflow #
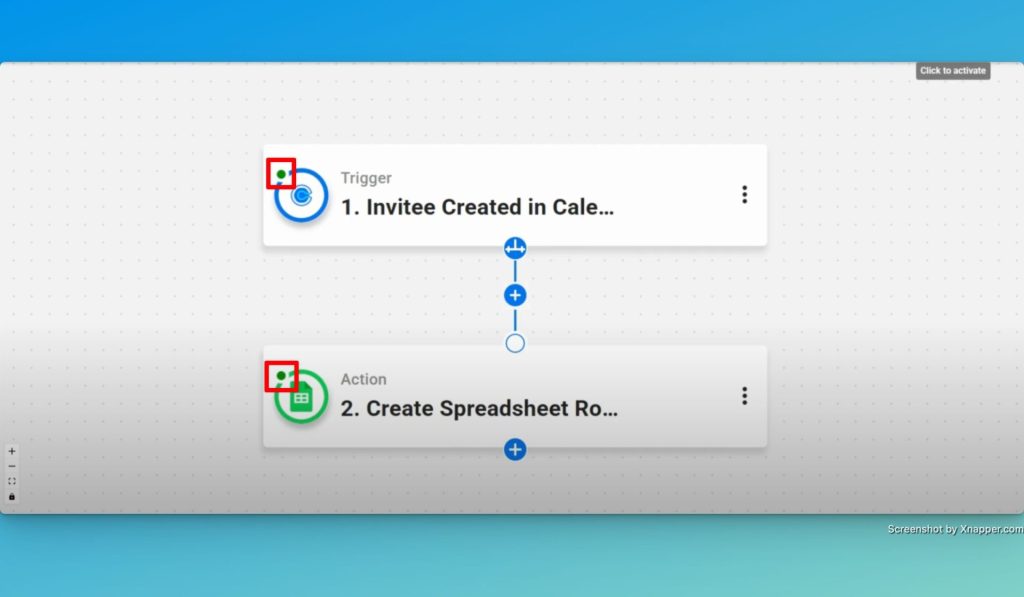
- Verify the Steps: Check that every step shows a green indicator.
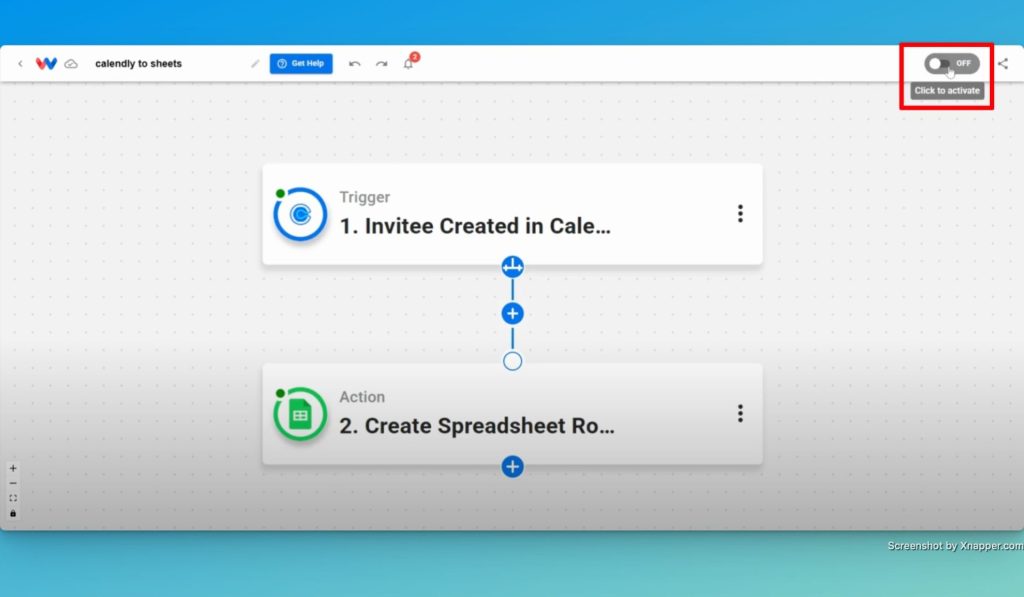
- Activate the Workflow: Toggle the workflow “On” in the upper right corner.
- Final Test: Schedule a test invite via Calendly and see if the details appear in Google Sheets.
Finishing Up: Automate Your Scheduling #
You have now built a powerful Calendly Invite Logging workflow. This automation logs invitee details into Google Sheets in real time that will save you time and cut down on errors. Busy business owners can now spend less time on data entry and more time making important decisions.
Ready to simplify your scheduling process? Try and build you own integration using our Workload Template and enjoy a smoother way to log your meeting invites automatically.
For more helpful guides and tips, subscribe to Workload University or visit our Workload Help Page. Now you can keep your business moving forward—one workflow at a time.
Automate your work—simplify your day!


