Stop Manually Replying to Form Submissions #
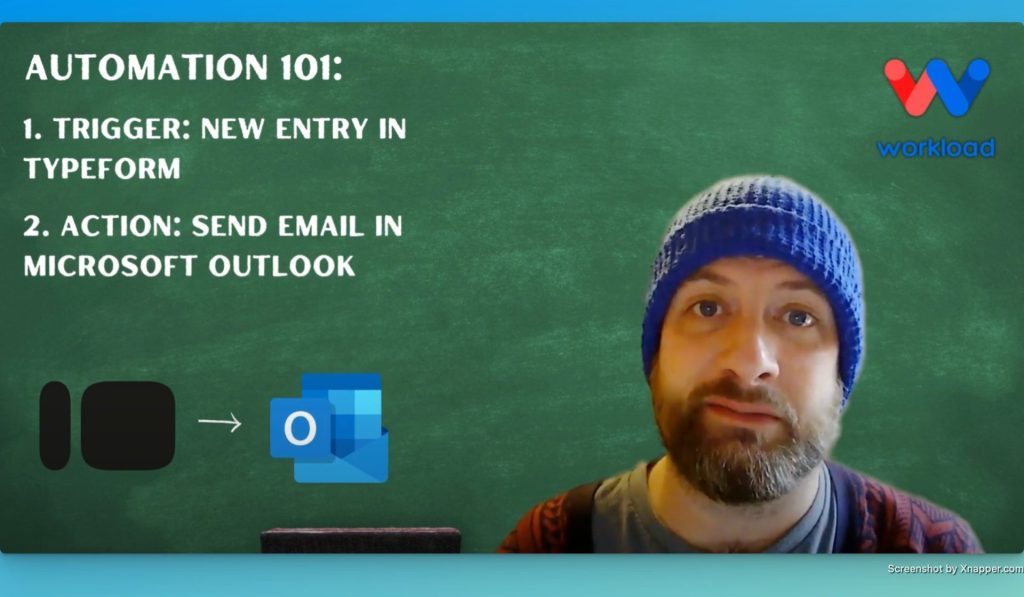
Manually replying to every new Typeform submission is time-consuming—and it’s easy to fall behind. Missed messages or delayed responses can cost you valuable leads. Workload’s Email New Form Entries automated workflow makes this easier by automatically sending a personalized email to the person who submitted your form.
The workflow starts when someone fills out a form in Typeform. It pulls their contact details—like name and email—and sends them a tailored follow-up message through Microsoft Outlook. In this blog post, we’ll guide you through setting up this automation so you can deliver instant replies, build trust, and stay ahead of the competition.
Need help? Let our workflow expert Eliot guide you through each step in our tutorial video. You can also explore Workload University or our Help Center.
Overview: Email New Form Entries with Typeform & Outlook #
This integration does three simple things:
- Trigger on a New Response: It finds new Typeform responses.
- Send an Email via Outlook: It creates an reply email using details from the form.
- Provide Instant Alerts: It sends the email directly from your Outlook inbox.
Before you start, make sure you have:
- A Typeform account.
- A Microsoft Outlook account.
- A Workload account to build and run your workflow.
Step by Step: Email New Form Entries Workflow #
Step 1: Set Up the Trigger (Typeform) #
- Open Workload: Log in to the Workload Dashboard and create a new workflow.
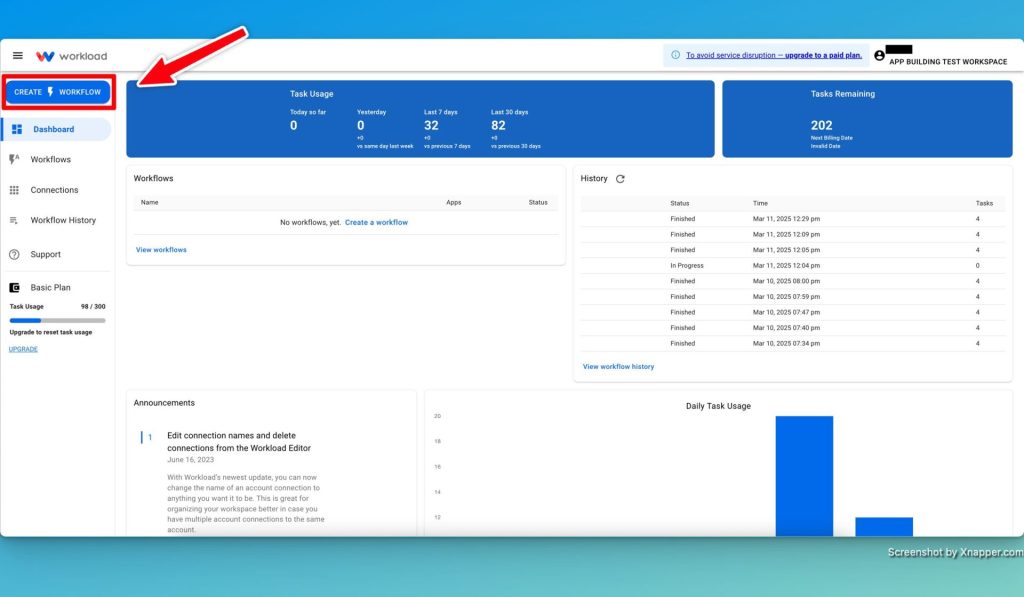
- Name the Workflow: Give the workflow a unique name. (ex: “Typeform to Outlook”)
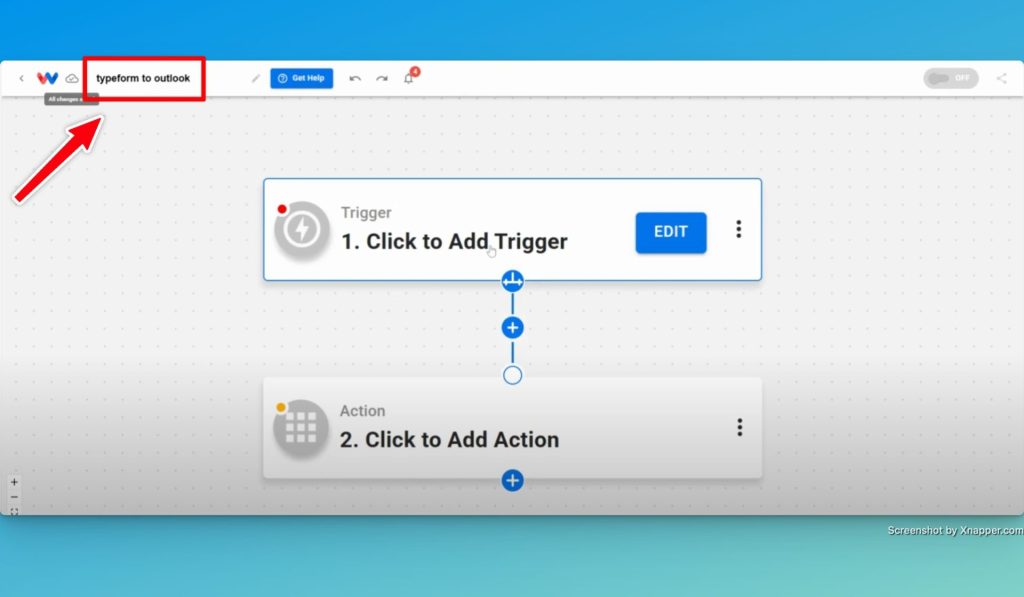
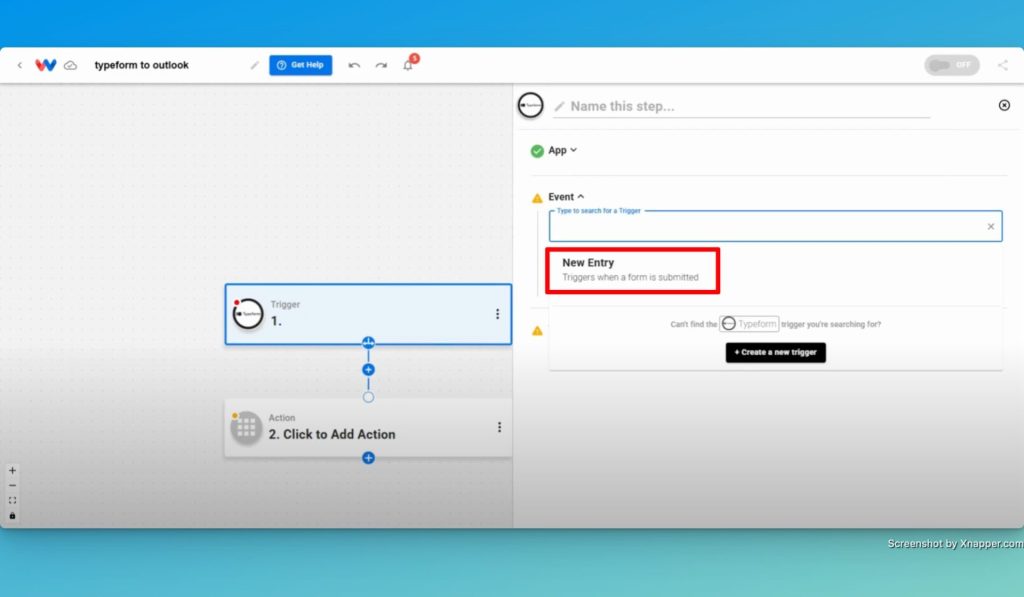
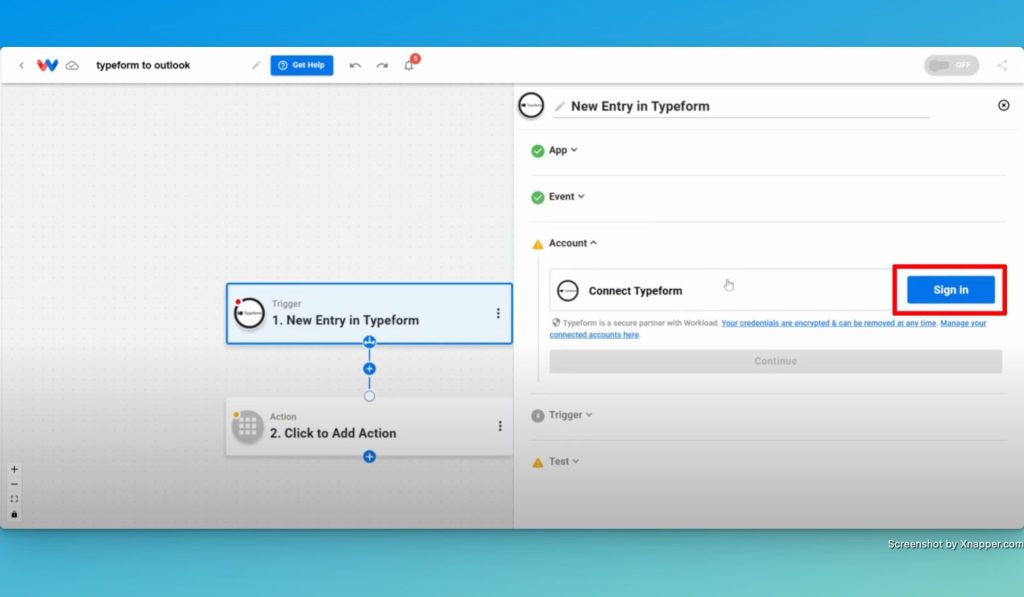
- Select the Trigger App & Event: Choose Typeform as the trigger app, then select “New Entry” as the trigger event.
- Securely Connect Your Typeform Account: Click the “Sign In” button or choose from an existing connection.
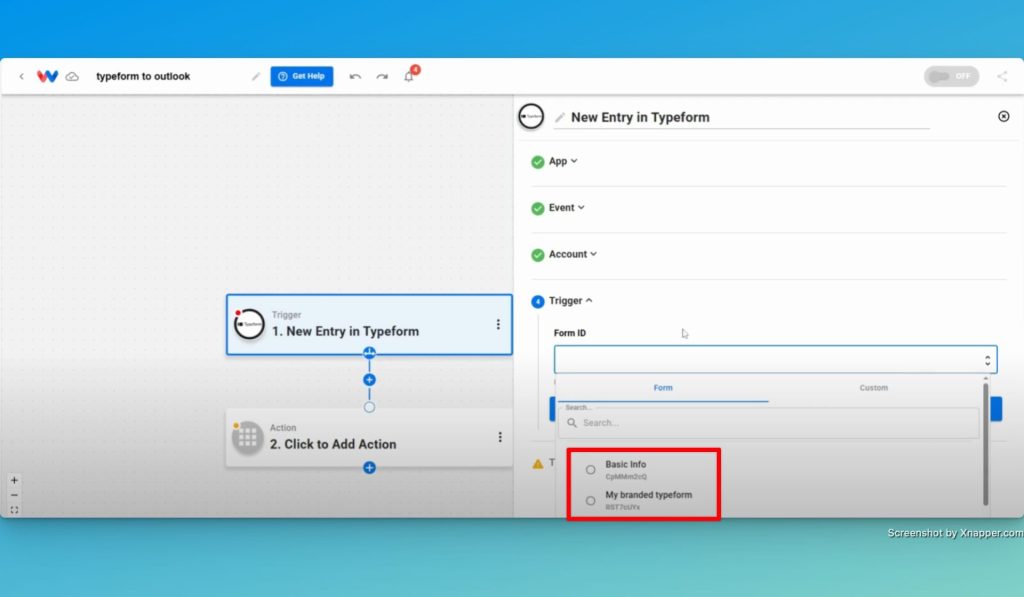
- Select a Form: Choose the form from the dropdown that you want the workflow trigger to monitor.
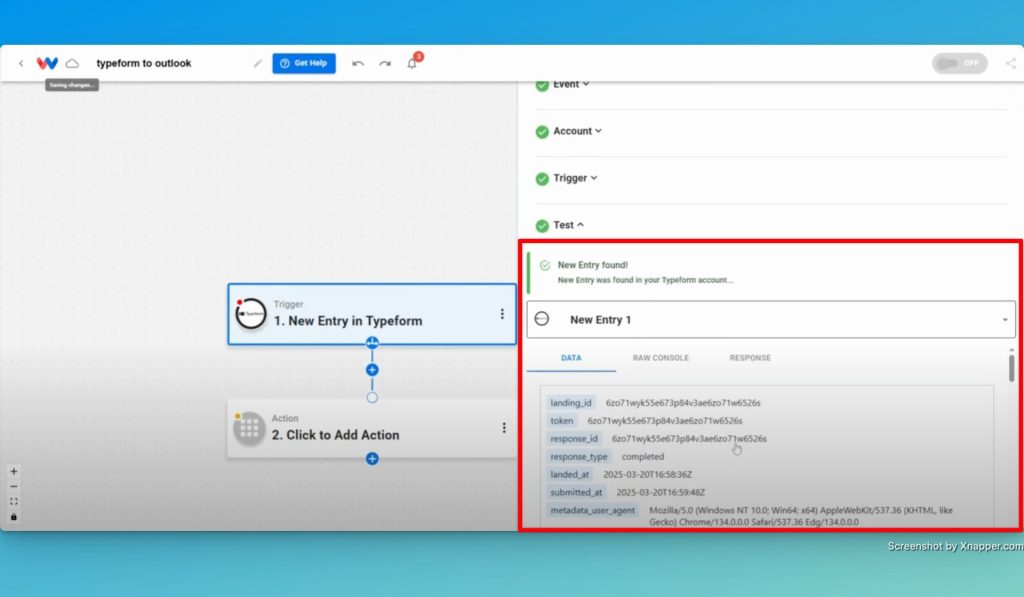
- Test the Trigger: Click the “Test” button and confirm that Workload finds a recent form entry.
Step 2: Create the Email Action (Microsoft Outlook) #
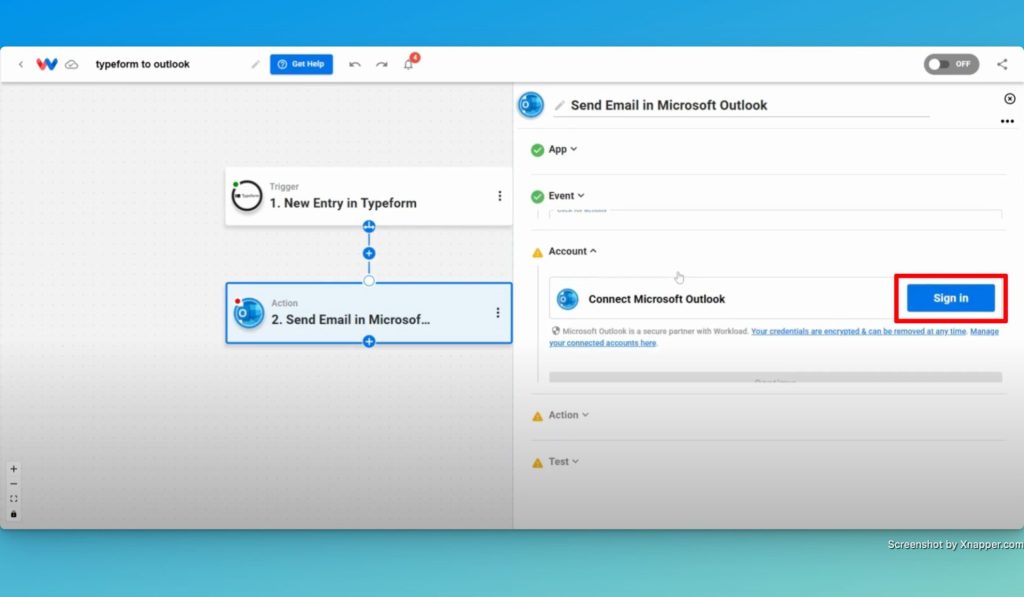
- Select the Action App & Event: Choose Microsoft Outlook as your action app and then pick “Send Email” as the event.
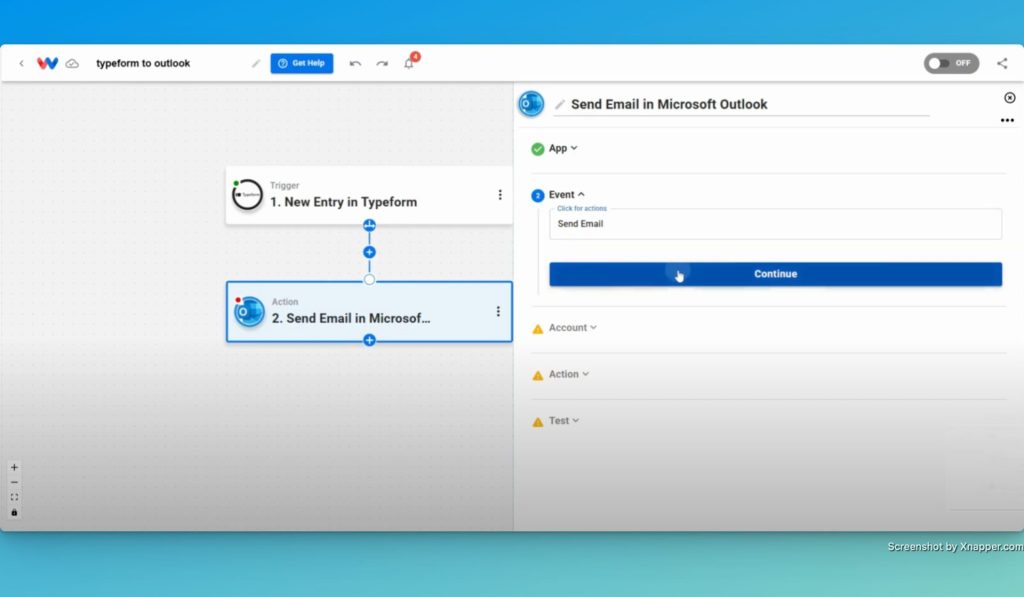
- Connect Your Outlook Account: Click the “Sign In” button or choose from an existing connection.
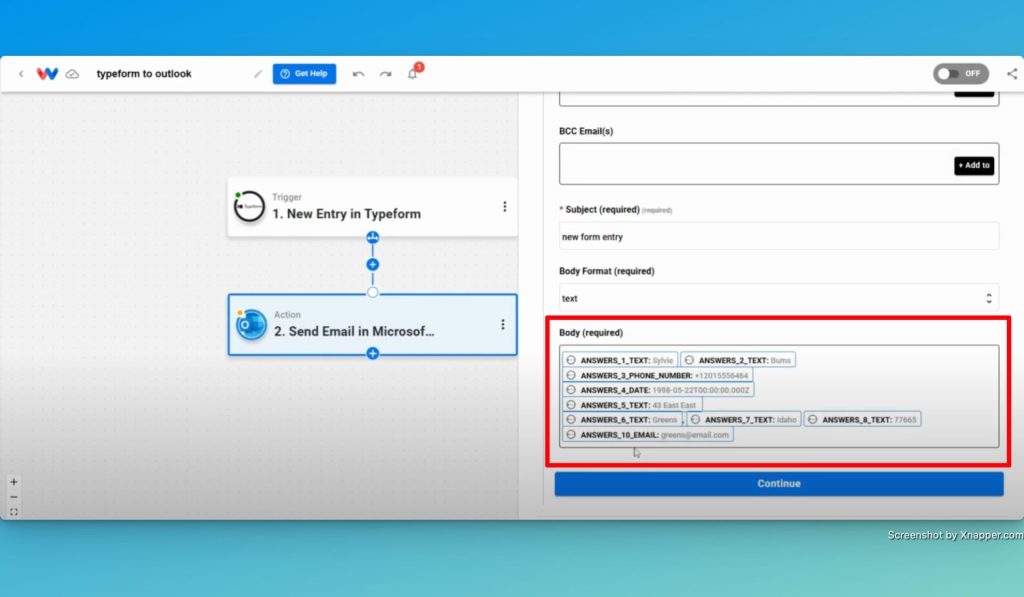
- Customize the Email: Enter the details you want to use for the email responses by mapping data from the trigger to fill out the fields you want to use. Some commonly used fields include:
- From Email (Note: leave blank to use default Outlook email address)
- To Email
- CC Email(s)
- Subject
- Body Format
- Body
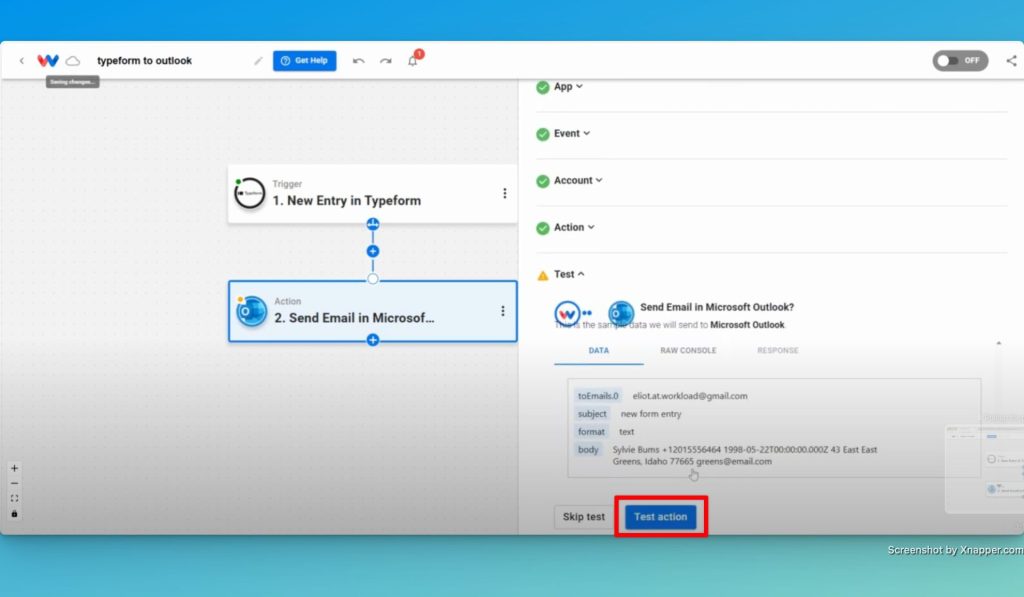
- Test the Email: Click on the “Test action” button to make sure the email sends correctly
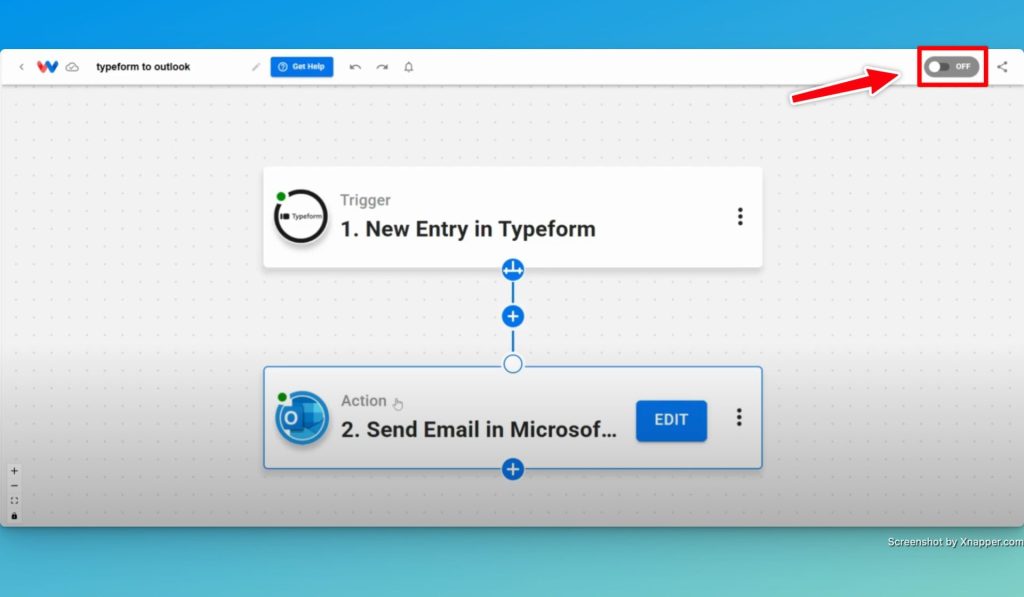
Step 3: Verify and Activate the Workflow #
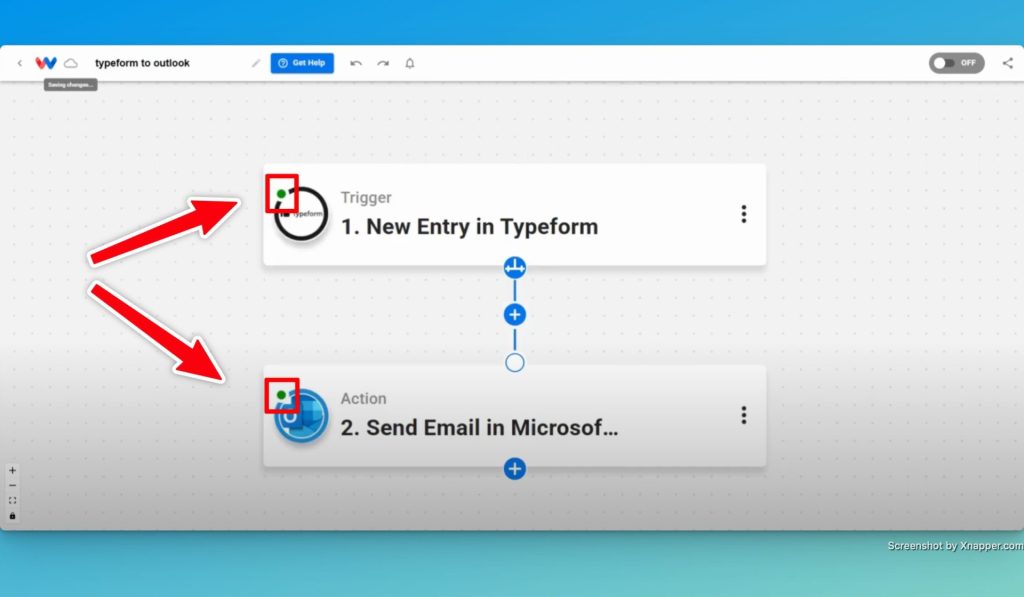
- Check Every Step: Make sure that all of the steps show a green indicator.
- Activate the Workflow: Toggle the workflow “On” to activate the workflow.
- Final Test: Submit a test entry in Typeform and verify the email arrives in Outlook.
Finishing Up: Email New Form Entries to Simplify Lead Management #
Cheers! You’ve just built a powerful Email New Form Entries workflow that sends personalized Outlook emails to every new Typeform lead. By automating your follow-up process, you’re saving time, improving response rates, and delivering a better experience to your prospects. Now, instead of repeating the same task over and over, you can focus on what really matters—growing your business.
Ready to simplify your process?
Try the integration today using our Workload Template and enjoy a smoother workflow building process.
For more easy guides and tips, like and subscribe to Workload University or check out the Workload Help Page and keep your business moving forward—one workflow at a time.
Automate your work—simplify your day!


