Introduction: Automate Patient Data with DrChrono, Google Sheets, and Gmail #
Automate patient data efficiently with DrChrono, Google Sheets, and Gmail. In this post, we’ll show you how to automate new patient records from DrChrono into Google Sheets and send a welcome email using Gmail—all with Workload’s workflow editor. Every time a new patient is added to DrChrono, their details automatically populate in a Google Sheet and trigger an email notification.
For a video walkthrough of this process, check out our Workload YouTube channel. You can also visit Workload University and our Workload Help page for additional tips and guidance.
Overview #
In this workflow, you will create a workflow to automate patient data with DrChrono, Google Sheets, and Gmail: #
- Trigger on New DrChrono Patients: Capture each new patient automatically.
- Add Data to Google Sheets: Store patient details in a structured spreadsheet.
- Send a Welcome Email with Gmail: Automate email communication to new patients.
Before you begin, make sure you have:
- A connected DrChrono account with patient data access.
- A Google Sheets account with a designated spreadsheet.
- A Gmail account for sending emails.
- A Workload account to create and manage your workflow.

Step 1: Setting Up Your Workflow in Workload #
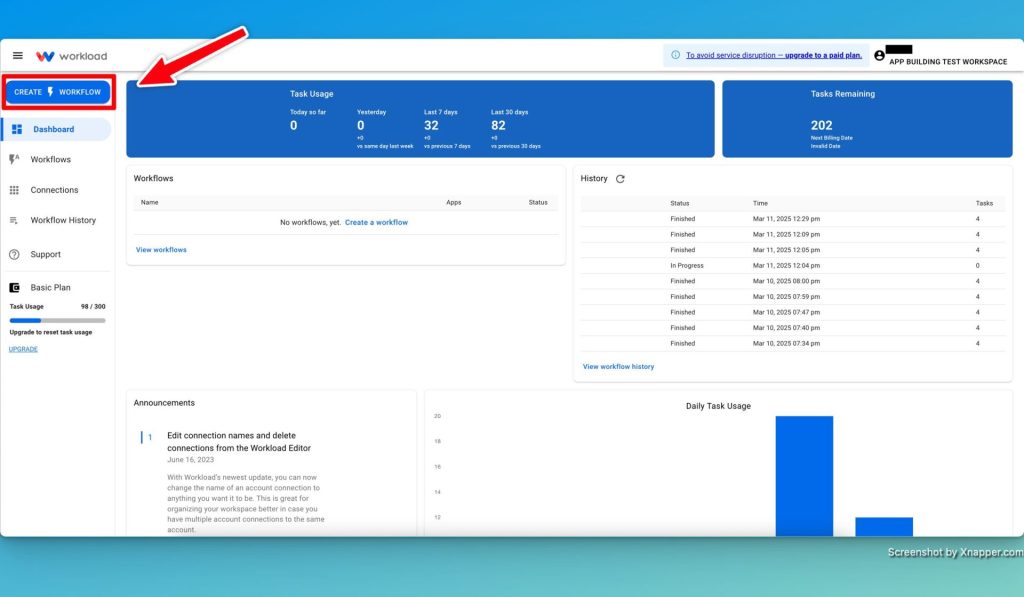
- Launch the Workload Editor: Open Workload and create a new workflow.
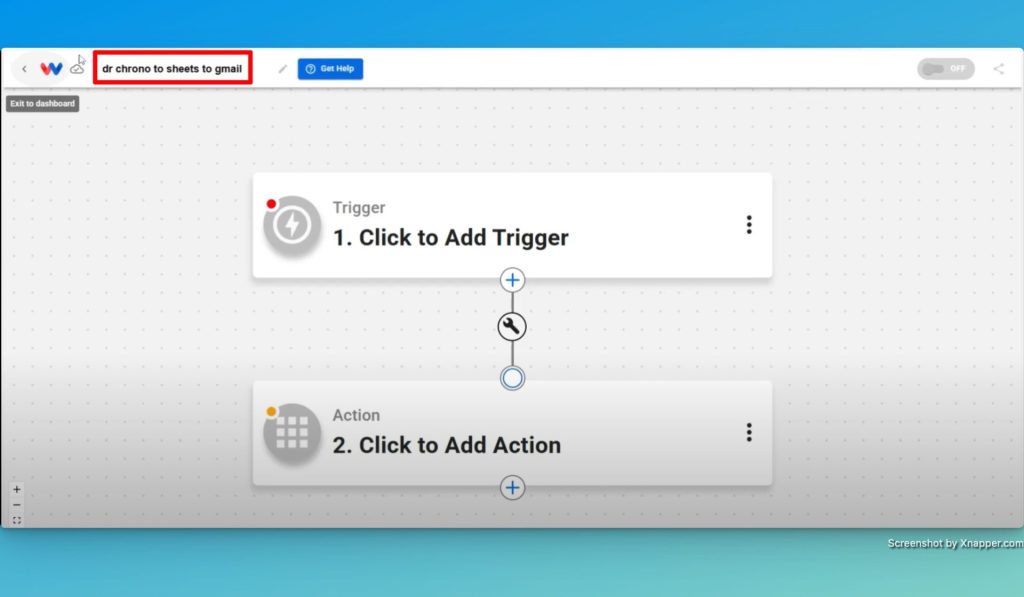
- Title Your Workflow: Name it something clear like “DrChrono to Sheets to Gmail.”
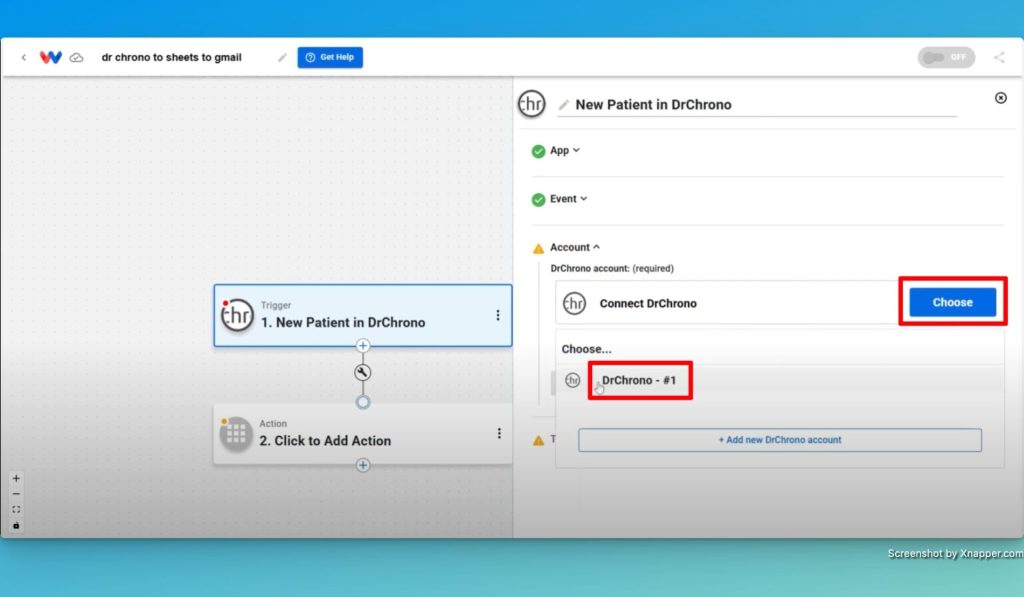
- Select the Trigger App: Choose DrChrono as the trigger and set the event to “New Patient.”

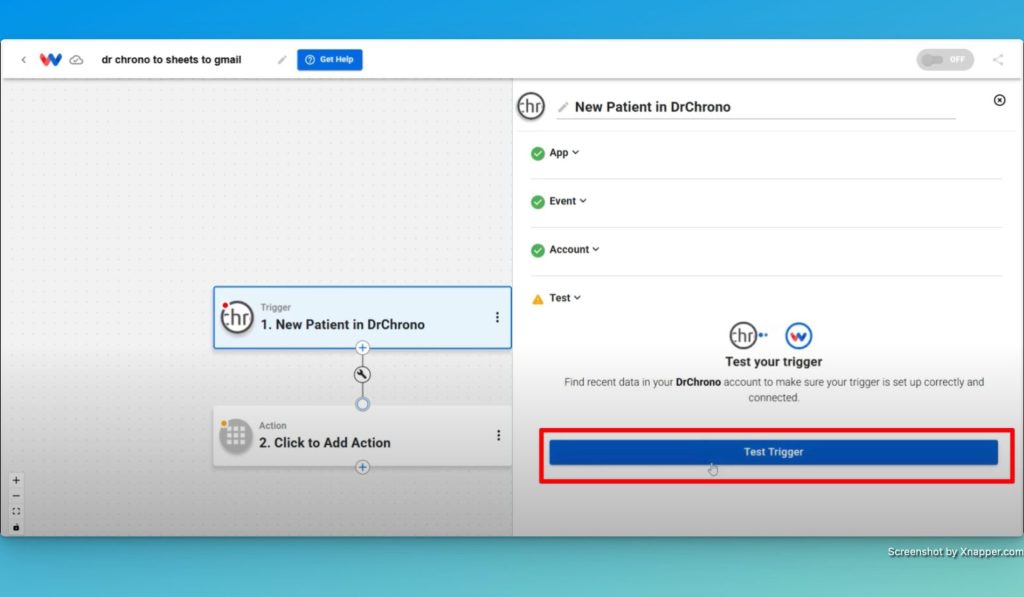
- Connect Your DrChrono Account: Link your DrChrono account and test the trigger to confirm it detects new patients.
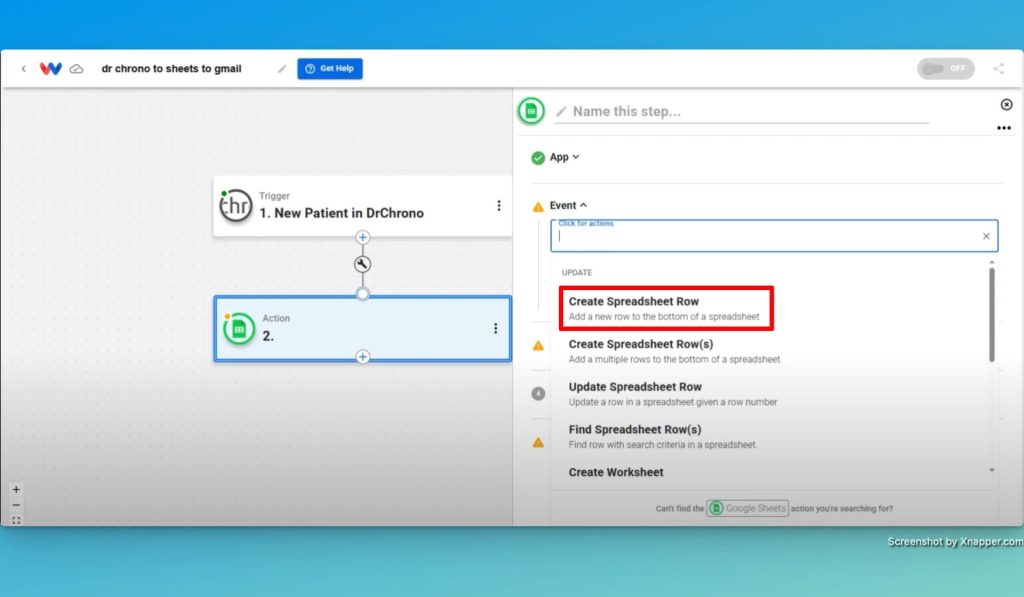
Step 2: Configuring the Google Sheets Action #
- Add an Action in Google Sheets: Select “Create Spreadsheet Row.”
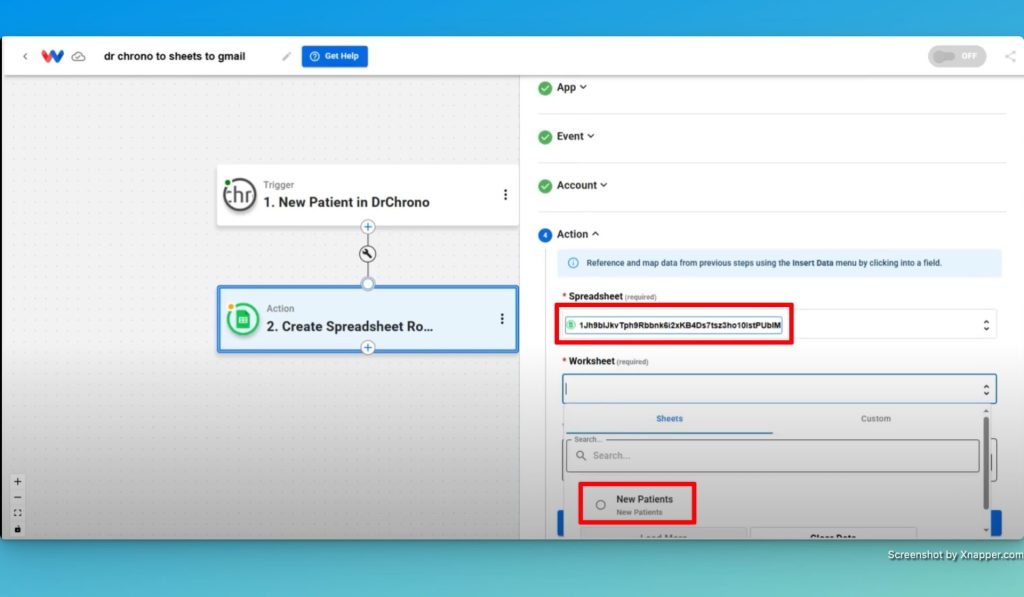
- Choose Your Spreadsheet: Pick the patient list spreadsheet and the correct worksheet.
- Map Patient Data:
- First Name → First Name column
- Last Name → Last Name column
- Phone Number → Phone Number column
- Email → Email column
- Social Security Number → SSN column (for internal use)
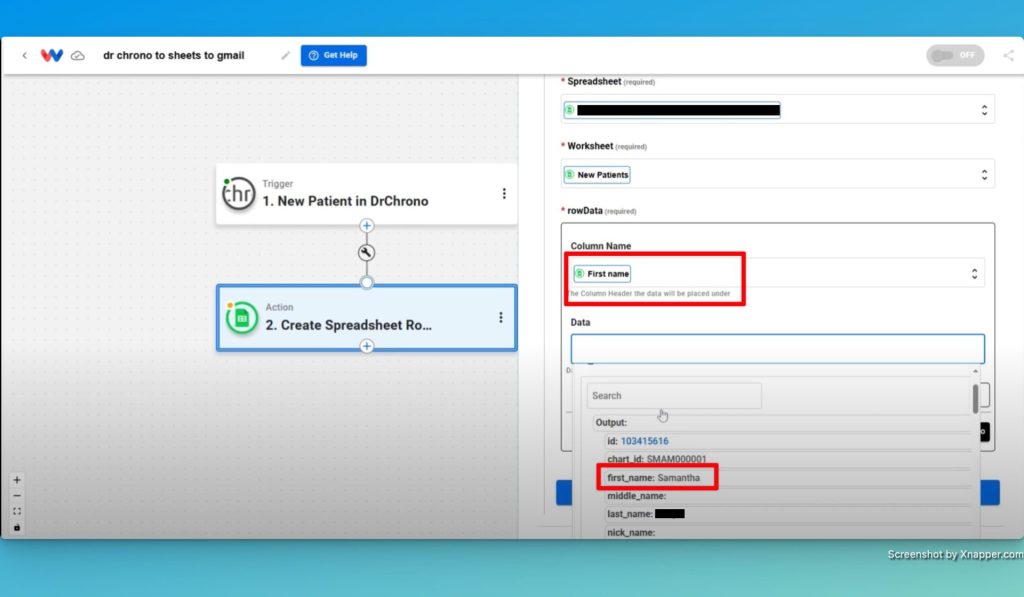
- Test the Action: Run a test to verify the patient data appears in the correct spreadsheet fields.
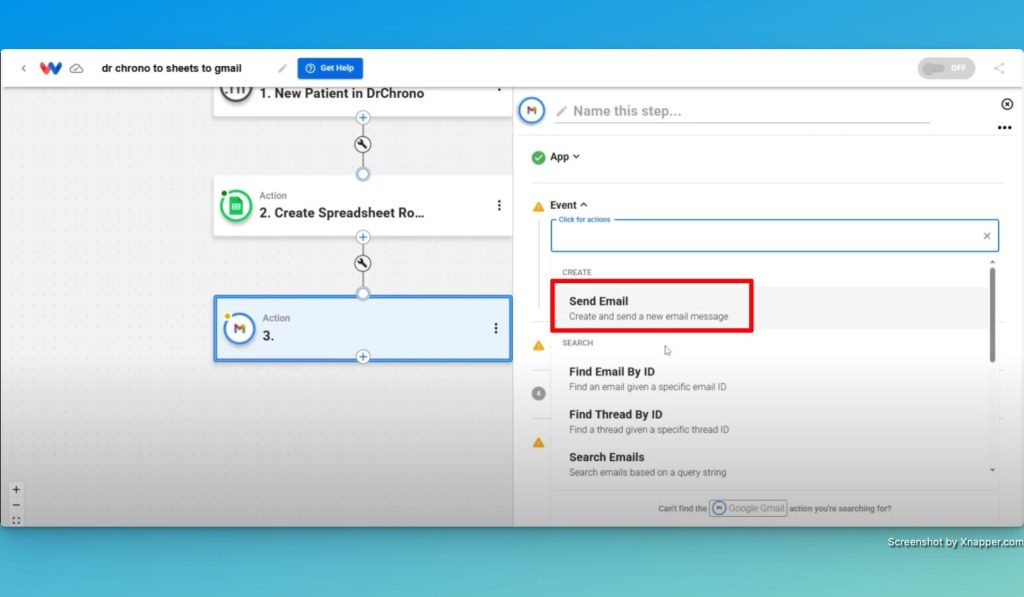
Step 3: Automating Email Delivery with Gmail #
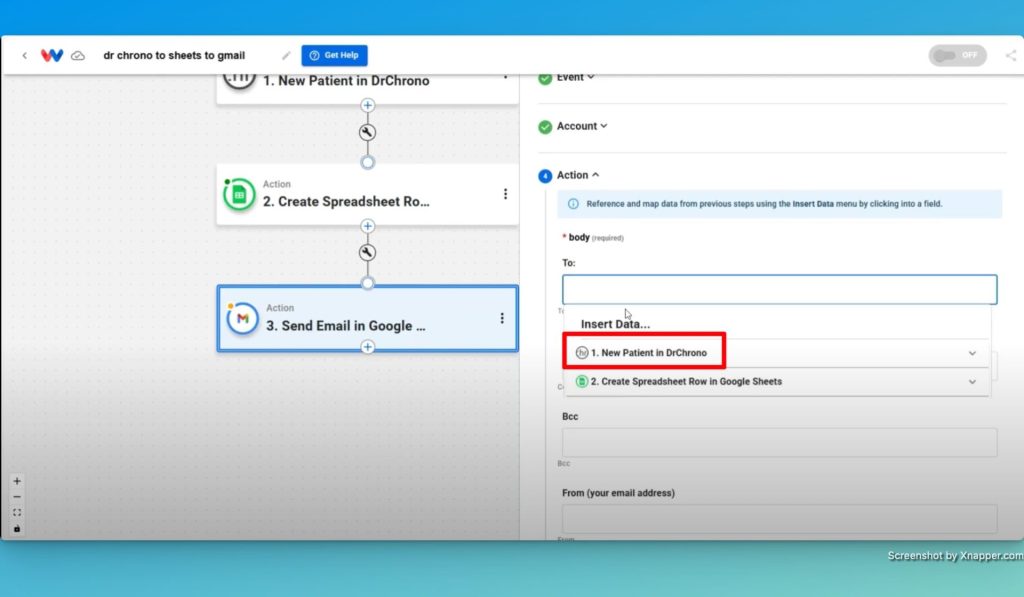
- Add a Gmail Action: Choose “Send Email” in Workload.
- Set Email Recipients:
- To: New patient’s email from the DrChrono data.
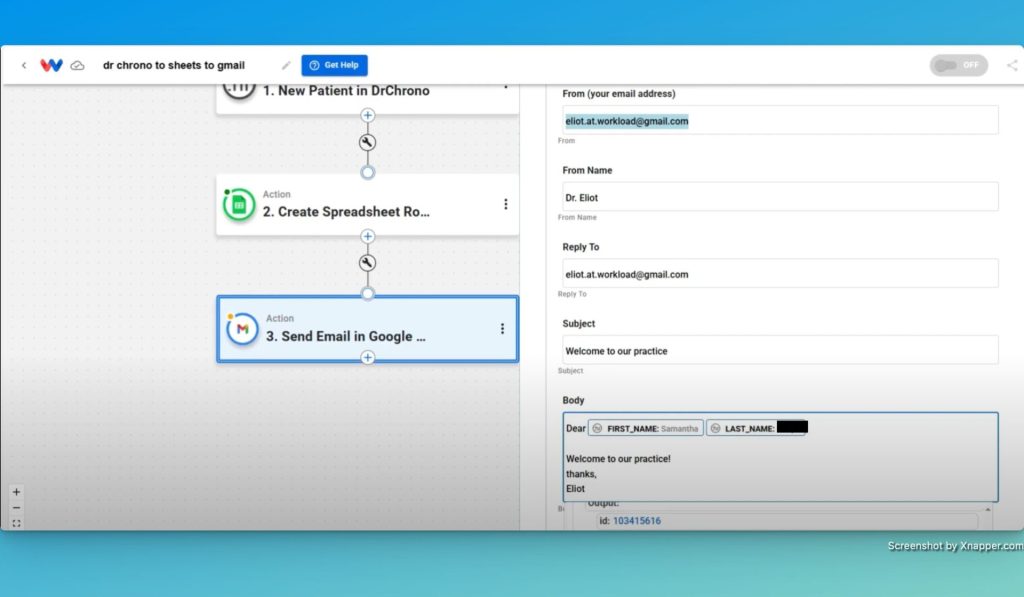
- From & Reply-To: Your business email.
- Create the Email Template:
- Subject: “Welcome to Our Practice”
- Body:
Dear [First Name], Welcome to our practice! We’re excited to have you as a patient. If you have any questions, feel free to reach out. Best, [Your Name]
- Test the Email Action: Ensure the email sends correctly and appears in the recipient’s inbox.
Conclusion: Automate Patient Data with DrChrono, Google Sheets, and Gmail #
Now that you have completed these steps, turn on your workflow to start automating patient data. Every new DrChrono patient automatically updates your spreadsheet and receives a welcome email. This workflow streamlines data management and improves patient engagement with minimal effort.
By automating these tasks, you save time and avoid manual data entry. Let Workload handle the process while you focus on patient care!
For more automation tips, visit Workload University or check out our Workload Help page.
Happy automating!


