Introduction: Integrate Google Forms and Gmail #
Automating your email responses saves time and streamlines communication. Moreover, in this post, we’ll show you how to set up a powerful workflow that will integrate Google Forms and Gmail using Workload’s AI Formatter tool.
When you receive a new response through your Google Forms, manually sorting through data and sending emails can be time-consuming. Fortunately, Workload’s AI Formatter simplifies this process by reformatting the raw data into a clean, easily consumable format for your Gmail automation. In just a few steps, you can create a workflow that automatically sends a welcome email to every new respondent. This guide will walk you through the process, ensuring you can implement the automation quickly and effectively.
For a video walkthrough of this workflow, visit our Workload YouTube channel. Additionally, you can also check out Workload University and our Workload Help page for more tips.
Overview: How to Integrate Google Forms and Gmail with AI by Workload #
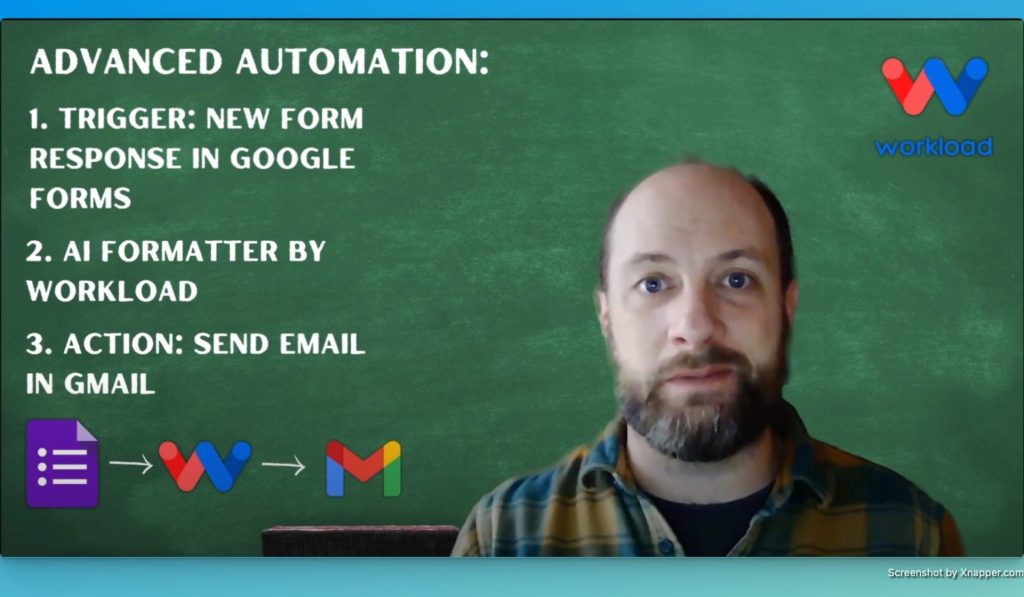
In this workflow, you will:
- Trigger on new Google Form responses: Automatically capture every submission as it comes in.
- Format data with AI: Quickly extract and simplify key information from your form responses.
- Send personalized Gmail emails: Automatically deliver a customized welcome email to each respondent in real time.
Before you begin, ensure you have:
- A connected Google Forms account with an active form to capture responses.
- A Gmail account ready for sending emails.
- A Workload account with access to the AI Formatter tool.
Step 1: Setting Up the Workflow in Workload #
Begin by launching the Workload editor and creating a new workflow. Follow these steps:
- Title Your Workflow: Name your workflow something descriptive like “Google Forms to Gmail.”
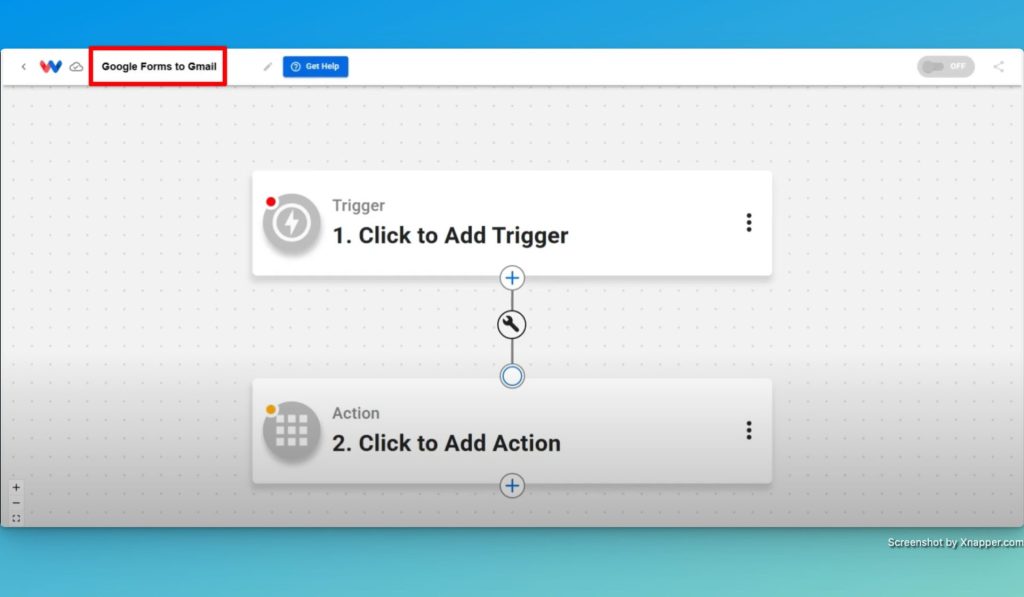
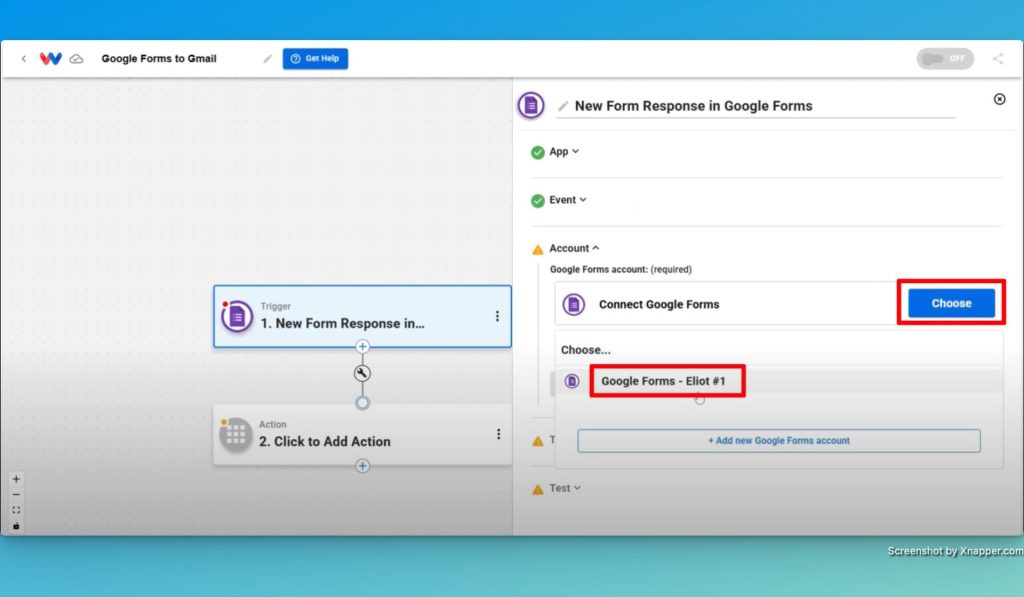
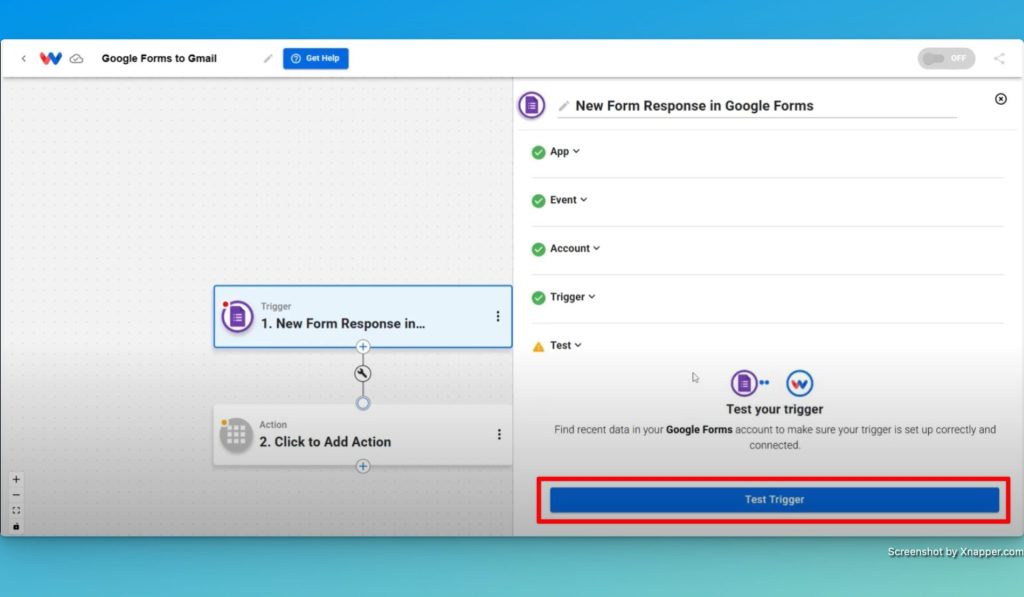
- Select the Trigger: Choose Google Forms as your trigger app. Then select the event “New Form Response.” This action will activate your workflow every time someone submits a response.

- Connect Your Account: Log in to your Google account and select the specific form you want to use. For instance, if you’re using a contact information form, choose that particular form from the list.
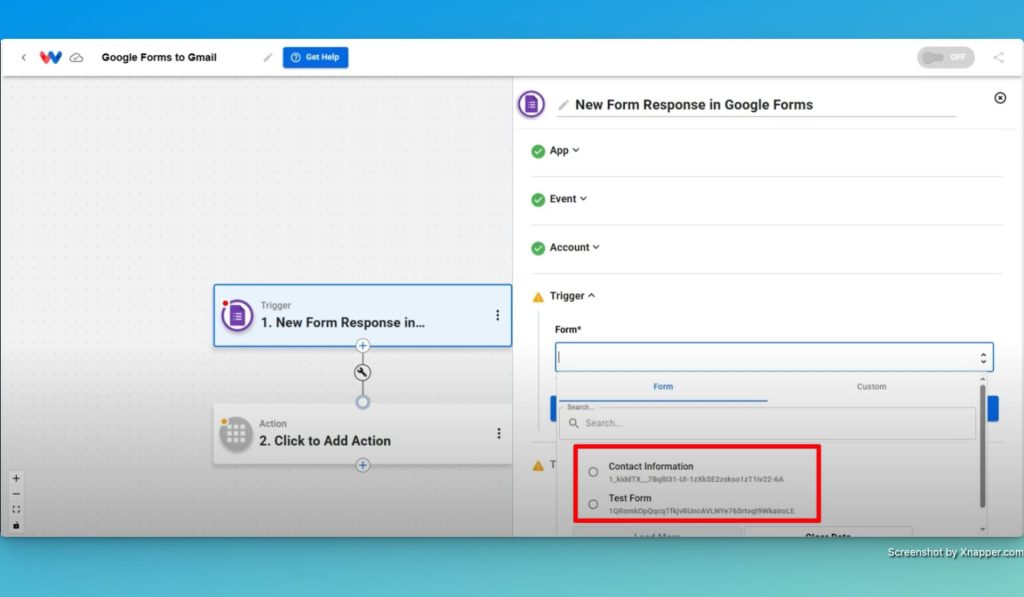
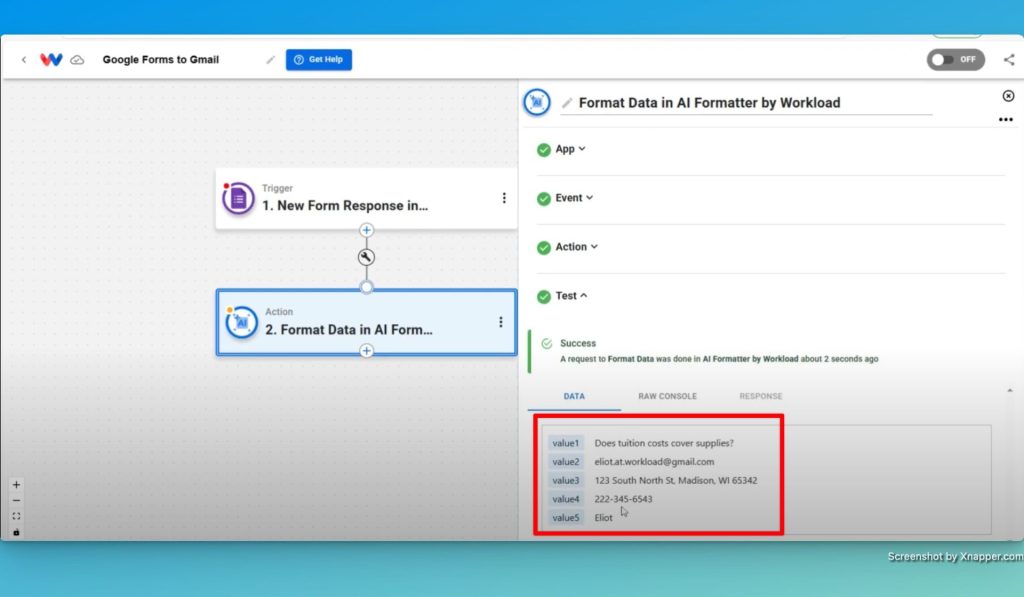
- Test the Trigger: Workload will fetch sample responses to ensure the trigger works properly. You’ll see that the response data is hidden inside arrays, which might seem tricky to use directly in Gmail.
Step 2: Simplifying Data with Workload’s AI Formatter #
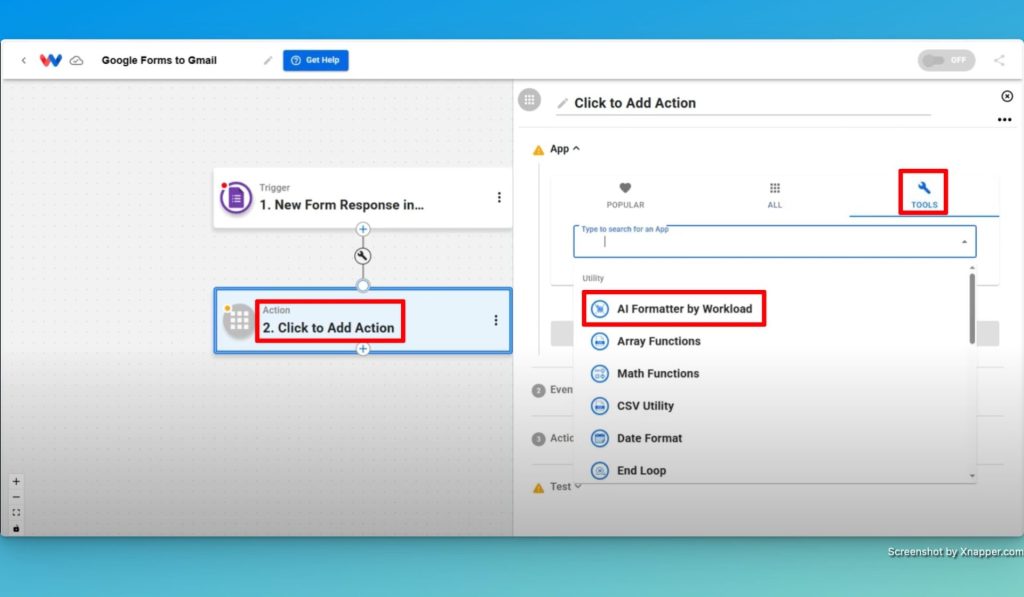
Google Forms responses often come in a complex, nested format. This is where Workload’s AI Formatter shines. Follow these simple steps:
- Add the AI Formatter: Within your workflow, click on the “Add Action” box. Then, select the TOOLS icon and then choose “AI Formatter by Workload“.
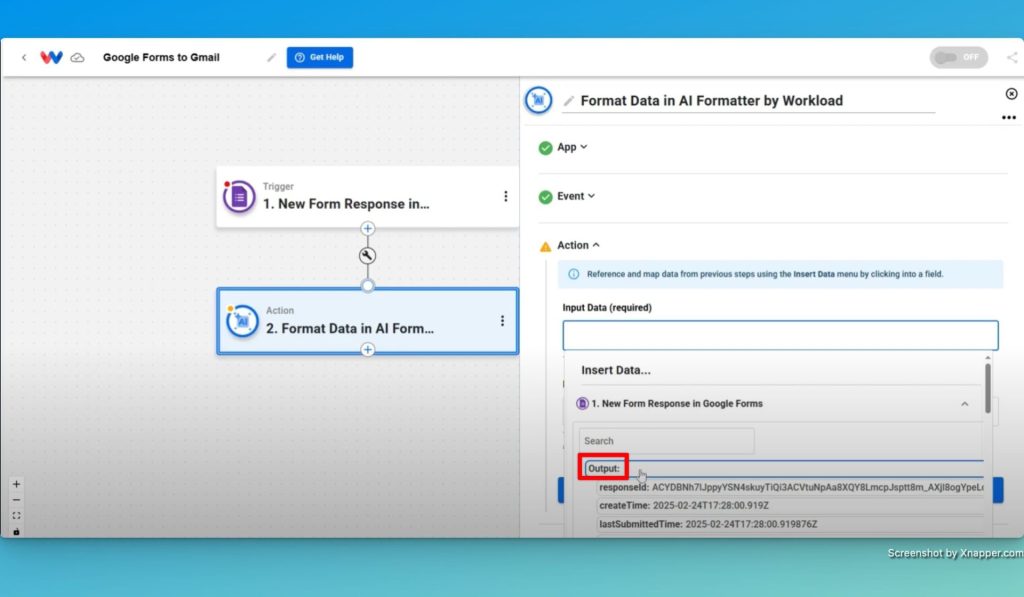
- Format the Data: The purpose of this step is to extract all value fields from the raw response data. By pasting a pre-written prompt (e.g., “Pull all the value fields out of the input and show them as independent responses that are not contained within an array”), you instruct the AI to reformat the input data.
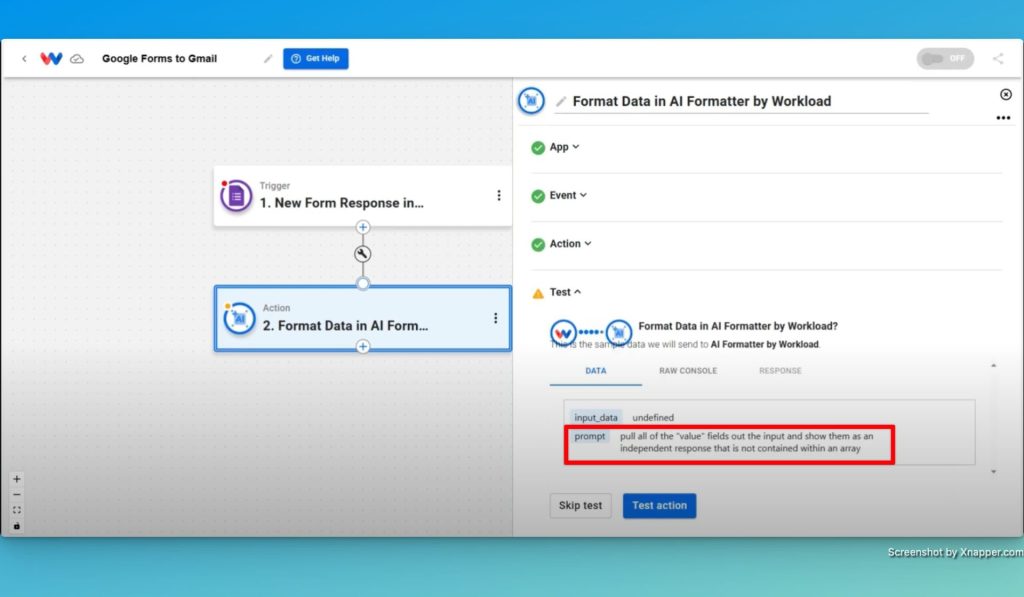
- Test the Formatter: After applying the formatter, test the tool. You should see that the output now displays the answers in a simple, accessible format. This structured data makes it easy for Gmail to pick out the necessary fields for your email.
This active transformation of data not only improves clarity but also sets the stage for a seamless email automation process.
Step 3: Automating Email Delivery with Gmail #
With the data now cleanly formatted, you can easily set up an action to send emails through Gmail:
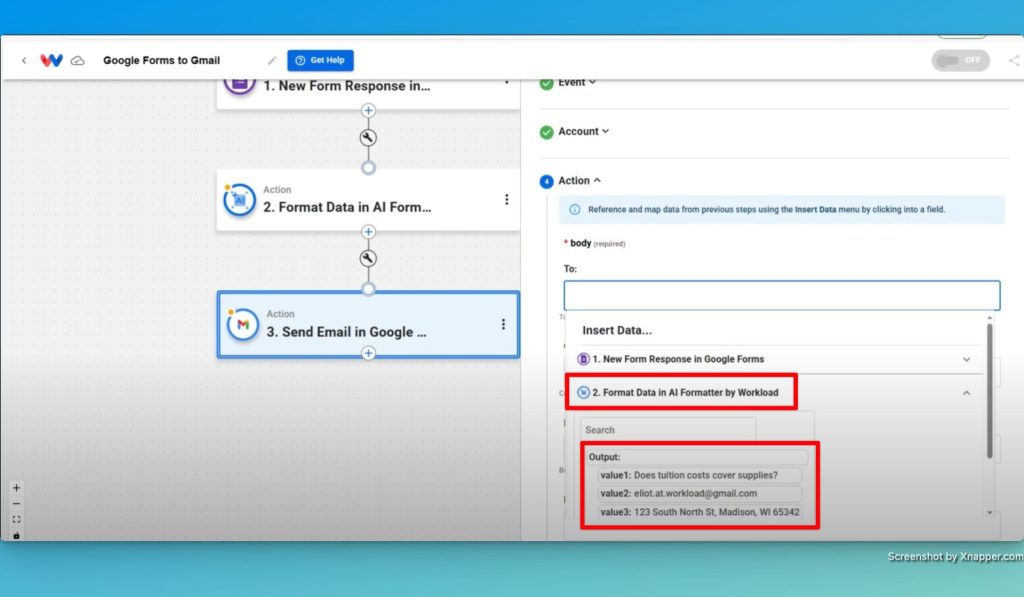
- Add a Gmail Action: Create a new step in your workflow for Gmail by choosing the “Send Email” action event. Connect your Google account if you haven’t already.

- Configure Email Details: Use the formatted data from Step 2 in your workflow to populate email fields. For example:
- To Email: Pull the email address from the AI-formatted output.
- From Email and Name: Enter your email and name.
- Subject: Set a welcoming subject line, like “Welcome.”
- Body: Write a friendly welcome message. For instance:Hello,
Thank you for signing up for our program. We noticed you had a concern about [insert concern]. Rest assured, we will address it as soon as possible.
Thanks,
[Your Name]
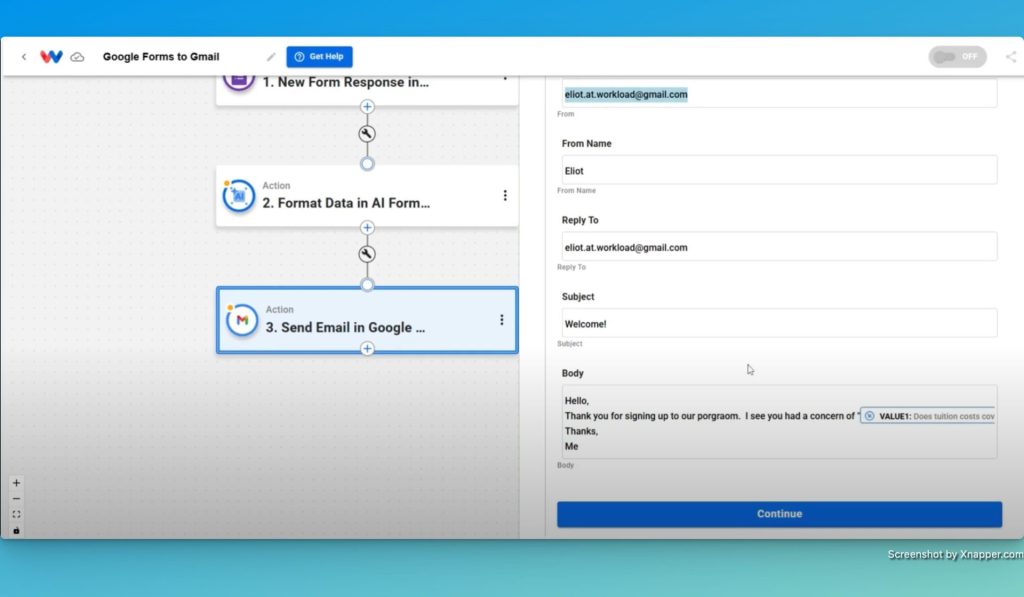
- Test the Action: Run a test to ensure the email sends correctly. Check your inbox to confirm that the email appears as intended, with all dynamic fields properly populated.
By actively configuring each email field with data from your formatted response, you ensure that every respondent receives a personalized and timely email.
Conclusion #
Once you complete these steps, turn on your workflow to activate the automation. Now, every time a new form response comes in, Workload’s AI Formatter reconfigures the data, and Gmail sends out a customized welcome email. This integration not only boosts efficiency but also enhances the user experience by providing prompt and relevant communication.
Implementing this automation is a game-changer for businesses and individuals alike. Enjoy the benefits of streamlined data processing and email automation—let your technology work for you!
For more tips on automation and scheduling, visit Workload University or check our Workload Help page.
Happy automating!


